ClassAddmin
← All guides

Handbook

Admissions Officer Handbook

Staff handling enquiries, applications and new admissions.

Download PDF7 topics across 3 chapters

Getting started

Where admissions lives and what you can reach.

1.Welcome to ClassAddmin
Welcome to ClassAddmin — screen

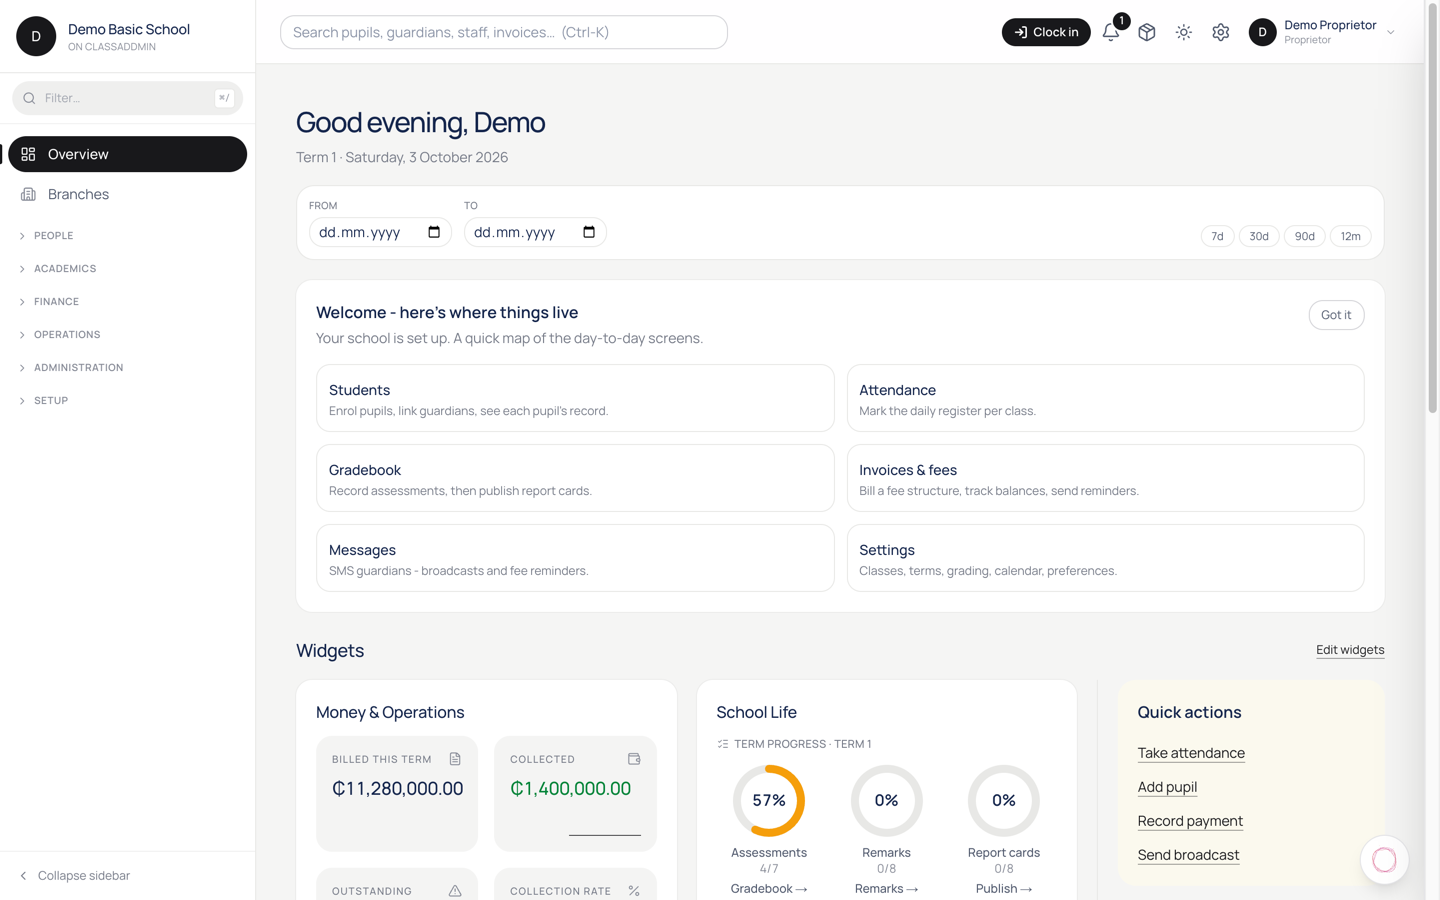
ClassAddmin is your school's day-to-day operations cockpit. From a single dashboard you'll track admissions, mark attendance, send invoices, collect MoMo payments, message parents, and run payroll.

The first time you sign in, head to Overview - that's the home screen. It shows today's collections, this week's absences, anything that needs your attention, and shortcuts to the things you'll touch every day.

You don't need to be a computer expert. Everything lives in the left sidebar: People, Academics, Finance, Operations, Administration. If you can find the right section, you can do the task - every page is built around one job.

Three things to do on day one

  1. Add your school's logo and contact details under Settings → School. They appear on invoices, receipts and report cards.
  2. Invite your team under Settings → Staff. Each person gets a sign-in link by email, SMS or shareable URL.
  3. Open the Help button (bottom-right corner of every page) any time you're stuck. It searches our guides and can answer questions in plain English.

That's it - explore the sidebar at your own pace. If you ever get lost, the back button works the same as in any browser, and clicking the ClassAddmin logo (top-left) takes you home.
2.A tour of the sidebar

A tour of the sidebar — screen

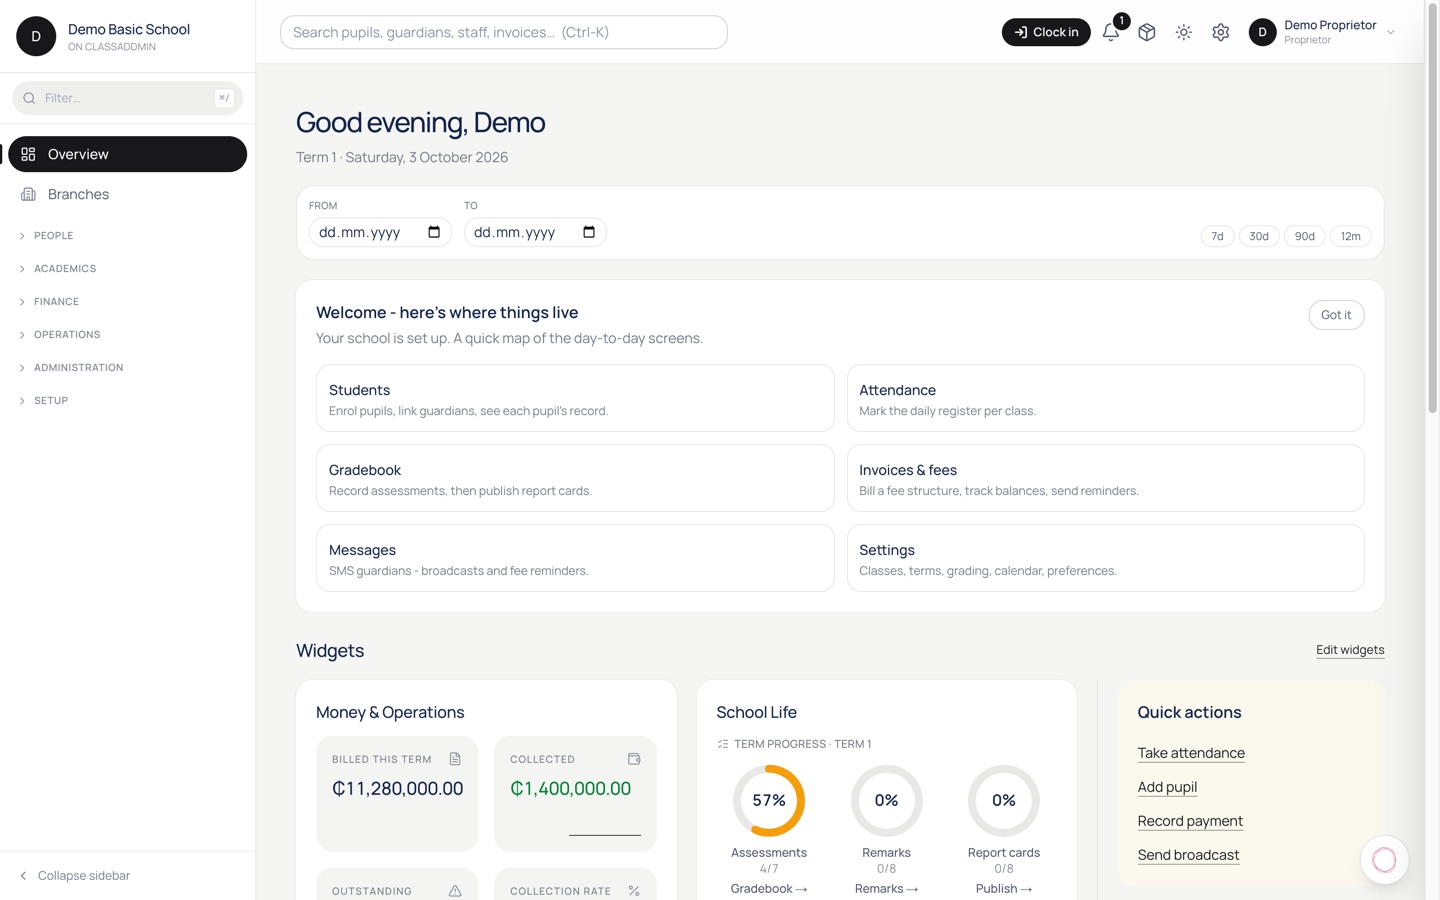
The sidebar on the left is split into six sections. You only see the items your role gives you access to - a class teacher's sidebar looks shorter than a proprietor's.

People

  • Admissions - applications from new pupils. Review, accept, reject.
  • Students - every enrolled pupil. Profile, fees, attendance history.
  • Guardians - parents and caregivers, with their pupils and contact details.

Academics

  • Attendance - mark today's register. One tap per pupil.
  • Gradebook - assessments, scores, comments, report cards.
  • Discipline - log incidents and follow-ups.
  • Timetable - period schedule per class.
  • My Teaching - for teachers: just your classes and lessons.

Finance

  • Finance - overview of money in and out.
  • Fee Structures - what fees each class pays per term.
  • Invoices - what you've billed.
  • Payments - what's been collected (cash, MoMo, bank).
  • Payroll - staff salaries.
  • Books - accounting reports (proprietors and bursars only).
  • Expenses - what the school spends.

Operations

  • Transport - vehicles, routes, who rides which bus.
  • Messages - broadcast SMS to guardians.
  • Parent threads - two-way chat with each pupil's parents.

Administration

  • Reports - exportable PDFs and dashboards.
  • Staff - invite, edit, remove.
  • Promotion - end-of-year class promotion.
  • Audit log - who changed what.
  • Support - open a ticket with us.
  • Subscription - your plan and billing.
  • Settings - everything else.

Search and help

The search bar at the top finds pupils, guardians, invoices and staff instantly. The bell icon shows alerts that need attention. The profile menu (top-right) is where you sign out.

Taking applications

The public form, and what arrives when a family submits it.

3.Set up the public admissions form

Set up the public admissions form — screen

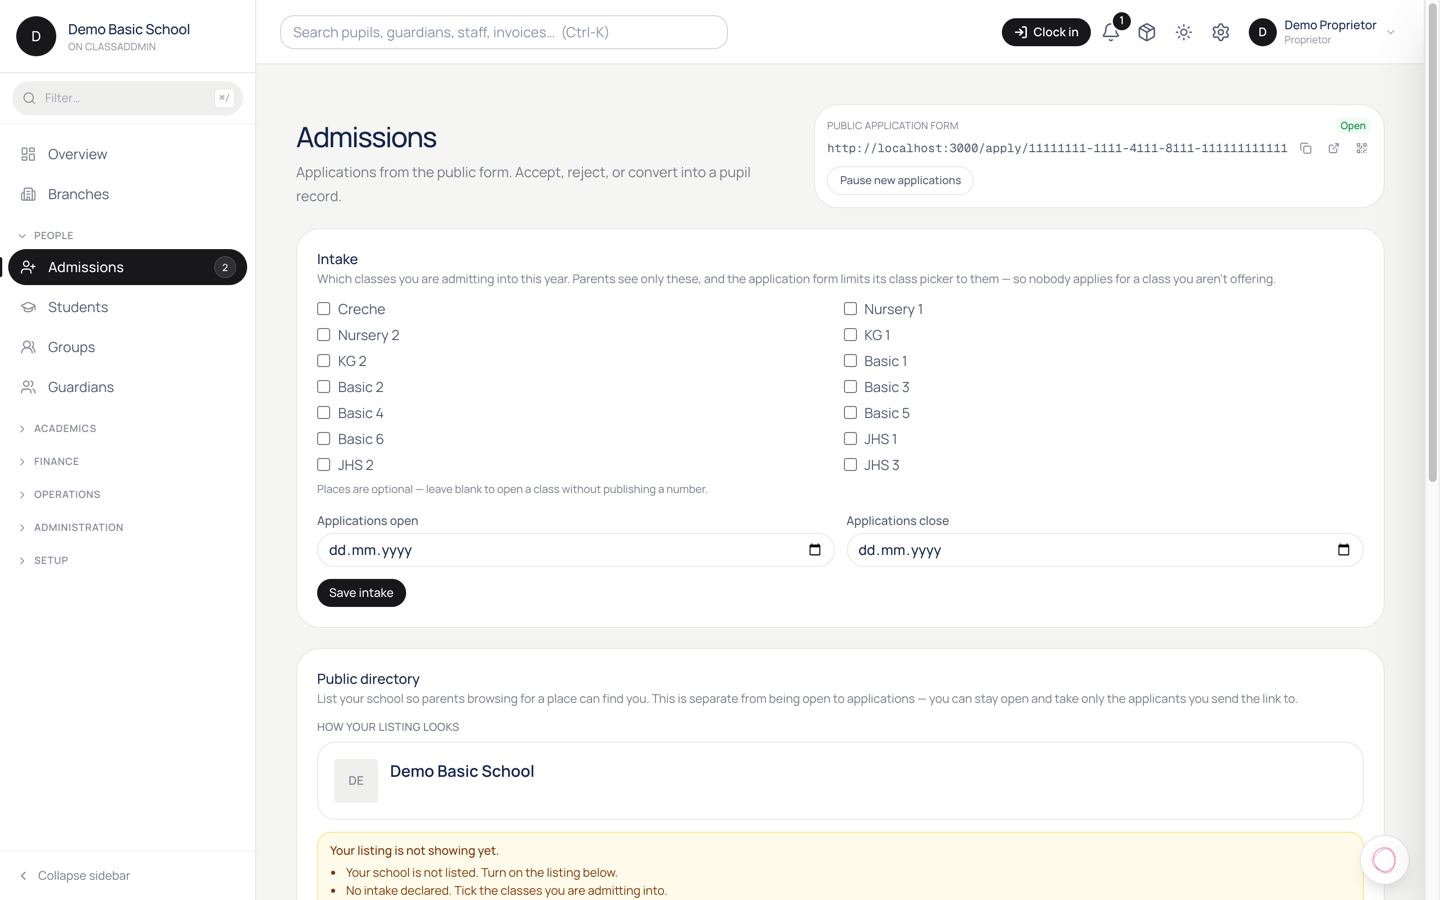
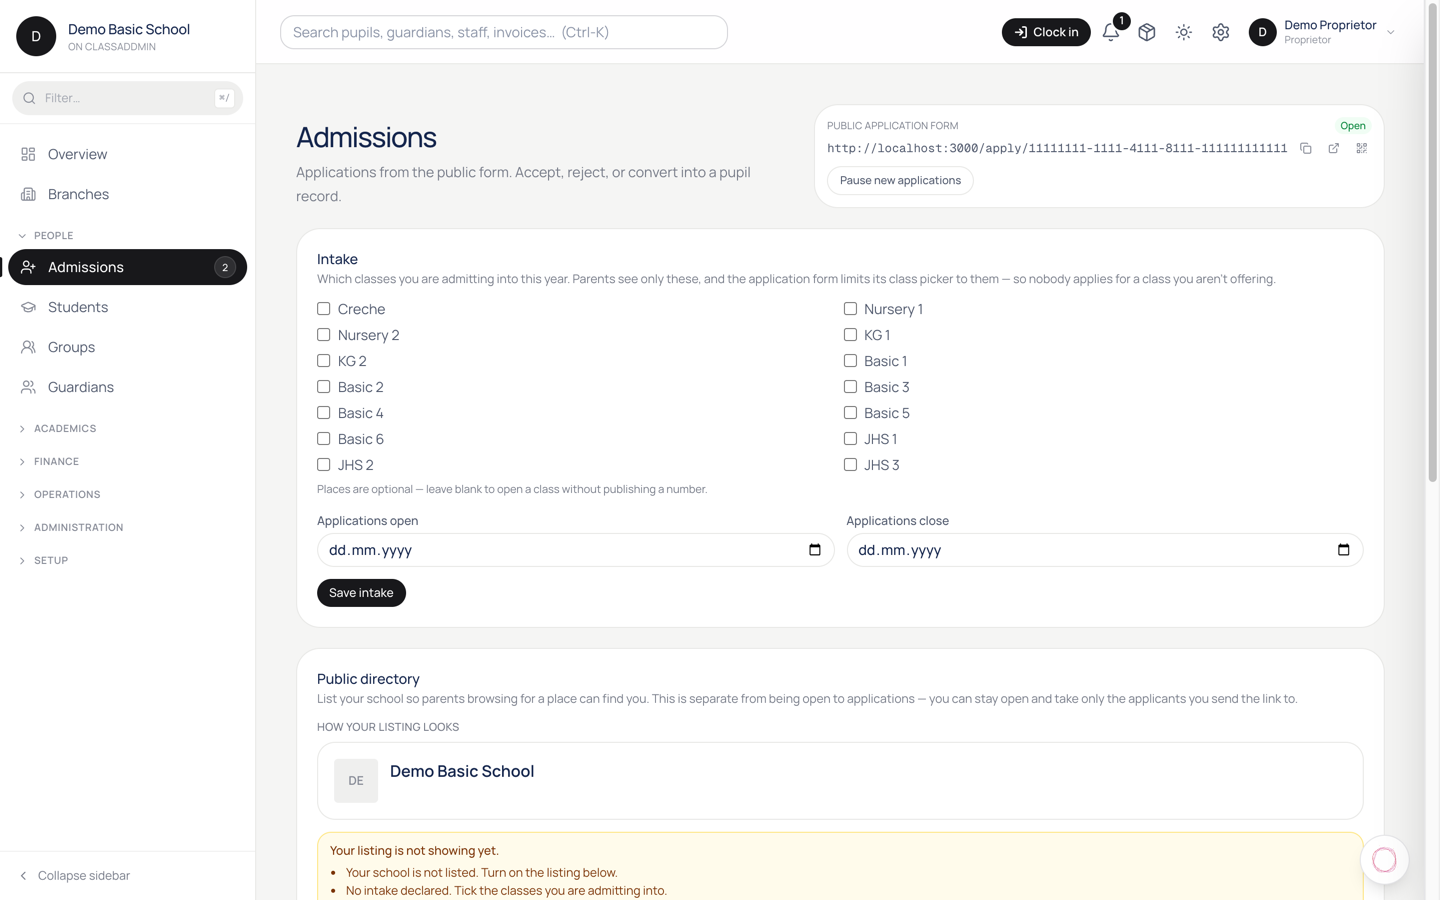
The public application form is a URL parents fill in to apply for their child to join your school - no sign-in needed. Submissions land in the Admissions queue ready for you to review.

You can share the form link via WhatsApp, paste it into your school's website, or print it as a QR code on flyers.

Configure the form

  1. Settings → Admissions (or Admissions → Settings).
  2. Tabs:
    • Open / closed - the master switch. Turn off when you've reached intake capacity.
    • Fields - which extra questions to ask (sibling at the school, where they heard about you, etc.).
    • Custom questions - your own questions specific to your school (e.g. religion, language at home).
    • Bot protection - Cloudflare Turnstile (recommended on; spammers fill forms with junk otherwise).

Standard fields

Every form asks for:

  • Pupil first/middle/last name
  • Date of birth
  • Sex
  • Class applying to
  • Previous school (optional)

Plus one guardian:

  • Name, phone, email, relationship.

You can't remove these - they're required to admit a pupil. But you can mark some as optional via the Fields tab.

Custom questions

Add your own questions under Custom questions:

  1. Click Add question.
  2. Pick the type:
    • Short text - name, phone, simple answer.
    • Long text - paragraph response.
    • Single choice - radio buttons (pick one).
    • Multiple choice - checkboxes (pick many).
    • File upload - birth certificate, vaccination card.
  3. Write the question and (for choice types) the options.
  4. Tick Required if the parent must answer to submit.
  5. Save.

The custom answers come through as part of the application card under Admissions.

Share the form

  1. Admissions → Share (top right).
  2. The page shows:
    • The URL - copy + paste anywhere. e.g. app.classaddmin.com/p/greenhill/apply.
    • A QR code - download the PNG. Print on flyers, posters, school gates.
    • Embed code - drop into your school's website.

Receive an application

When a parent submits:

  1. The application lands under Admissions with status pending.
  2. The submission timestamps the parent's IP and User-Agent (in case of disputes).
  3. If you configured an email-on-submission webhook, you also get an email (under Settings → Notifications → Email templates).

To decide on the application, see Admit an applicant.

Close intake

When you're full:

  1. Settings → Admissions → Open / closed.
  2. Toggle to Closed.
  3. The form URL still resolves but shows "Admissions are currently closed - please check back next term".

You can re-open any time.

Common gotchas

  • Parents say "the form rejected me" - Turnstile thought they were a bot. Common on shaky mobile data. Either retry, or turn down Turnstile sensitivity.
  • Custom question answers don't show on the application - the parent didn't fill them (they were optional). Default to making important questions required.
  • File uploads fail - file too big (>10MB). Tell parents to take a phone photo, not a 4K scan.

Turning an applicant into a pupil

Admitting, then getting the family onto the system.

4.Admit an applicant - turn an application into a pupil

Admit an applicant - turn an application into a pupil — screen

Once a parent fills the public application form, their submission lands in Admissions with status pending. To turn an approved applicant into a pupil, you don't re-type anything - the system carries every field across.

Steps

  1. Admissions in the sidebar. Filter by pending if you have a backlog.
  2. Click the applicant to open their card.
  3. Review the application - entrance test scores, sibling information, custom questions you defined for the form.
  4. Click Decide → Accept (top right).
  5. A side panel opens:
    • Class - pick which class to enrol them in.
    • Academic year - defaults to current.
    • Admission number - leave blank to auto-generate (recommended).
    • Optional: starting term, fee structure override (if this pupil pays a different rate from the class default - e.g. siblings, scholarships).
  6. Click Accept and enrol.

The system will:

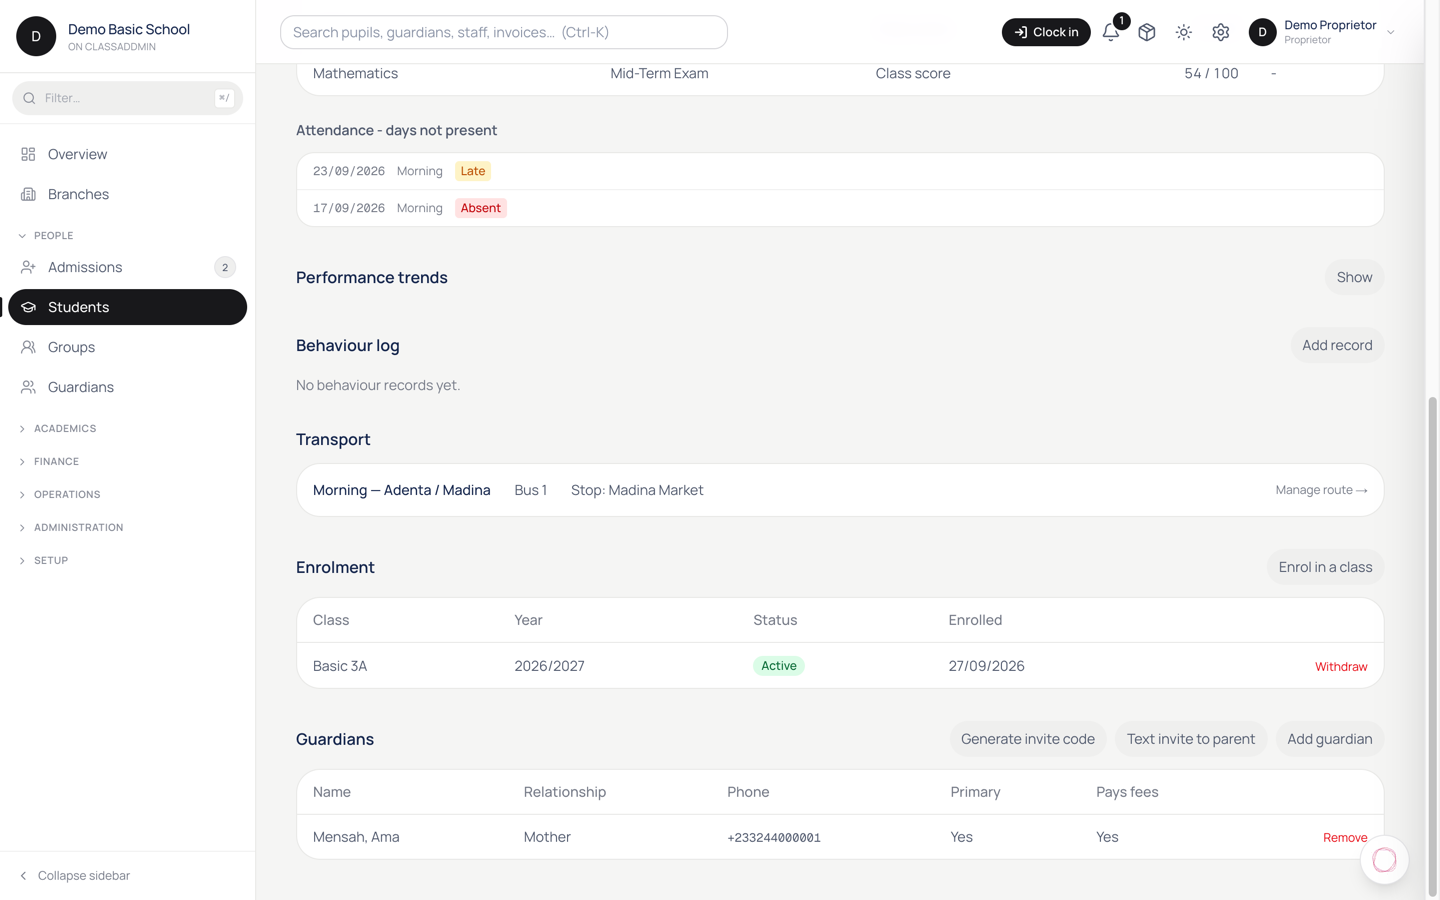
  • Create the students row.
  • Copy guardian details into guardians and link them via student_guardians.
  • Create an active enrollments row in the chosen class.
  • Stamp the applicant status = converted so it leaves the pending queue but stays in the history.
  • Send the parent a welcome email with their portal link (if Resend is configured).

Steps to reject

If the applicant isn't a fit:

  1. Open the card.
  2. Click Decide → Reject.
  3. Pick a reason - class full, didn't meet criteria, withdrew.
  4. (Optional) Send a courtesy email.
  5. Click Reject.

The applicant moves to history with status = rejected. You can still reopen and re-decide later.

Bulk admit

If you've decided on a batch (e.g. the whole next-term intake list), use the bulk action at the top of the Admissions list:

  1. Tick the applicants.
  2. Bulk → Accept.
  3. Pick the class - same class applies to all selected; if they should go to different classes, accept them one-by-one.

Common gotchas

  • "No enrolment year exists yet" - go to Settings → Academic Years and add the year first.
  • Guardian phone is already on file under another student - that's fine. The system links the existing guardian rather than duplicating.
  • Parent never got the welcome email - check Settings → Communications → Email and confirm Resend is configured. The portal link can also be sent by SMS from the pupil's profile.

5.Add a new student

Add a new student — screen

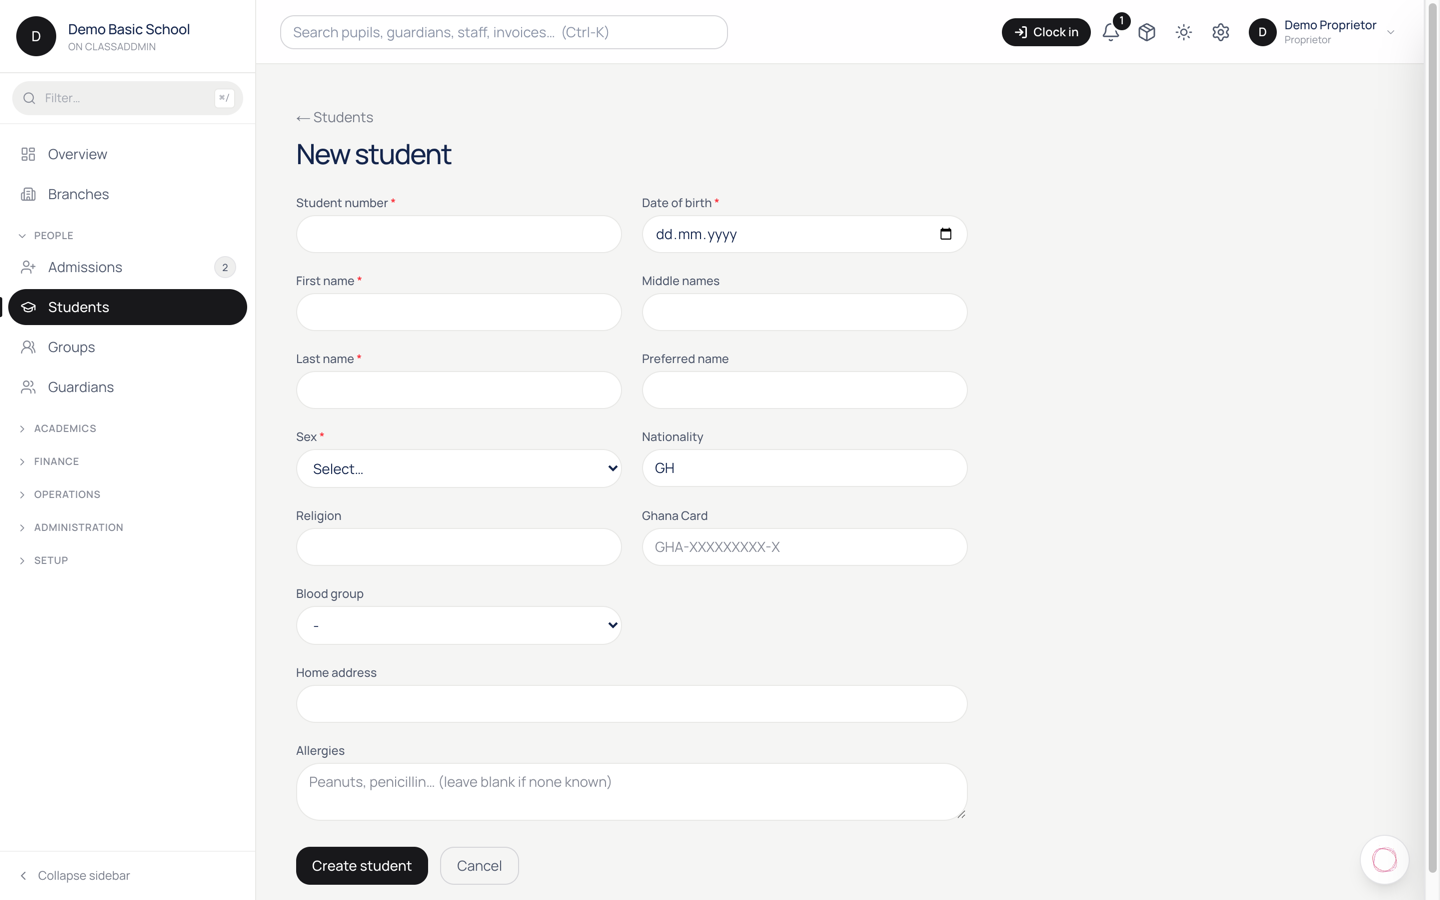
When a child joins your school mid-term or under-the-radar (i.e. without going through the admissions form), you create them directly from Students → New student.

For a child who came through the admissions queue, don't create them here - use Admit an applicant instead so their application history isn't lost.

Steps

  1. Students → New student (top right).
  2. Fill the required fields:
    • First name and Last name - as they appear on the birth certificate.
    • Date of birth.
    • Sex.
    • Admission number - leave blank to auto-generate, or set your own format.
  3. Fill the optional fields if you have them: middle name, photo, blood group, allergies, address.
  4. Pick the class the pupil is joining. This creates an active enrolment under the current academic year.
  5. (Optional) Add a guardian in the same form - name, phone, email, relationship. You can also link guardians later (see Link a guardian to a student).
  6. Click Save.

The pupil now appears in the Students list and is enrolled in the chosen class.

What happens next

  • Attendance picks up the pupil from tomorrow's register (today's register is already locked in by then - see Mark attendance).
  • Fees depend on whether the class has a fee structure for the current term. If yes, you can issue them an invoice from the pupil's profile → Fees tab.
  • Gradebook assessments are auto-linked to all pupils in the class; the new pupil sees the same blank score sheet as the rest.
  • Parent threads are created the first time staff message - no need to set them up here.

Common gotchas

  • "Pupil already exists with this admission number" - pick a different number or leave the field blank to auto-generate.
  • Class dropdown is empty - you haven't set up classes for the current academic year yet (Settings → Classes).
  • No date of birth on the certificate - use the date the parent verbally confirms; you can correct later from the pupil's profile.

7.Bulk import students from a CSV

Bulk import students from a CSV — screen

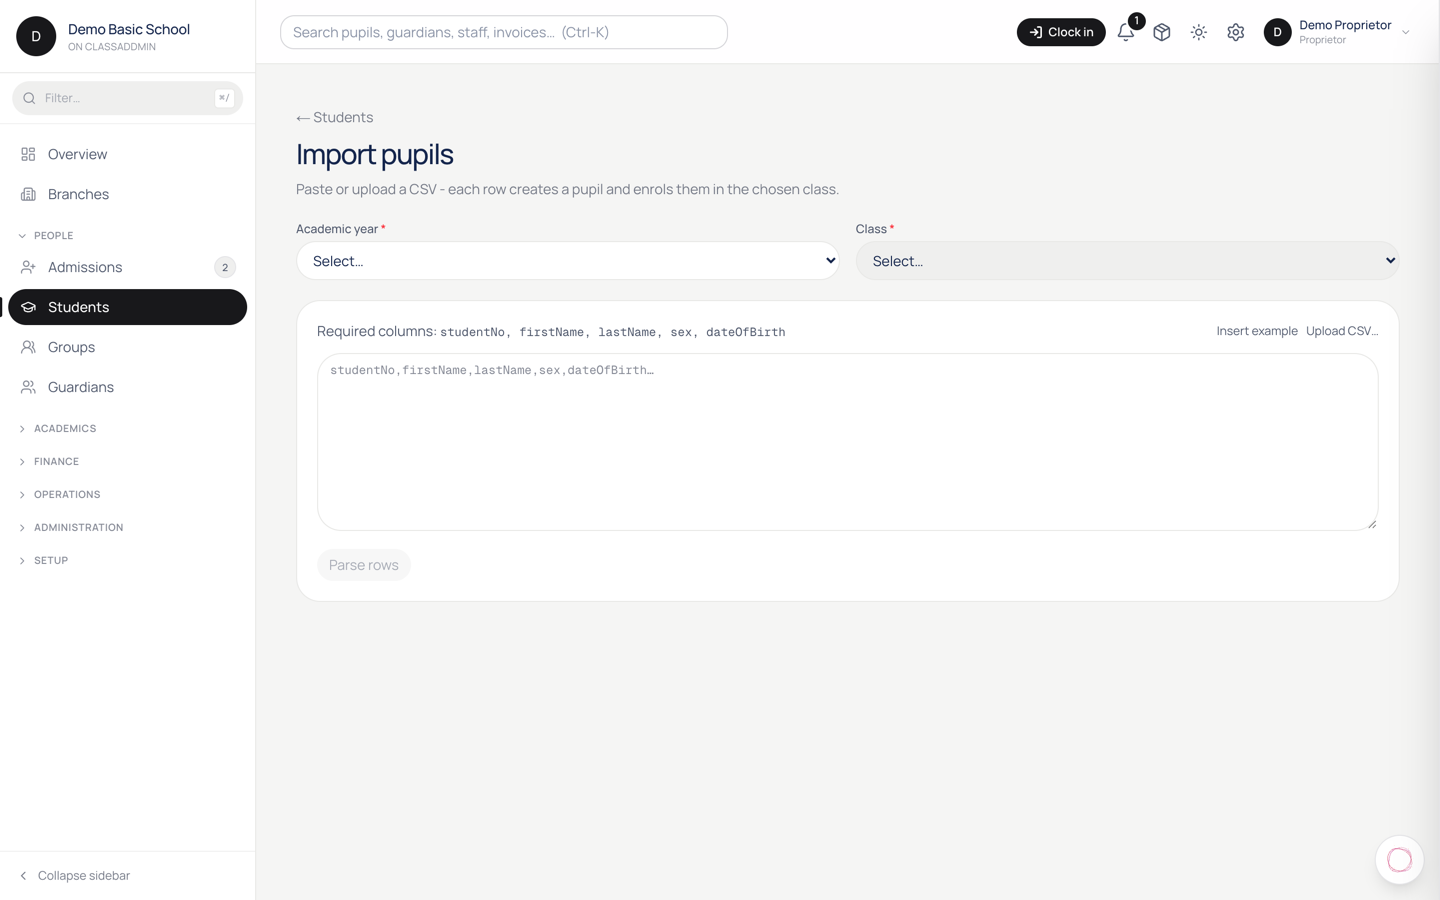
When you're onboarding from another system (or back-from-paper-registers), upload a CSV instead of typing each pupil. The importer handles 1000+ rows comfortably.

What the CSV should look like

Download the template from Students → Import → Download template.

Required columns:

Column What goes in
first_name Pupil's first name
last_name Pupil's last name
date_of_birth YYYY-MM-DD or DD/MM/YYYY
sex male, female, or other
class_display_name Class name as it appears in your school (e.g. "Basic 3 A")

Optional columns:

  • middle_name
  • admission_number - leave blank to auto-generate
  • student_no - same as admission_number, alias
  • blood_group
  • allergies
  • address
  • guardian_1_name, guardian_1_phone, guardian_1_email, guardian_1_relationship - same shape for guardian_2_* if a second guardian.

The class name in class_display_name must match a class that already exists. If you haven't set up your classes for the current academic year, do that first under Settings → Classes.

Steps

  1. Students → Import (top right).
  2. Drop the CSV file in (or click to pick).
  3. The system parses it and shows a preview: how many rows it'll create, how many guardians it'll link, and any rows that look problematic.
  4. Review the conflicts section:
    • Duplicate admission number - already exists in your school.
    • Class not found - you misspelt the class name in the CSV.
    • Invalid date of birth - wrong format.
  5. Either:
    • Fix the CSV and re-upload, or
    • Skip the problem rows and import the rest.
  6. Click Import.

The job runs in the foreground. For 100 rows it takes ~10 seconds; 1000 rows ~90 seconds. Don't close the tab.

After

  • Pupils appear in the Students list immediately.
  • Each pupil's enrolment in the chosen class is active.
  • Guardians are linked. If two pupils share a guardian (same phone), the existing guardian is linked - not duplicated.

Common gotchas

  • "Sex" must be lowercase - Male or M won't match. Use male.
  • Encoding - save as UTF-8 in Excel, not the default Windows ANSI. Otherwise Akan names come through as ? or ??.
  • Class display name has trailing spaces - match exactly, including capitalisation. Copy from the Classes list to be safe.
  • Phone formats - 0244XXXX, +233244XXXX, and 233244XXXX are all accepted; the system normalises them on import.