ClassAddmin
← All guides

Handbook

Bursar Handbook

Bursars and accountants responsible for school finances.

Download PDF22 topics across 7 chapters

Getting started

Your way around the parts of ClassAddmin you own.

1.Welcome to ClassAddmin

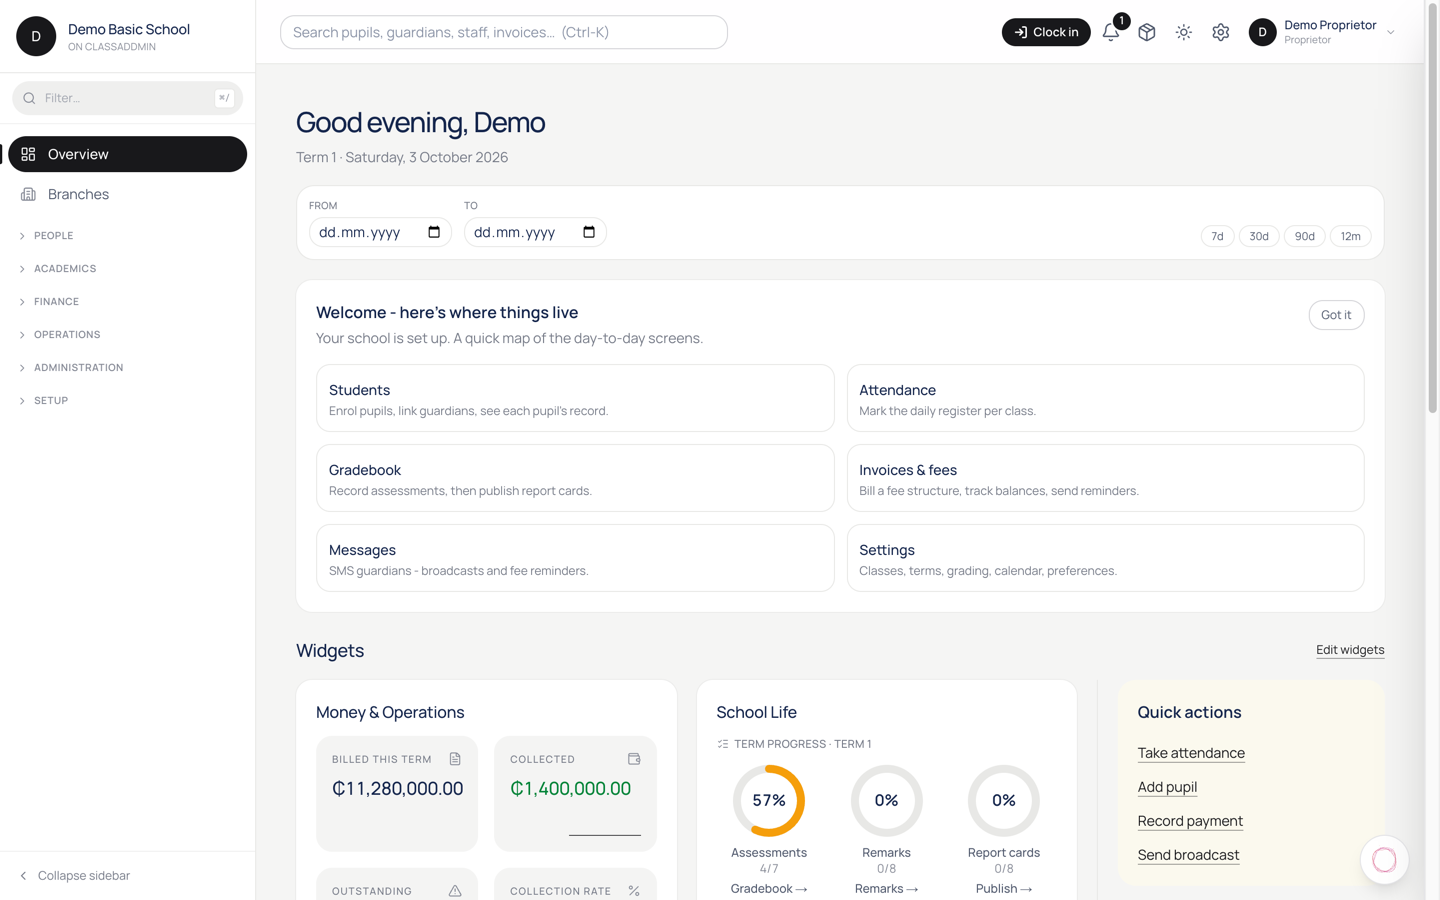
Welcome to ClassAddmin — screen

ClassAddmin is your school's day-to-day operations cockpit. From a single dashboard you'll track admissions, mark attendance, send invoices, collect MoMo payments, message parents, and run payroll.

The first time you sign in, head to Overview - that's the home screen. It shows today's collections, this week's absences, anything that needs your attention, and shortcuts to the things you'll touch every day.

You don't need to be a computer expert. Everything lives in the left sidebar: People, Academics, Finance, Operations, Administration. If you can find the right section, you can do the task - every page is built around one job.

Three things to do on day one

  1. Add your school's logo and contact details under Settings → School. They appear on invoices, receipts and report cards.
  2. Invite your team under Settings → Staff. Each person gets a sign-in link by email, SMS or shareable URL.
  3. Open the Help button (bottom-right corner of every page) any time you're stuck. It searches our guides and can answer questions in plain English.

That's it - explore the sidebar at your own pace. If you ever get lost, the back button works the same as in any browser, and clicking the ClassAddmin logo (top-left) takes you home.

2.A tour of the sidebar

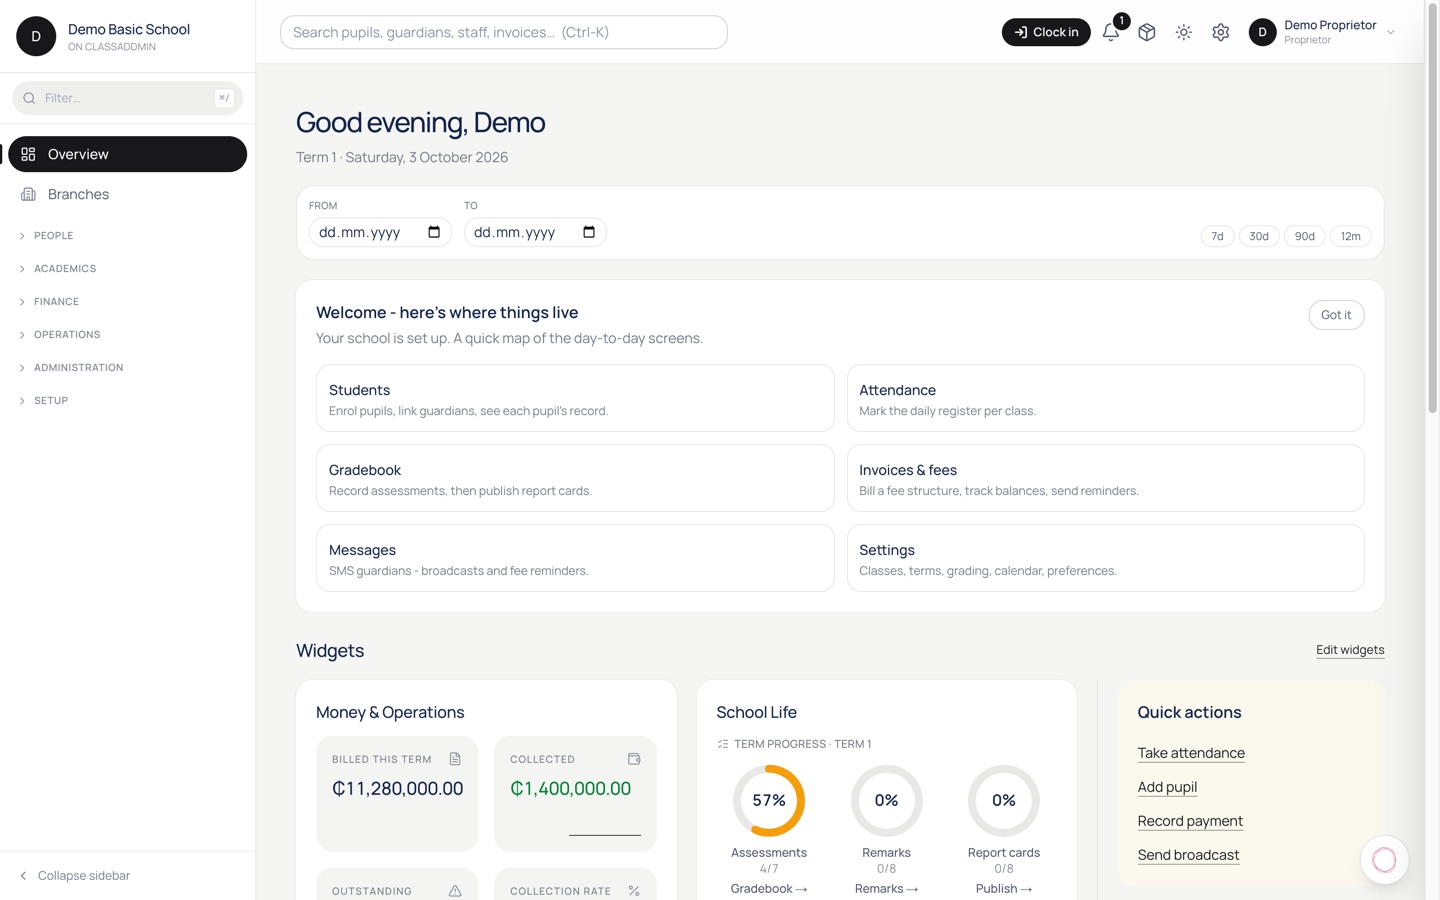
A tour of the sidebar — screen

The sidebar on the left is split into six sections. You only see the items your role gives you access to - a class teacher's sidebar looks shorter than a proprietor's.

People

  • Admissions - applications from new pupils. Review, accept, reject.
  • Students - every enrolled pupil. Profile, fees, attendance history.
  • Guardians - parents and caregivers, with their pupils and contact details.

Academics

  • Attendance - mark today's register. One tap per pupil.
  • Gradebook - assessments, scores, comments, report cards.
  • Discipline - log incidents and follow-ups.
  • Timetable - period schedule per class.
  • My Teaching - for teachers: just your classes and lessons.

Finance

  • Finance - overview of money in and out.
  • Fee Structures - what fees each class pays per term.
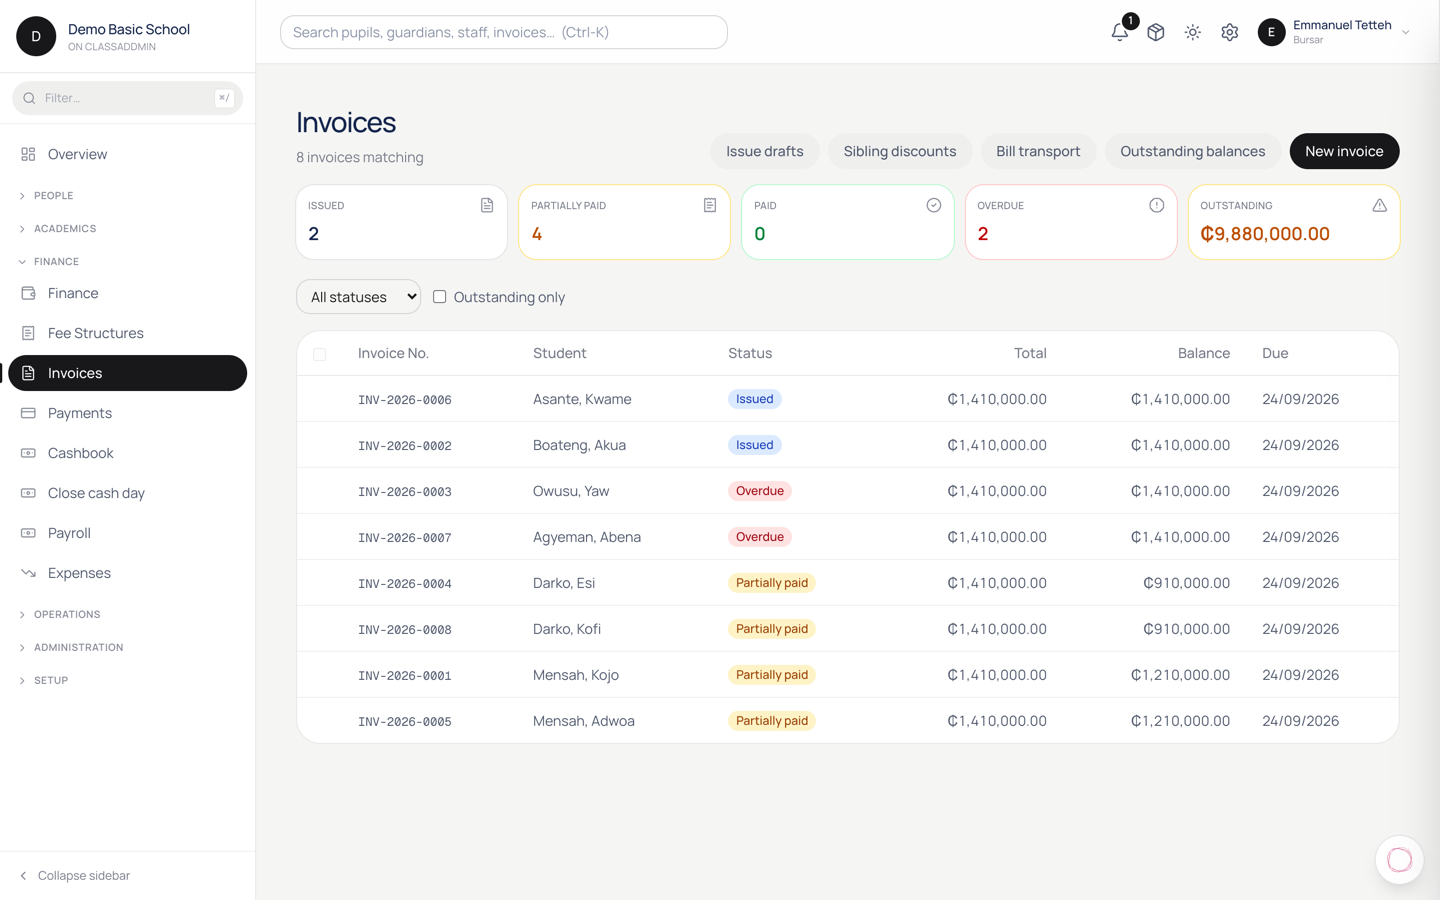
  • Invoices - what you've billed.
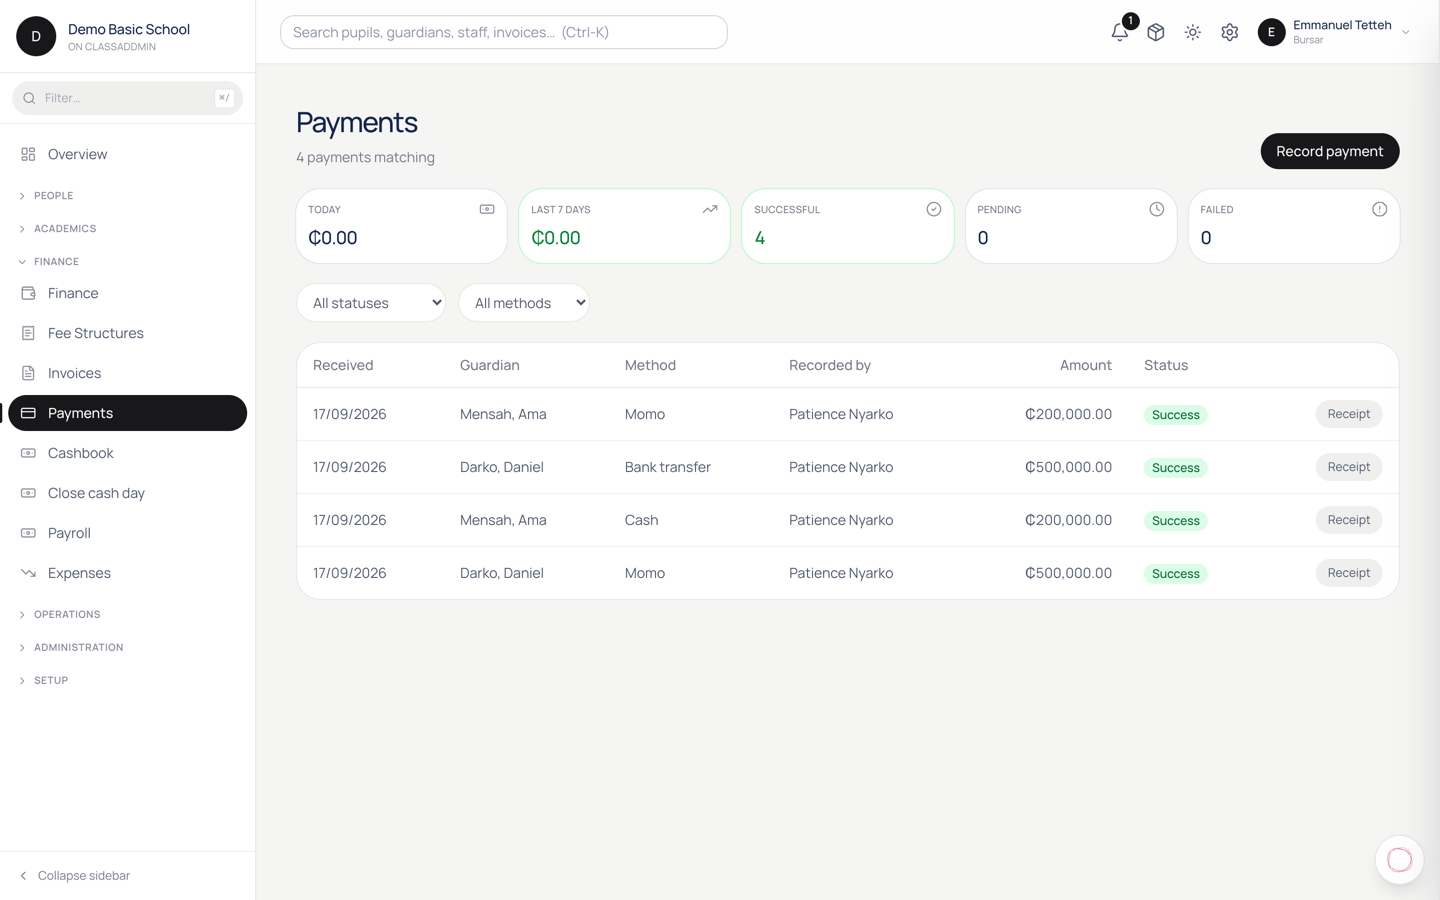
  • Payments - what's been collected (cash, MoMo, bank).
  • Payroll - staff salaries.
  • Books - accounting reports (proprietors and bursars only).
  • Expenses - what the school spends.

Operations

  • Transport - vehicles, routes, who rides which bus.
  • Messages - broadcast SMS to guardians.
  • Parent threads - two-way chat with each pupil's parents.

Administration

  • Reports - exportable PDFs and dashboards.
  • Staff - invite, edit, remove.
  • Promotion - end-of-year class promotion.
  • Audit log - who changed what.
  • Support - open a ticket with us.
  • Subscription - your plan and billing.
  • Settings - everything else.

Search and help

The search bar at the top finds pupils, guardians, invoices and staff instantly. The bell icon shows alerts that need attention. The profile menu (top-right) is where you sign out.

Setting up fees

Deciding what each pupil owes, before a single invoice goes out.

3.Set up a fee structure for a class

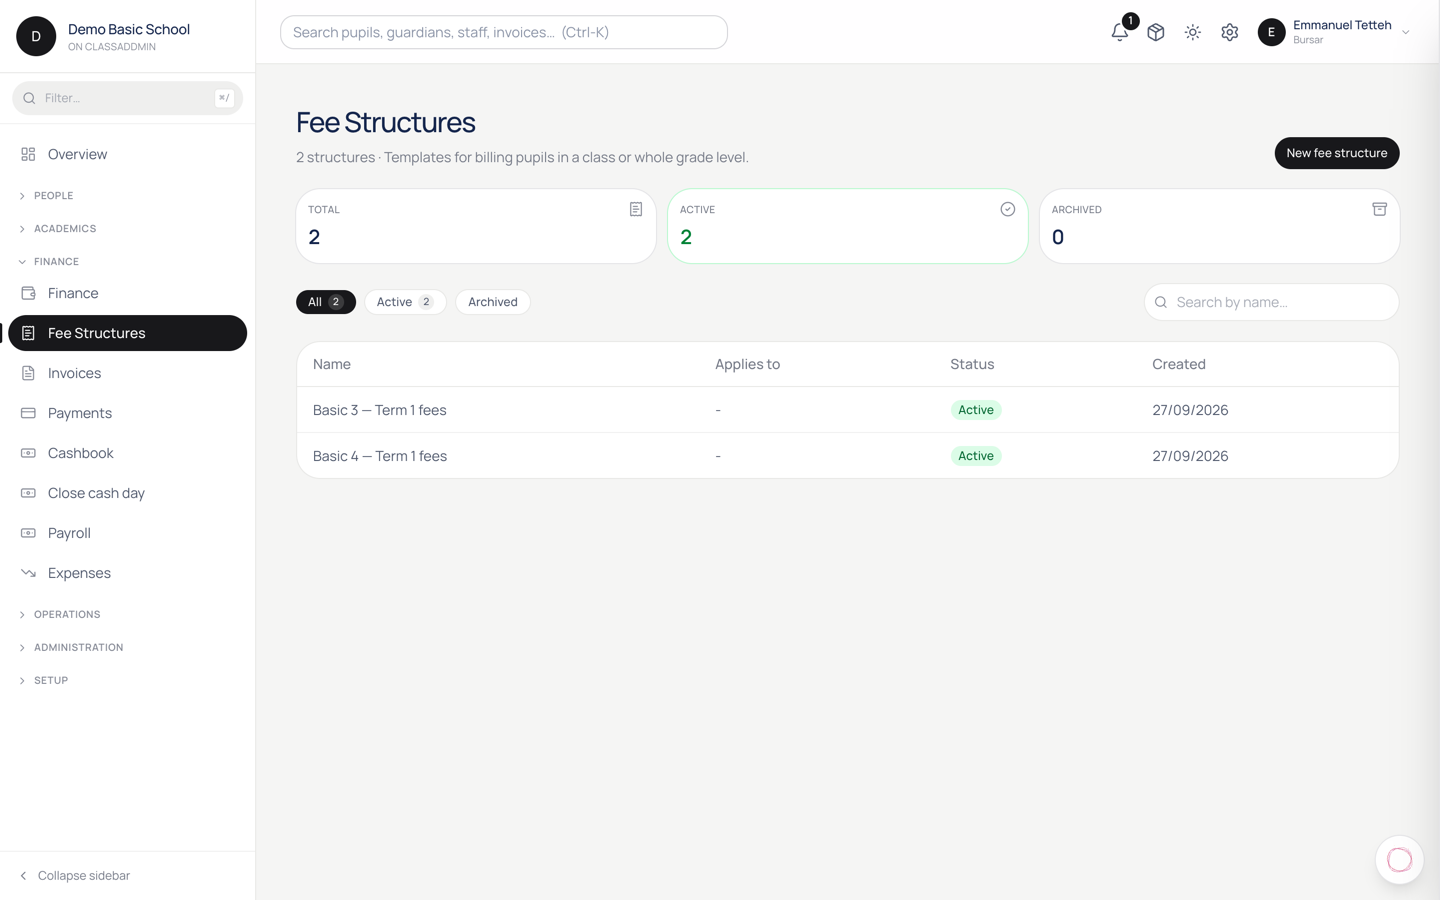
Set up a fee structure for a class — screen

A fee structure says "every pupil in this class pays these amounts this term". Once set up, you generate invoices in one click (see Issue a term's invoices).

Plan first

Decide what your school charges per term:

  • Tuition
  • Exam fee
  • Lunch
  • Books / stationery
  • Activity fee (sports, ICT, etc.)
  • Boarding (if applicable)
  • Transport (if applicable)

Each of these is a component. You set the amount per component, and the system sums them into the invoice total.

Steps

  1. Fee Structures in the sidebar.
  2. Click New fee structure.
  3. Pick the class and the term this applies to. (You can copy from a previous term - see below.)
  4. Add each component:
    • Name - "Tuition", "Lunch", "Books".
    • Amount in GHS.
    • Component code - pick from the catalogue (Tuition, Exam, Lunch, Books, Activity, Boarding, Transport, Other). The code is what links to the chart of accounts (so tuition revenue posts to Tuition Fees, not Other Income - see Books auto-posting).
  5. Click Save.

The fee structure is now active. The next time someone clicks Generate term invoices for this class+term, the system uses these amounts.

Copy from last term

End-of-term and starting a new one with same fees? Don't re-type:

  1. Fee Structures → pick the existing structure.
  2. Click Duplicate.
  3. Pick the destination term.
  4. The new structure is created with the same components and amounts. Edit anything that changed (usually just tuition going up 5%).

Differential fees

Some schools charge different rates for some pupils - siblings get a discount, scholarship pupils pay less, boarding pupils have extra components.

Two approaches:

  • Per-pupil overrides - open the pupil → Fees tab → Custom fee structure for this term. Sticks just to that pupil.
  • Multiple class structures - uncommon, but you can create two structures for the same class+term tagged differently (boarding vs day). Assign pupils manually.

Most schools use overrides for the edge cases and a single structure for the bulk.

Common gotchas

  • "Class already has a structure for this term" - exactly one structure per class+term. Edit the existing one, or duplicate it.
  • Amount must be ≥ 0 - set zero for free components rather than negative (negative components are treated as discounts; use them only when you want to actually reduce the total).
  • Components don't show on the invoice - they show as line items. If you only see the total, look at the invoice's Lines tab in the invoice detail view.

4.Offer parents an installment payment plan

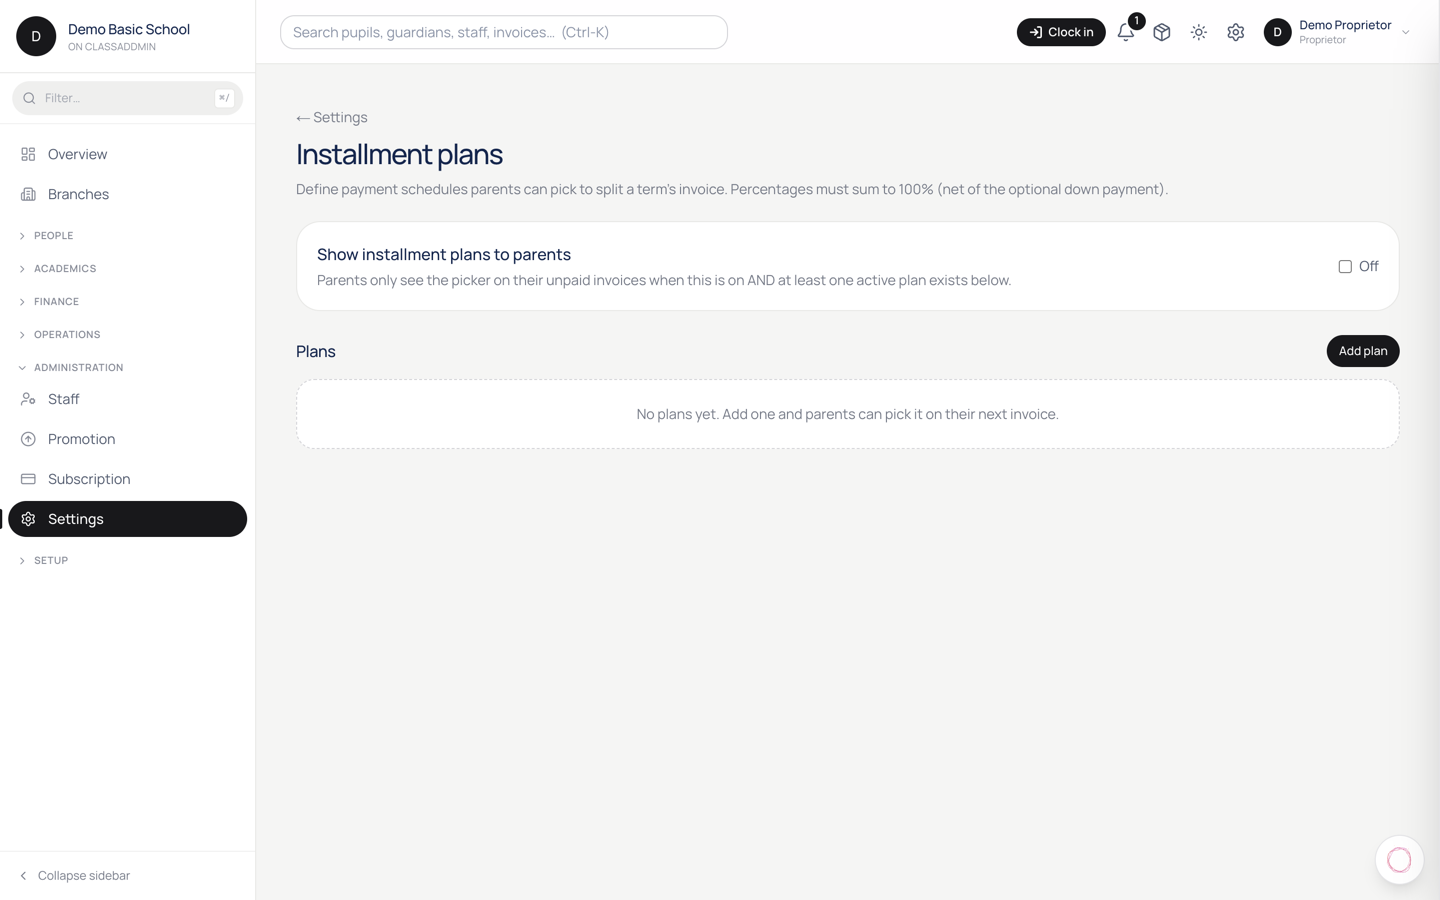
Offer parents an installment payment plan — screen

When a term's fees are big enough that paying upfront is painful, offer parents an installment plan - a down payment plus monthly chunks.

ClassAddmin lets you define a plan template (e.g. "30% down + 3 monthly") and apply it to any invoice in one click. Parents see the plan in their portal and can pay each chunk on its due date.

Step 1 - Define a template (once)

You only do this once for the school; reuse for every parent.

  1. Settings → Installment plans.
  2. Click New template.
  3. Fill:
    • Name - "Standard 4-step", "5-month boarding plan".
    • Description - what parents see in their portal.
    • Down payment - % of invoice (e.g. 30%) or a flat GHS amount.
    • Reminder days - how many days before each step's due date parents should get an SMS (default: 7).
  4. Add the steps:
    • Each step has a % of remaining (after the down payment) and a due-date offset (days after issue, or anchored to month-end).
    • Example: 4 steps × 25% × monthly → "25% in 30 days, 25% in 60 days, 25% in 90 days, 25% in 120 days".
  5. Make sure the steps sum to 100% of the post-down-payment balance. The system blocks templates that don't.
  6. Click Save.

Step 2 - Apply the plan to a parent's invoice

  1. Open the invoice (Invoices → click the row).
  2. Click Add plan in the right rail.
  3. Pick the template.
  4. Click Preview - see the schedule with actual dates and amounts.
  5. Click Apply.

The parent's portal now shows:

  • The down payment as a single Pay GHS X.XX (Down payment) button.
  • After they pay that, the steps reveal - "Step 1: due 12 March, GHS 750" with a Pay button each.

The school's invoice balance updates as each step is paid.

Step 3 - Reminders

The system sends each parent an SMS at the reminder days before each step's due date, listing the amount and the portal link.

You don't have to do anything for this - it's automatic via the installment reminder cron.

If a parent misses a step

The step status flips to overdue the day after the due date. The parent's portal still shows the same Pay button - they can pay late. No automatic late-fee for now (could be wired in later if your school wants).

If a parent stops paying entirely, you can:

  • Cancel the plan - invoice → plan → Cancel. The remaining balance becomes due in full immediately.
  • Renegotiate - cancel the plan and apply a new one with the remaining balance as the new starting point.

Common gotchas

  • "Steps don't sum to 100%" - fix the percentages on the template; the system can't apply an unbalanced plan.
  • "Down payment is bigger than the invoice" - you set a flat amount higher than the bill. Use a percentage instead.
  • Parents say they can't see step buttons - they haven't paid the down payment yet. Step buttons reveal one-by-one as preceding ones clear.

5.Set up the bank account online fees are paid into

Set up the bank account online fees are paid into — screen

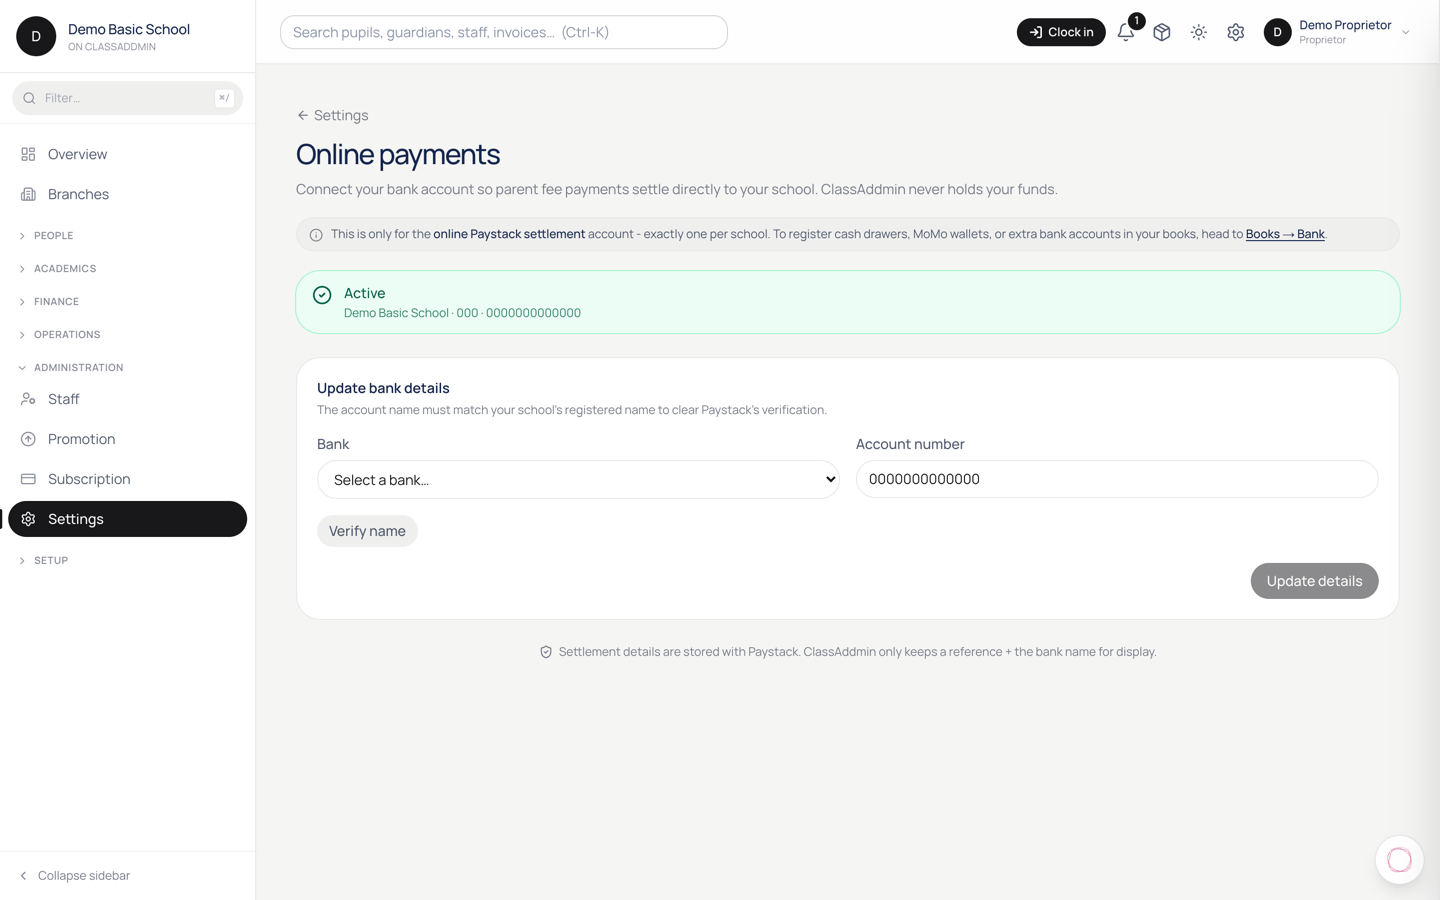
When a parent taps Pay now in the app, the money has to land somewhere. This is where you tell ClassAddmin which bank account that is.

Find it at Settings → Payments.

Steps

  1. Settings → Payments.
  2. Enter your bank and account number — for example 1234567890123.
  3. Enter the account name as the bank has it, for example Academy Basic School.
  4. Save. The details are verified against the bank before anything is stored.

The three states

State What you see What it means
Not set up The form Parents can't pay online yet
Pending A Refresh button Still being validated — check back
Active Your current details Online payments are settling to you

Pending isn't an error. Validation can take a little while; click Refresh rather than re-submitting the form, which just starts it again.

What this does and doesn't cover

This account receives online payments only — the card and mobile-money payments parents make through the app.

It has nothing to do with the MoMo numbers and bank details printed on your invoice. Those are instructions for a parent sending money themselves, set up separately under Settings → Payment channels. A school can run either, or both:

  • Settlement account → parent taps Pay now → money arrives automatically, recorded automatically.
  • Payment channels → parent sends money themselves → someone records the payment by hand.

Until this is set up

Parents have no Pay now button. They can still pay by every other route, and your bursar records those as usual — but the easiest option for a parent is missing, and so is the automatic recording that comes with it.

Common gotchas

  • Verification fails. The account name must match the bank's records exactly. Academy Basic Sch. won't match Academy Basic School.
  • Stuck on pending. Use Refresh. Re-submitting restarts validation.
  • Money hasn't arrived. Settlement isn't instant — payouts follow the payment provider's schedule, not the moment a parent pays.
  • You changed banks. Update here. Payments already in flight settle to the old account.
  • A personal account. Use the school's account. Fees settling into an individual's account is the kind of thing an auditor asks about.

The termly cycle

Invoice, collect, chase — the loop you run every term.

6.Issue a term's invoices in one click

Issue a term's invoices in one click — screen

When a new term starts, every pupil needs an invoice for their term's fees. You don't make them one at a time - Fee Structures + the bulk-issue button do it for you.

Before you start

You need:

  • A Fee Structure for each class (Settings → Fee Structures). It defines what every pupil in the class pays for the term - tuition, exam fees, lunch, books.
  • The current academic year and term set under Settings → Terms.
  • Active enrolments for each pupil in the class.

Steps

  1. Open Invoices in the sidebar.
  2. Click Generate term invoices in the top-right.
  3. Pick the term (defaults to the current one).
  4. Pick the classes you want - leave them all ticked to bill the whole school.
  5. Click Preview. The dialog shows how many invoices will be created and their total value.
  6. Click Generate. The invoices land in Draft status.
  7. Click Issue all drafts. They flip to Issued - parents can now see and pay them via their portal link.

What if a pupil shouldn't be billed?

Three options:

  • Mark them inactive under Students. Inactive pupils are skipped automatically.
  • Generate, then delete the single invoice from the Invoices list (only works on Drafts).
  • Use a per-pupil scholarship - record a scholarship payment for the full amount, which zeroes their balance.

Re-running the generate

The generate step is idempotent - running it twice won't create duplicate invoices for the same pupil + term. If you add new pupils mid-term, generate again to bill just the new ones.

7.Record a cash or MoMo payment

Record a cash or MoMo payment — screen

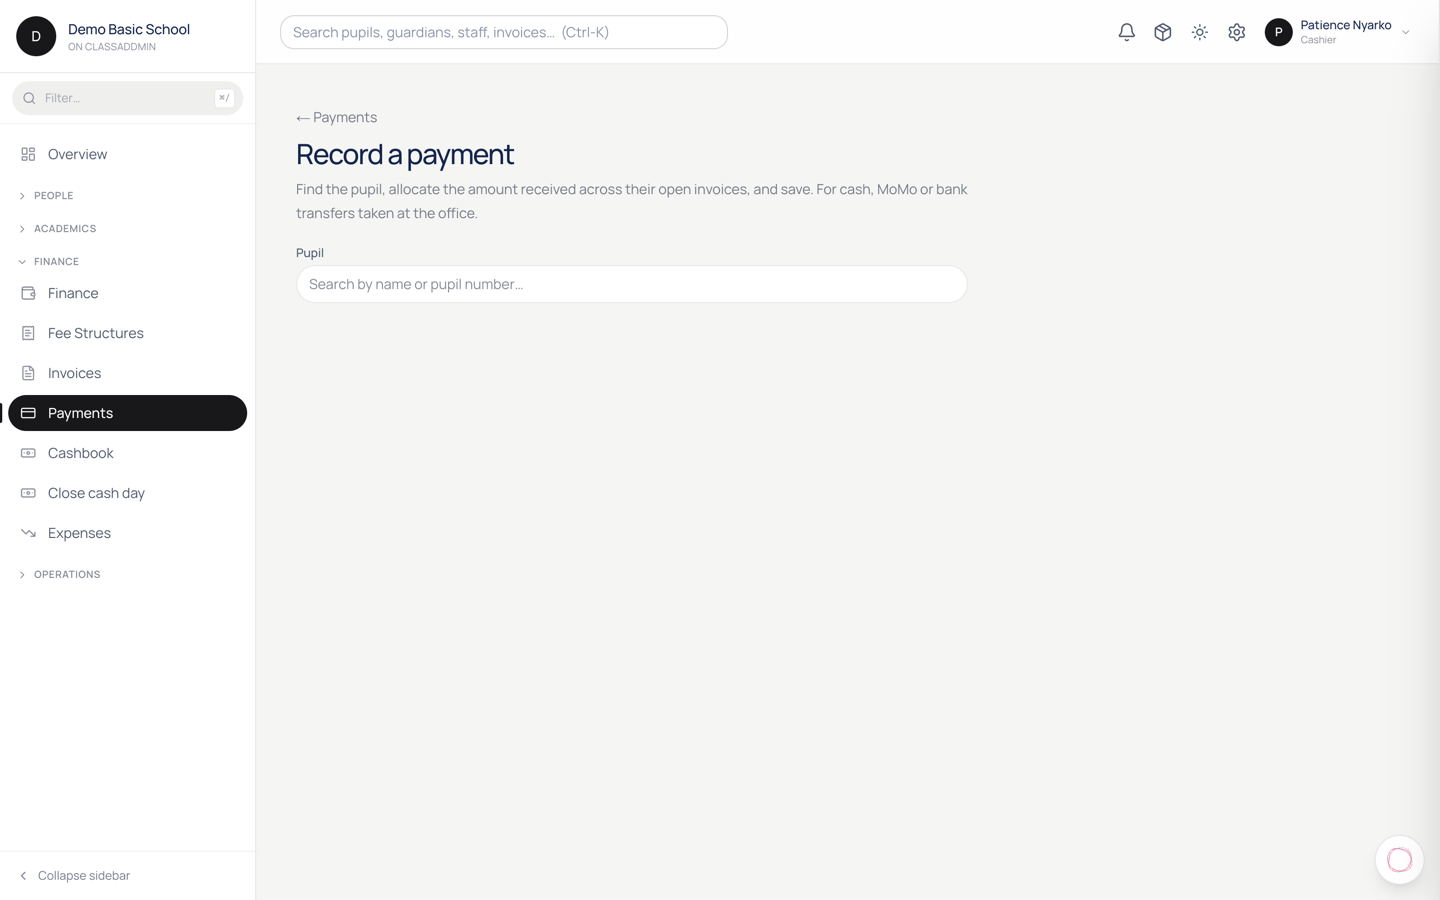
When a parent pays at the office - in cash or by mobile money transfer - record it in ClassAddmin so their balance updates and you can hand them a receipt.

Steps

  1. Click Record payment in the top-right of any finance page (the orange button).
  2. Find the pupil - type their name or admission number; the search is fuzzy.
  3. Pick the method: Cash, MoMo, Bank Transfer.
  4. Enter the amount in GHS. You can split it across multiple outstanding invoices on the same screen - the form shows each pupil invoice and lets you allocate.
  5. (Optional) Add a note - useful for "paid by grandmother" or "MoMo ref 9988**".
  6. Click Save. The payment lands as success; receipt prints automatically.

What if the parent only paid part of one invoice?

That's fine. The invoice flips to partially_paid and the remaining balance carries over. You can record another payment against the same invoice later - they'll stack.

What if a parent paid over the phone via MoMo before coming in?

Same flow - pick MoMo and paste the transaction reference in the notes. The cashier in the office sees the same form as a parent who walks in with notes.

Online MoMo payments

If your school is on the Family or Plus tier, parents can pay from their phone via the parent portal link. Those payments don't need recording - they post automatically via the Paystack webhook the moment they're confirmed.

Reversing a mistake

Go to Payments, find the row, click the three-dot menu → Reverse. A reversal entry is created (it doesn't delete the original - that would break the audit log). The parent's balance goes back to what it was before.

8.Chase fee defaulters

Chase fee defaulters — screen

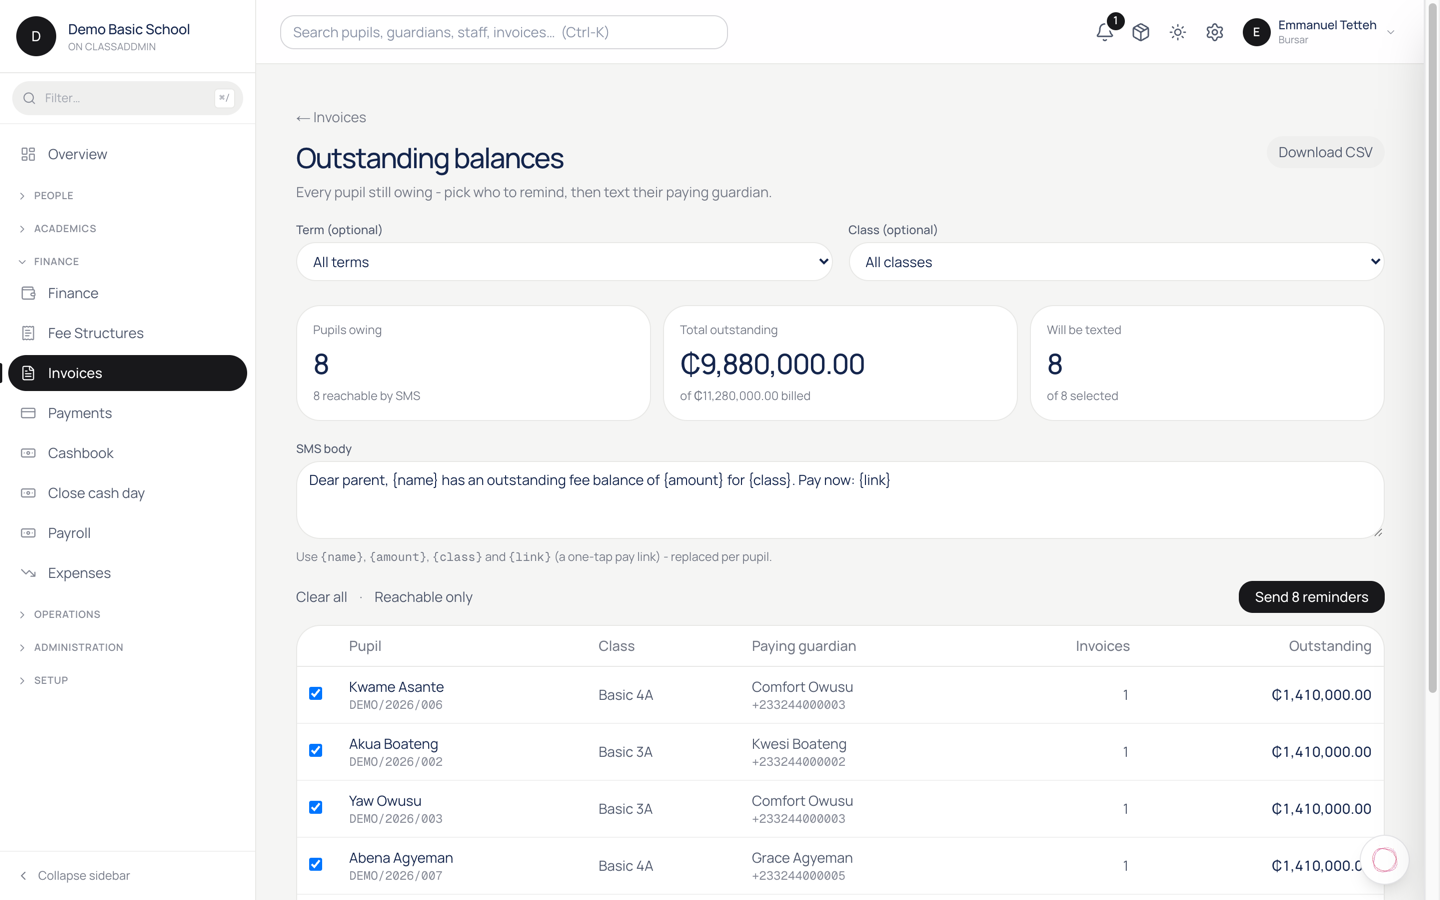
A defaulter is a pupil whose invoice is past its due date and still has a balance. ClassAddmin gives you three tools to chase them, from gentle nudge to public list.

See who owes what

  1. Invoices → filter status to overdue.
  2. Sort by balance descending - the biggest owing first.
  3. Each row shows pupil, class, invoice number, balance, days overdue.

You can also use Finance → Biggest balances for a per-pupil view (one row per pupil rather than per invoice).

Tool 1 - Bulk SMS reminder

Use this when more than a handful of parents are overdue.

  1. Messages → Send to: Fee defaulters.

  2. The system pre-fills the recipient count - every guardian flagged pays_fees whose pupil has an overdue invoice.

  3. Type the message. Keep it under 160 characters to stay in one SMS:

    Dear Parent, Adwoa's Term 2 fees of GHS 1,200 are now overdue. Pay via the portal: app.classaddmin.com/p/abc - Greenhill School.

    Wait - that's actually a poor template. Don't include the pupil's name in a broadcast (it goes to every parent, so it'd be wrong for everyone). Use generic wording:

    Dear Parent, your child's Term 2 fees are overdue. Pay via the portal link sent earlier or visit the office. Thank you - Greenhill School.

  4. Click Send SMS.

Each recipient is a separate credit. A 50-pupil defaulter list costs 50 credits.

Tool 2 - Individual SMS

When you want a personalised message (with the actual pupil name and amount):

  1. Invoices → click an overdue invoice.
  2. Click Notify guardian in the right rail.
  3. The system sends an SMS like "Adwoa's Term 2 fees of GHS 1,200 are overdue. Pay via the portal: [link]" - pupil name, amount, link auto-filled.

This uses one credit per pupil, but it's the most effective format.

Tool 3 - Set up a payment plan

If the parent can't pay all at once, don't keep chasing - offer them an installment plan. See Offer parents an installment payment plan.

A plan is psychologically easier than "your whole term's fees are overdue", and the system handles the reminders for each step automatically.

Tool 4 - Auto-reminder cron (weekly)

If your school has the weekly fee reminder cron on (Settings → Communications → Fee reminders), the system automatically SMSes every defaulting parent every Monday morning. You don't need to do anything.

You can turn this off if you find it annoying. Some schools prefer to chase manually.

How NOT to chase

  • Don't paste pupil names in WhatsApp groups. Privacy nightmare.
  • Don't refuse to admit a pupil to class without telling the parent first. Make it a phone call, not a surprise.
  • Don't threaten on the SMS broadcast. Keep the tone professional; if a parent is in real difficulty, escalate to a head-teacher phone call.

9.Reverse or refund a payment

Reverse or refund a payment — screen

Sometimes a payment was wrong - wrong child, wrong invoice, wrong amount, or the parent paid by mistake. You don't edit the original; you reverse it, which creates a balancing entry that keeps the audit log clean.

Reverse a payment that hasn't been spent

When a payment is fresh and the parent wants a refund:

  1. Payments → find the row.
  2. Click the ⋮ menu → Reverse.
  3. Pick a reason:
    • Wrong amount - the parent paid more than intended.
    • Wrong invoice - paid against the wrong child.
    • Duplicate - the same payment was recorded twice.
    • Parent request - they changed their mind.
  4. (Optional) Add a note.
  5. Click Confirm.

The system:

  • Creates a reversal payment for the same amount, dated today.
  • Adjusts the original invoice's balance back to what it was before the payment.
  • Posts a reversing journal entry in the books.

You still owe the parent the money in real life. Hand them cash or send a MoMo transfer - ClassAddmin doesn't initiate refunds to MoMo wallets automatically. After you've physically refunded, you're done; the books reflect it.

Re-allocate (instead of refund)

Most "mistakes" don't need a refund - they need to be re-allocated to the right invoice.

  1. Payments → find the row.
  2. Click the ⋮ menu → Re-allocate.
  3. Pick the correct invoice (or split across multiple).
  4. Click Save.

The original allocation is reversed, the new one is created. No cash moves; the parent's overall balance is unchanged.

Paystack/MoMo refunds

If the parent paid online via Paystack, you can issue a Paystack refund from your Paystack dashboard - that returns the money to their wallet directly. In ClassAddmin, then reverse the payment with reason "Refund via Paystack" so the books match.

Partial refunds

Right now, refund is all-or-nothing - you can't reverse half a payment. To do a partial refund:

  1. Reverse the full payment.
  2. Re-record a smaller payment for the portion the parent actually owes/keeps.

Common gotchas

  • "This payment is already linked to an installment plan step" - reversing it also reverses the plan step. The plan recomputes; remaining steps shift back.
  • The reversal doesn't show on the parent portal - the portal shows balance, not history. Once you reverse, their balance reflects the change immediately.
  • Audit log shows me as the reverser, not the original cashier - correct. Both the original and the reversal stay on the log.

Money going out

Expenses and staff pay.

10.Record an expense

Record an expense — screen

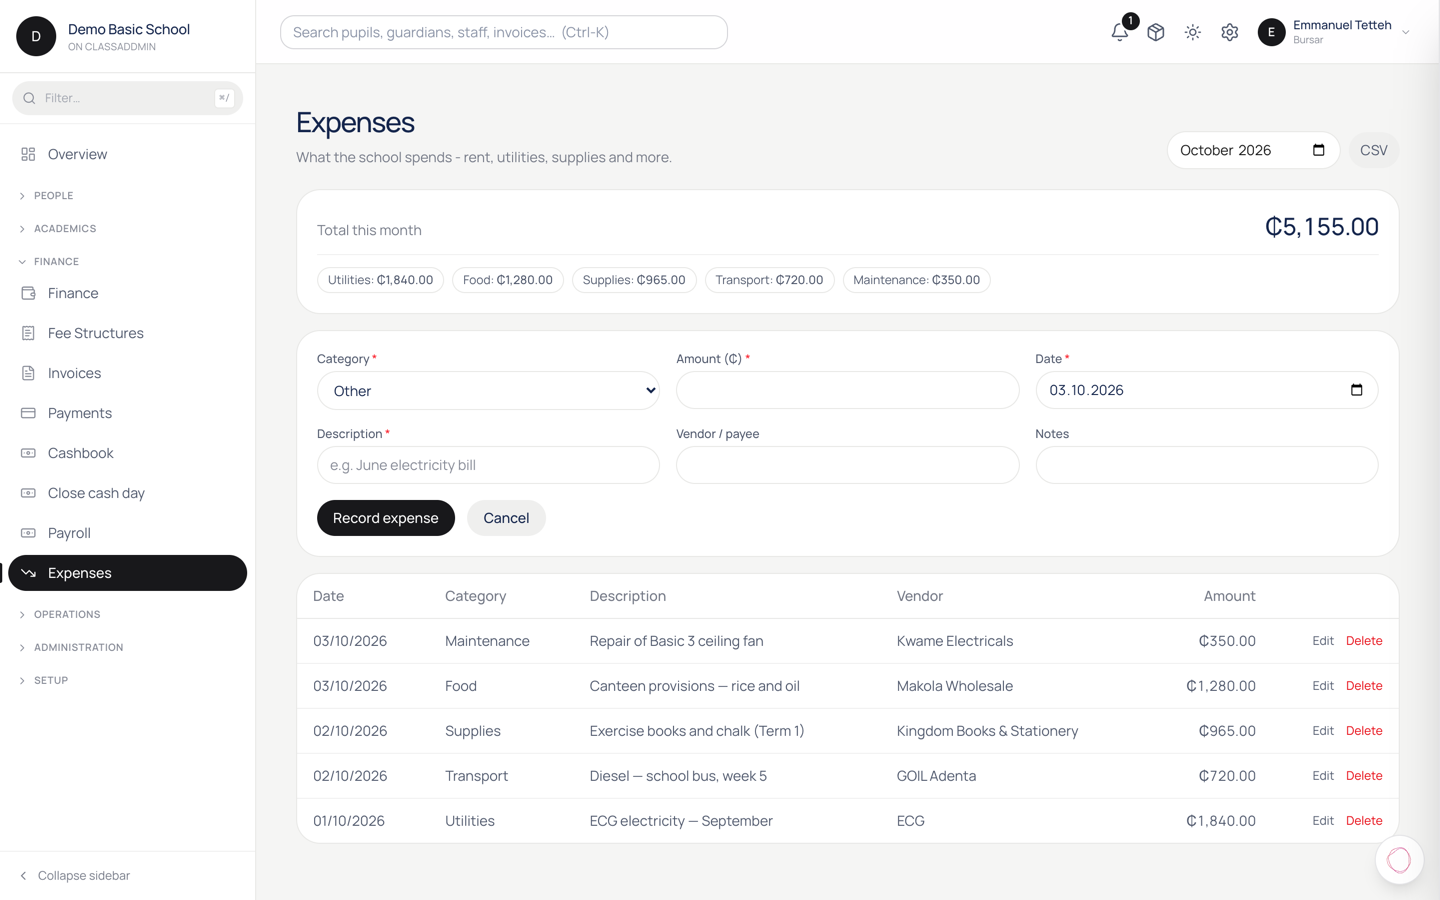
Every shilling the school spends should be recorded - electricity, supplies, vendor invoices, transport, anything. Recorded expenses feed the books module so the Income Statement and Balance Sheet are always current.

Steps

  1. Expenses in the sidebar.
  2. Click Record expense (top right).
  3. Fill:
    • Category - pick from the dropdown: Salaries, Rent, Utilities, Supplies, Maintenance, Transport, Food, Events, Other. Each category maps to a chart-of-accounts row in Books (see What is Books).
    • Amount in GHS.
    • Spent on - the date the money left. Today by default.
    • Description - what for. "ECG bill - November", "Lockers for Class 3", "Aluminium roofing repair".
    • Vendor - optional but useful. "ECG", "Mariam's Stationery", "Auntie Akua's Catering".
    • Notes - optional. Any extra context.
  4. (Optional) Upload receipt - attach a scan or photo of the receipt. Files are stored in the school's bucket.
  5. Click Save.

The expense lands in the list with status recorded. It also posts a journal entry in the books immediately: DR Expense Category, CR Cash on Hand.

Edit or delete

You can edit an expense at any time - open the row → edit → save. The journal in the books is reposted to match.

You can delete within 7 days of recording - open → ⋮ → Delete. After 7 days, deletion is locked and you must post a manual reversal journal instead (see Post a manual journal). This is to keep the audit trail honest.

Bulk record

When you have a stack of receipts from the week:

  1. Expenses → Import (top right).
  2. Download the template.
  3. Fill columns: category, amount_pesewas, spent_on, description, vendor.
  4. Upload.

100 expenses import in seconds; the books pick them all up automatically.

See spending by category

  1. Expenses → Month view.
  2. Pick the month.
  3. The top of the page shows total spend, a pie chart by category, and a list of the biggest single expenses.

Useful for the proprietor's monthly review meeting.

Common gotchas

  • Wrong category - easy to fix; edit the expense → change category → save. The journal re-posts to the new account.
  • "Amount must be > 0" - for negative expenses (refunds from a vendor), use a manual journal instead of trying to record a negative expense.
  • Receipt upload fails - usually a file size issue (>10MB). Compress the image and retry.

11.Run monthly payroll

Run monthly payroll — screen

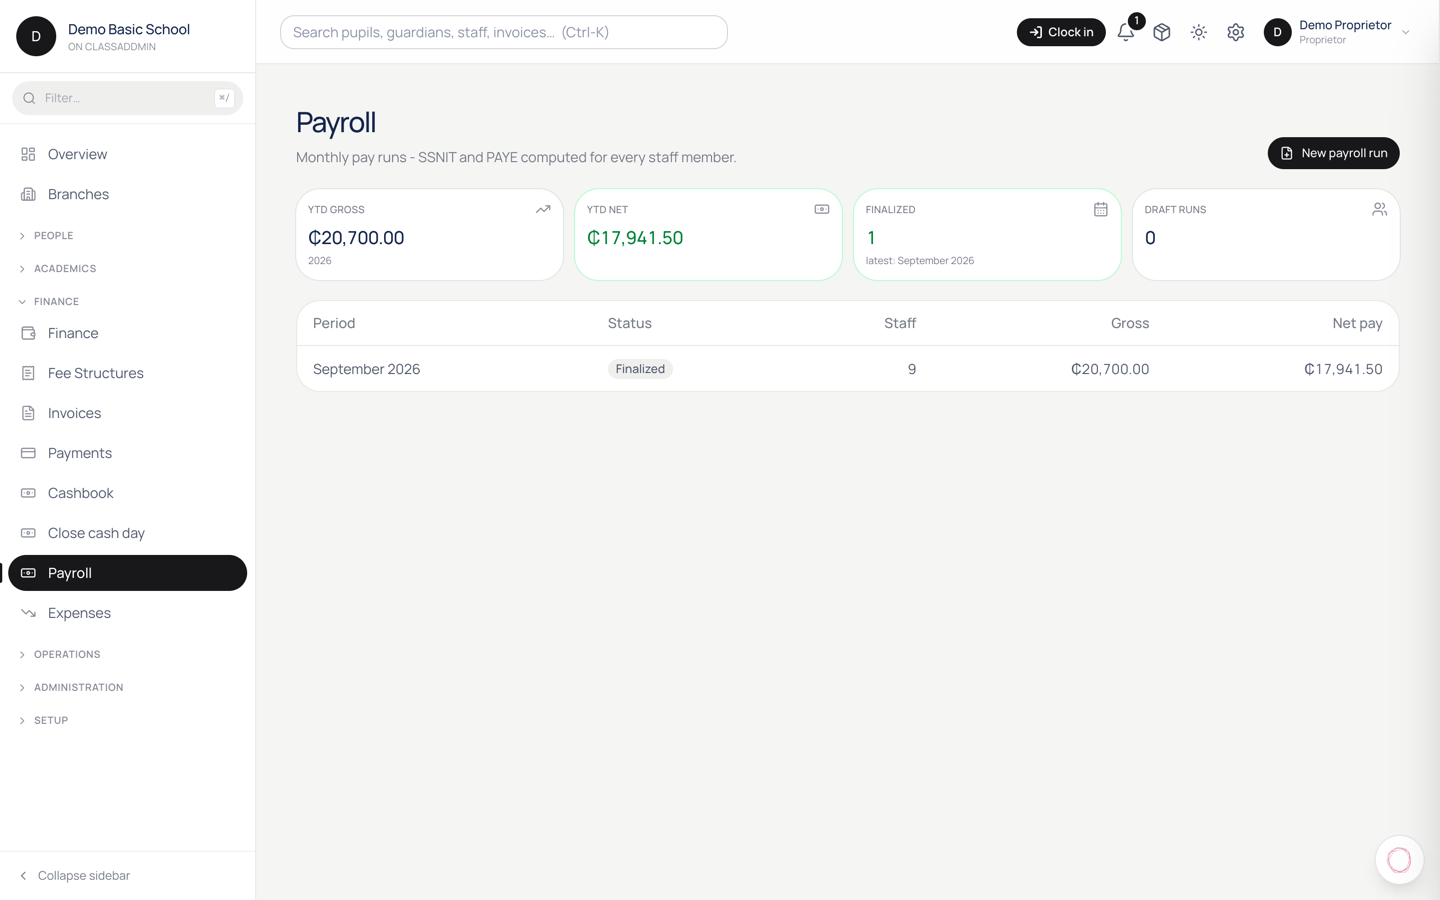
Payroll is once a month: you pick the month, the system pulls salaries from each staff profile, computes statutory deductions (PAYE, SSNIT), and outputs payslips you can email or print. Finalised runs auto-post to the books.

Set up staff salaries first

Before your first payroll run:

  1. Settings → Staff → click the staff member → Salary tab.
  2. Fill:
    • Gross monthly salary (GHS).
    • Allowances (transport, housing, etc - line items, each with a name + amount).
    • Pension contribution - tick if they're enrolled in SSNIT (most are).
    • Tax category - usually resident; affects PAYE calculation.
  3. Save.

Repeat for each staff member on payroll. Anyone without a salary entry is excluded from runs.

Run payroll

  1. Payroll in the sidebar.
  2. Click New run (top right).
  3. Pick the period - the month being paid. Default is the current month.
  4. Click Generate draft.

The system creates a payslip per staff member, computing:

  • Gross = monthly salary + allowances.
  • SSNIT = 5.5% employee contribution (deducted from gross).
  • PAYE = computed from the Ghana revenue scale on the post-SSNIT amount.
  • Other deductions - anything you add manually (loan repayment, sick-leave docking).
  • Net = gross − SSNIT − PAYE − other.

Review

The draft list shows every payslip. Click each to see the breakdown.

If anything looks wrong:

  • Salary changed mid-month - edit the staff profile (Settings → Staff → Salary), then Re-generate the run.
  • Add a one-off bonus - open the payslip → add an allowance with that bonus amount → save.
  • Deduct for late days - open the payslip → add an "Other deductions" line.
  • Exclude someone - open their payslip → Skip this run.

Finalise

Once everything is right:

  1. Click Finalise run (top right).
  2. Confirm.

The system:

  • Locks every payslip in the run (no further edits).
  • Auto-posts a journal in the books - DR Salaries, CR Bank, CR PAYE Payable, CR SSNIT Payable. See What is Books.
  • Marks the run finalized.

Distribute payslips

After finalising:

  • Each payslip has a PDF you can download from the payslip page.
  • Click Email all to send each staff member their own payslip to their on-file email. They get a link to download it.
  • Or click Print all to print on the school's letterhead - useful for staff without email.

Pay the staff

ClassAddmin computes what to pay but does not move money. You're responsible for:

  • Transferring net pay to each staff member's account (bank transfer, MoMo, or cash).
  • Paying PAYE to GRA via their portal - by the 15th of the following month.
  • Paying SSNIT to the SSNIT office or via their portal - by the 14th of the following month.

The books module helps with these too: PAYE Payable and SSNIT Payable accumulate on the balance sheet until you record a payment that clears them.

Common gotchas

  • "Total gross is zero" - the staff member doesn't have a salary set. Fill it on their profile and re-generate.
  • PAYE looks wrong - Ghana's tax bands change every budget. Settings → Payroll → Tax bands should match the latest GRA publication. If not, update.
  • Can't finalise - "previous month not finalised" - finalise oldest first to keep the sequence clean.

Finance settings

Payment channels, instalment plans, and how receipts are numbered.

12.Set up how parents pay you, and what your invoice says

Set up how parents pay you, and what your invoice says — screen

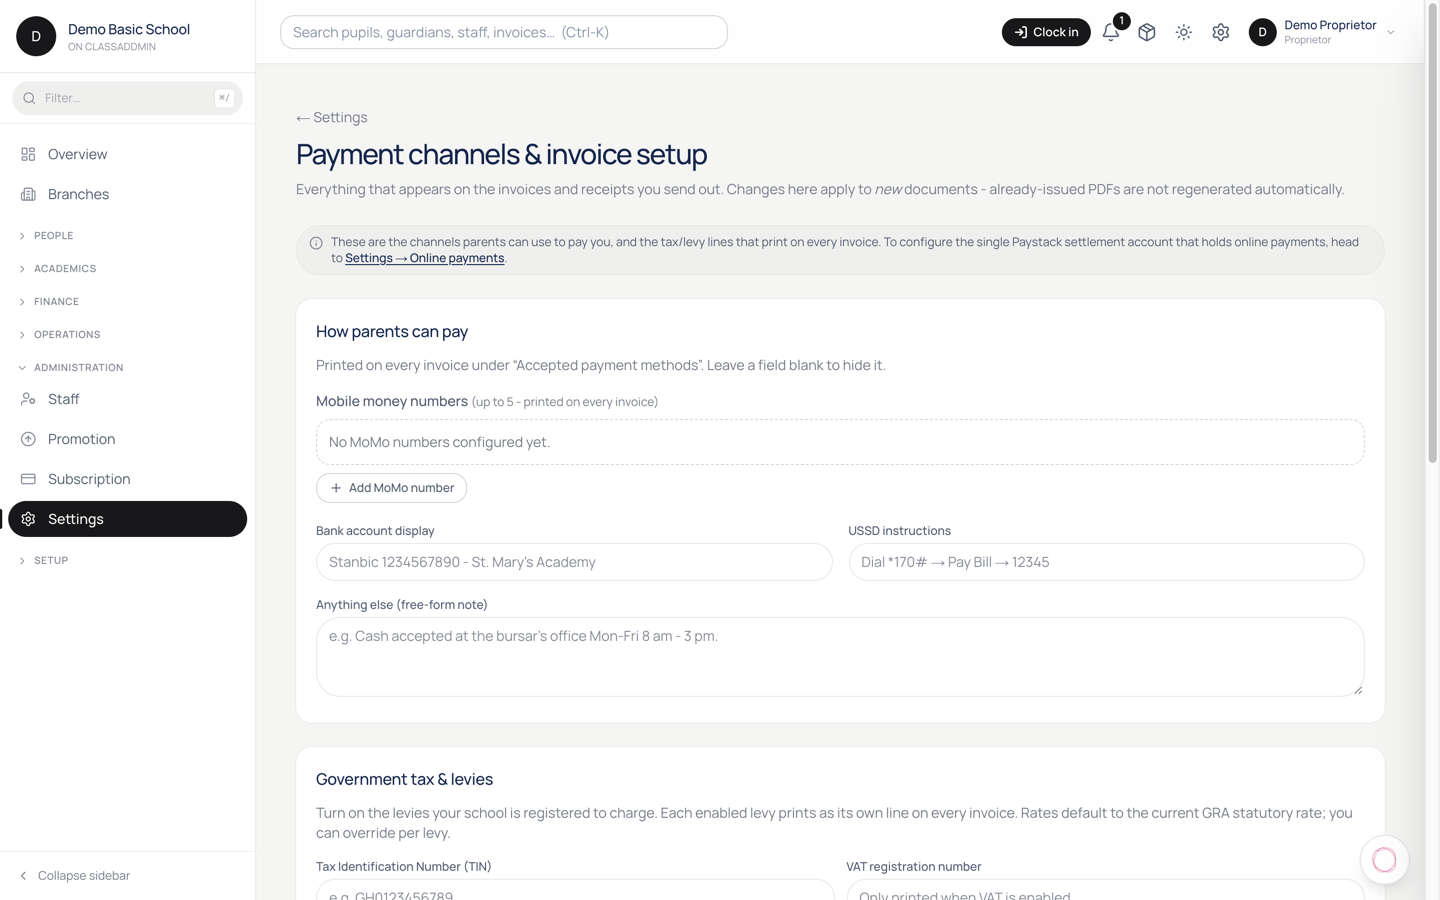
This one page decides two things parents actually see: how they can pay you, and what your invoice and receipt look like when they open the PDF. Worth getting right once, before you issue a term's invoices.

Find it at Settings → Payment channels & invoice setup.

1. How parents can pay

Everything you put here is printed on the invoice, so a parent has your payment details in front of them.

  1. Mobile money lines. Add a number for each network you accept — MTN MoMo, Telecel Cash, AirtelTigo Money. Add as many as you use.
  2. Bank account display. Free text, exactly as you want it to read, for example Stanbic 1234567890 - St. Mary's Academy.
  3. USSD instructions. If you have a pay-bill short code, write the steps out: Dial *170# → Pay Bill → 12345.
  4. Anything else. A free-text line for the rest — for example Cash accepted at the bursar's office Mon-Fri 8 am - 3 pm.

Changes save as you go; you'll see Saved. appear.

This is separate from paying online

These details tell a parent how to send you money themselves. They are not the same thing as the Pay now button in the parent app, which settles into your Paystack account. Set both up if you want both: the card button for parents who'd rather tap, and these details for everyone else.

2. Government tax and levies

Toggle on only what your school is actually registered to charge, and set the rate for each:

  • VAT — Value Added Tax
  • NHIL — National Health Insurance Levy
  • GETFund Levy — Ghana Education Trust Fund Levy
  • COVID-19 HRL — COVID-19 Health Recovery Levy

Once on, each appears as its own line on the invoice and is included in the total, so a parent can see what they're paying and why.

Only switch these on if your school is registered to collect them. Charging a levy you don't remit is a problem with the Ghana Revenue Authority, not with ClassAddmin.

3. What the invoice looks like

  • Signatory name and Signatory title — whose name sits at the bottom of the invoice, for example Mrs. Mary Asante, Proprietor.
  • Invoice footer terms — your payment terms in your own words, for example Late payments attract 5% per term. All balances are due by week 2 of term.
  • QR code — turn on to print a code a parent can scan to pay.
  • Brand colour — the accent colour on the PDF.

Brand colour needs the Family plan. On other plans the colour picker is visible but greyed out, so you can see what upgrading gets you.

What happens after you save

Every invoice and receipt generated from now on uses these settings. Invoices already issued keep the details they were printed with — an old invoice won't retrospectively change its payment instructions, which is the correct behaviour if a parent is holding a printout.

If you change a MoMo number mid-term, re-issue or re-download the invoices you want to carry the new one.

Common gotchas

  • A parent paid to an old MoMo number. The number lives on the invoice they were holding. When you retire a line, keep it active with your provider until the term's invoices are settled.
  • The tax line looks wrong. Check the rate, not just the toggle — each levy has its own rate box, and they're independent.
  • Nothing appears on the PDF. These affect newly generated documents. Open a fresh invoice rather than a cached download.
  • The colour picker won't move. That's the Family-plan gate, not a bug.

13.Set up the bank account online fees are paid into

Set up the bank account online fees are paid into — screen

When a parent taps Pay now in the app, the money has to land somewhere. This is where you tell ClassAddmin which bank account that is.

Find it at Settings → Payments.

Steps

  1. Settings → Payments.
  2. Enter your bank and account number — for example 1234567890123.
  3. Enter the account name as the bank has it, for example Academy Basic School.
  4. Save. The details are verified against the bank before anything is stored.

The three states

State What you see What it means
Not set up The form Parents can't pay online yet
Pending A Refresh button Still being validated — check back
Active Your current details Online payments are settling to you

Pending isn't an error. Validation can take a little while; click Refresh rather than re-submitting the form, which just starts it again.

What this does and doesn't cover

This account receives online payments only — the card and mobile-money payments parents make through the app.

It has nothing to do with the MoMo numbers and bank details printed on your invoice. Those are instructions for a parent sending money themselves, set up separately under Settings → Payment channels. A school can run either, or both:

  • Settlement account → parent taps Pay now → money arrives automatically, recorded automatically.
  • Payment channels → parent sends money themselves → someone records the payment by hand.

Until this is set up

Parents have no Pay now button. They can still pay by every other route, and your bursar records those as usual — but the easiest option for a parent is missing, and so is the automatic recording that comes with it.

Common gotchas

  • Verification fails. The account name must match the bank's records exactly. Academy Basic Sch. won't match Academy Basic School.
  • Stuck on pending. Use Refresh. Re-submitting restarts validation.
  • Money hasn't arrived. Settlement isn't instant — payouts follow the payment provider's schedule, not the moment a parent pays.
  • You changed banks. Update here. Payments already in flight settle to the old account.
  • A personal account. Use the school's account. Fees settling into an individual's account is the kind of thing an auditor asks about.

Statements and the cashbook

A pupil's statement of account, and the day-to-day cashbook.

14.Reconcile the day's takings with the cashbook

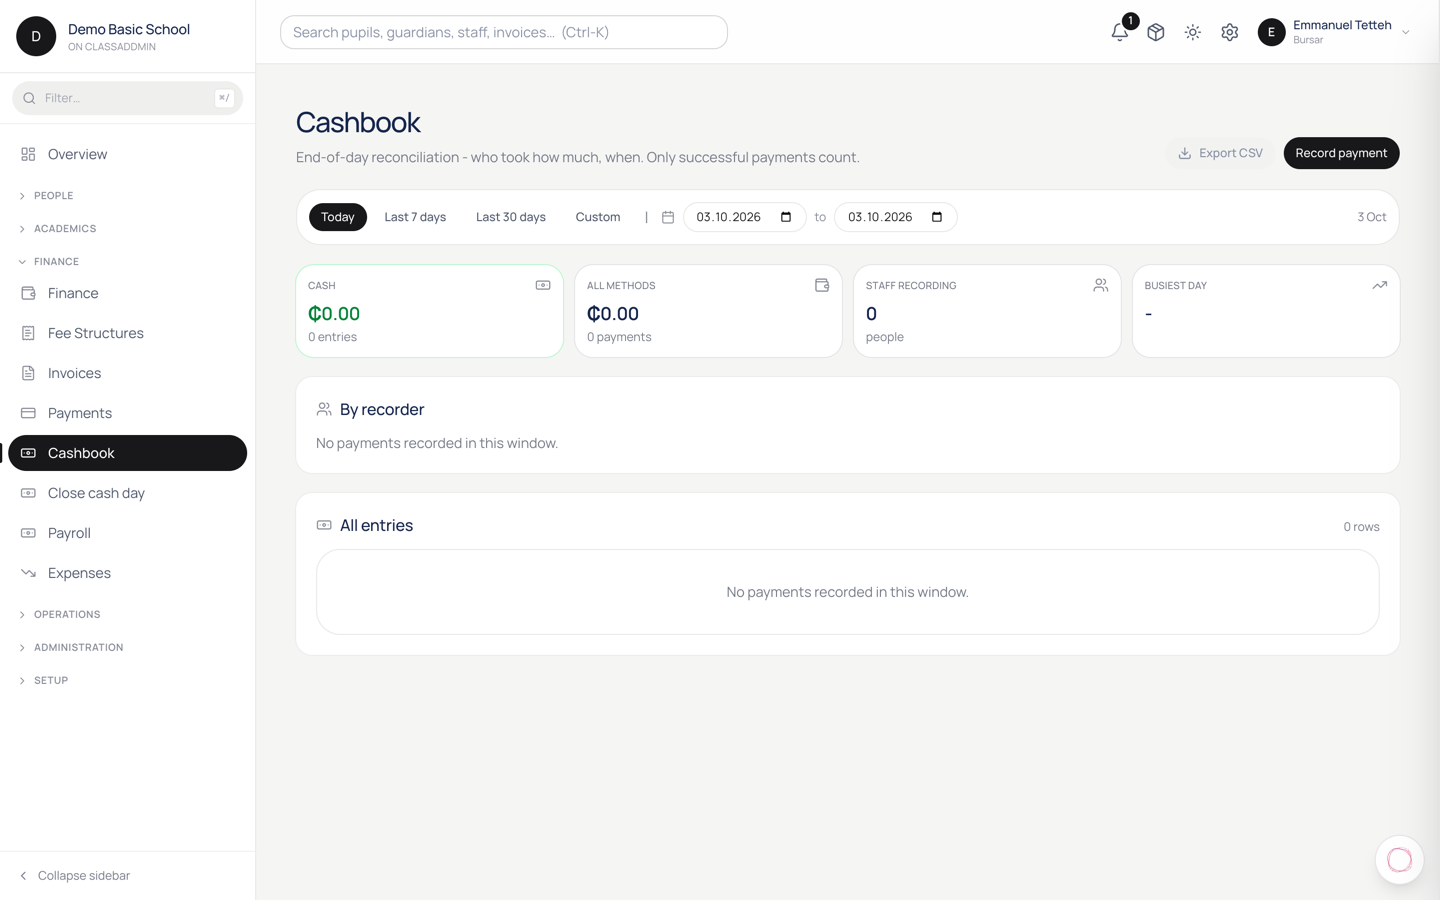
Reconcile the day's takings with the cashbook — screen

The cashbook answers one question: what came in, and who took it? It lists every confirmed payment in a date window, grouped by the member of staff who recorded it.

Find it at Finance → Cashbook.

Steps

  1. Finance → Cashbook.
  2. Pick a window — Today, 7 days, 30 days, or a custom range for a month-end or term-end.
  3. Read down the groups. Each staff member has their own, with a total.
  4. There's a per-day roll-up, and a CSV export if you want it in a spreadsheet.

Why it's grouped by person

Because that's the shape of the question you're actually asking at close of day: this is what the front desk says it took — does it match the drawer?

Every payment records who entered it. The cashbook is simply that made visible. It's not an accusation; it's the ordinary control that lets an honest person prove their drawer balanced, and it's what makes a discrepancy findable the same day rather than at year end.

When to use it

  • End of day — against each cashier's drawer.
  • Month end — a custom range for the month, exported for your accountant.
  • Term end — reconcile the term's takings before closing the books.
  • When something's off — narrow the window until the gap appears.

Cashbook, or the books?

Two different jobs:

  • Cashbook — money received, by person, in a window. An operational check.
  • Books (income statement, balance sheet) — the school's accounts. A financial picture.

Reconcile in the cashbook daily. Read the books monthly.

Common gotchas

  • A payment is missing. Only confirmed payments appear. A card payment still settling won't be there yet.
  • The total is higher than the cash drawer. The window includes every method — a mobile-money or card payment isn't in the drawer. Filter your thinking by method before assuming a shortfall.
  • A payment sits under the wrong person. It's grouped by who recorded it, not who received the money. Two people sharing one sign-in makes this meaningless — which is a good reason not to share sign-ins.
  • Numbers don't match the income statement. Expected. The cashbook is money received on a date; the books recognise income against the term it belongs to.

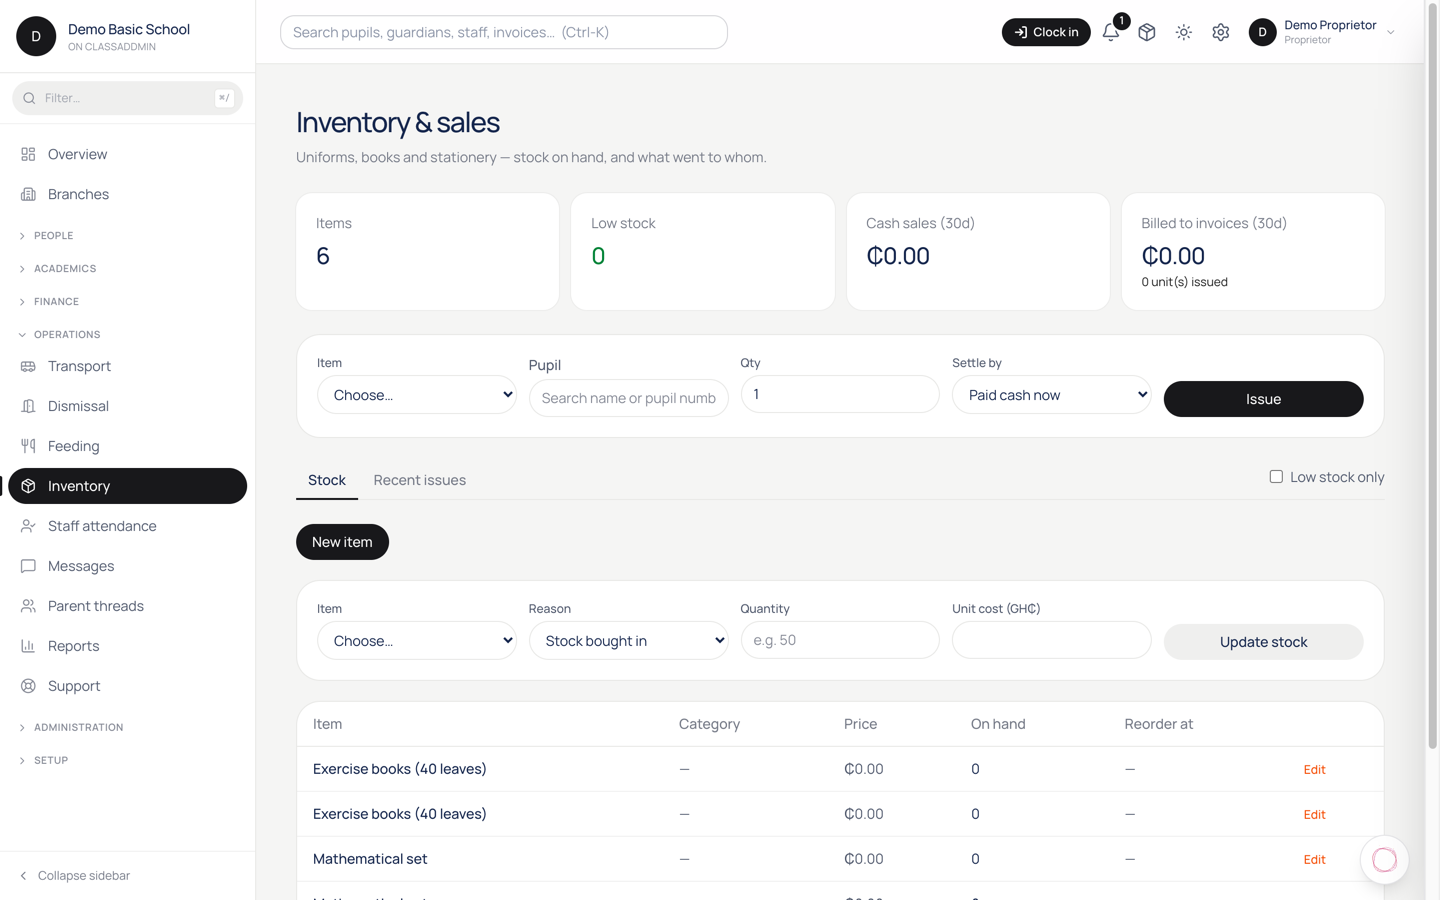
15.Sell uniforms, books and stationery from stock

Sell uniforms, books and stationery from stock — screen

Inventory covers the things a school sells to families — uniforms, exercise books, stationery. It does two jobs: tells you what's on the shelf, and gets an item that left the shelf onto the right parent's bill.

Find it at Inventory, with two tabs: Stock and Issues.

Stock

The Stock tab lists every item and how many you have. Add an item with its name, price and how many you're holding.

Keep the count honest. If it drifts from what's in the store cupboard, the number stops being worth looking at and people go back to counting by hand.

Issue an item to a pupil

This is the part that matters — it's how a uniform becomes money owed.

  1. Inventory → the issue form.
  2. Pick the Item.
  3. Pick the pupil.
  4. Enter the Qty — how many.
  5. Choose Settle by:
    • Paid cash now — the parent is paying at the counter.
    • On credit — add it to what they owe.
  6. Save.

Stock goes down by the quantity either way. What differs is the money.

What "on credit" actually does

Issuing on credit writes a line onto the pupil's invoice. It is not a separate note in a separate place.

That means a school jumper handed over in September is chased by exactly the same fee reminders as tuition, appears on the pupil's statement, and shows up in your outstanding-fees figures. There's no second list to remember to look at.

It also means the family sees it. A parent opening their bill will find "School jumper × 1" alongside the term's fees, which is the honest way to present it.

The Issues tab

Issues is the history — what went out, to whom, when, and how it was settled. Use it when a parent queries a charge, or when the stock count doesn't match the shelf and you need to see what left.

Common gotchas

  • Stock doesn't match the cupboard. Something left without being issued. The Issues tab shows what was recorded; the gap is what wasn't.
  • A parent disputes an item on their bill. Find it in Issues — it carries the date and quantity.
  • You issued to the wrong pupil. Tell whoever runs fees. The charge is a line on an invoice now, so it's corrected there, not by re-issuing.
  • You issued on credit but took the cash. The invoice line stays until a payment is recorded against it. Record the payment normally; don't delete the line.
  • Nothing appears on the invoice. Check the pupil actually has an invoice for the current term — a credit line needs a bill to sit on.

The books

Where the numbers end up, and how to close a month cleanly.

16.What is "Books" and do I need it?

What is "Books" and do I need it? — screen

Books is your school's accounting layer. Every payment received, expense recorded, and payroll finalised in ClassAddmin posts a balanced journal entry behind the scenes - and Books lets you read the results: Income Statement, Balance Sheet, Trial Balance, Cash Flow.

If you've used Xero or QuickBooks before, this is the same idea - but already filled with your data, with no setup needed.

Why bother?

Three reasons:

  1. You stop guessing. "Did we make money this month?" is one click on the Income Statement, not an evening with a calculator.
  2. You match the bank. Bank reconciliation marks every Stanbic / Ecobank / MoMo transaction as either matched-to-the-ledger or not, so you spot missing entries early.
  3. Year-end accounts are ready. When your accountant asks for trial balance and P&L for 2025, you don't go digging - you download them.

What "auto-posting" means

Every time the bursar records a cash payment, ClassAddmin also writes a journal entry: debit Cash, credit Tuition Fees. Same for expenses (debit Salaries, credit Cash), payroll runs, and opening balances. You don't do double-entry yourself - it happens automatically. Your job is to read the reports and reconcile.

What you still do by hand

Just three things:

  • Add accounts you want that aren't in the default chart (e.g. "Stationery donations").
  • Post manual journals for adjustments - depreciation, bad-debt write-offs, owner's draw.
  • Reconcile bank statements monthly - confirm every line on your bank statement matches a journal in ClassAddmin.

Everything else is automatic.

Who can use it

By default: proprietors see everything (chart of accounts, manual journals, periods), bursars see the reports and can post manual journals and reconcile the bank. Other roles don't see Books at all. You can change this under Settings → Roles → "accounting.*".

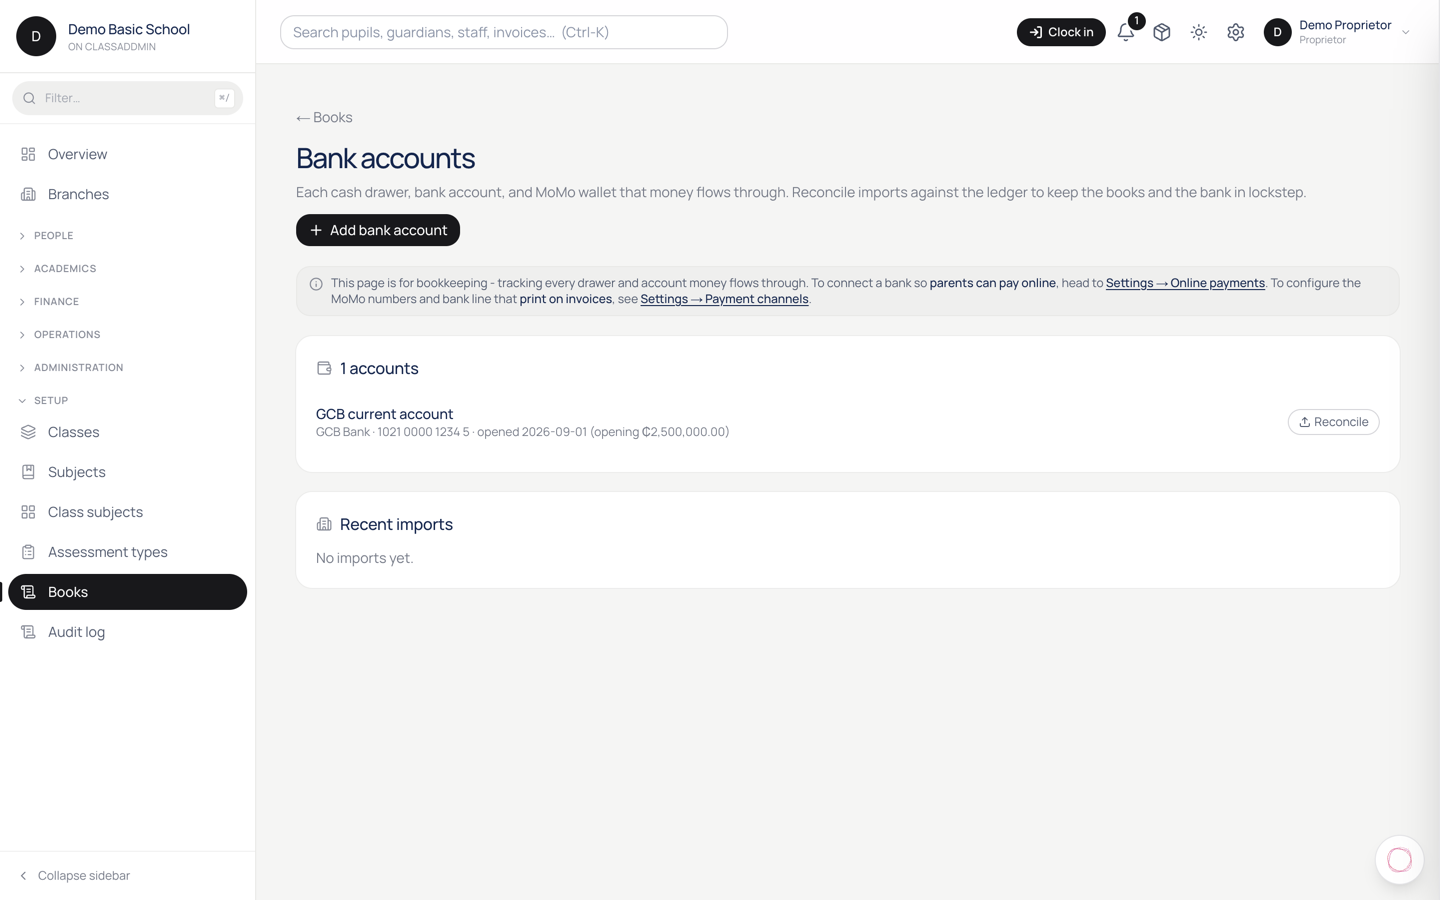
17.Add a bank account

Add a bank account — screen

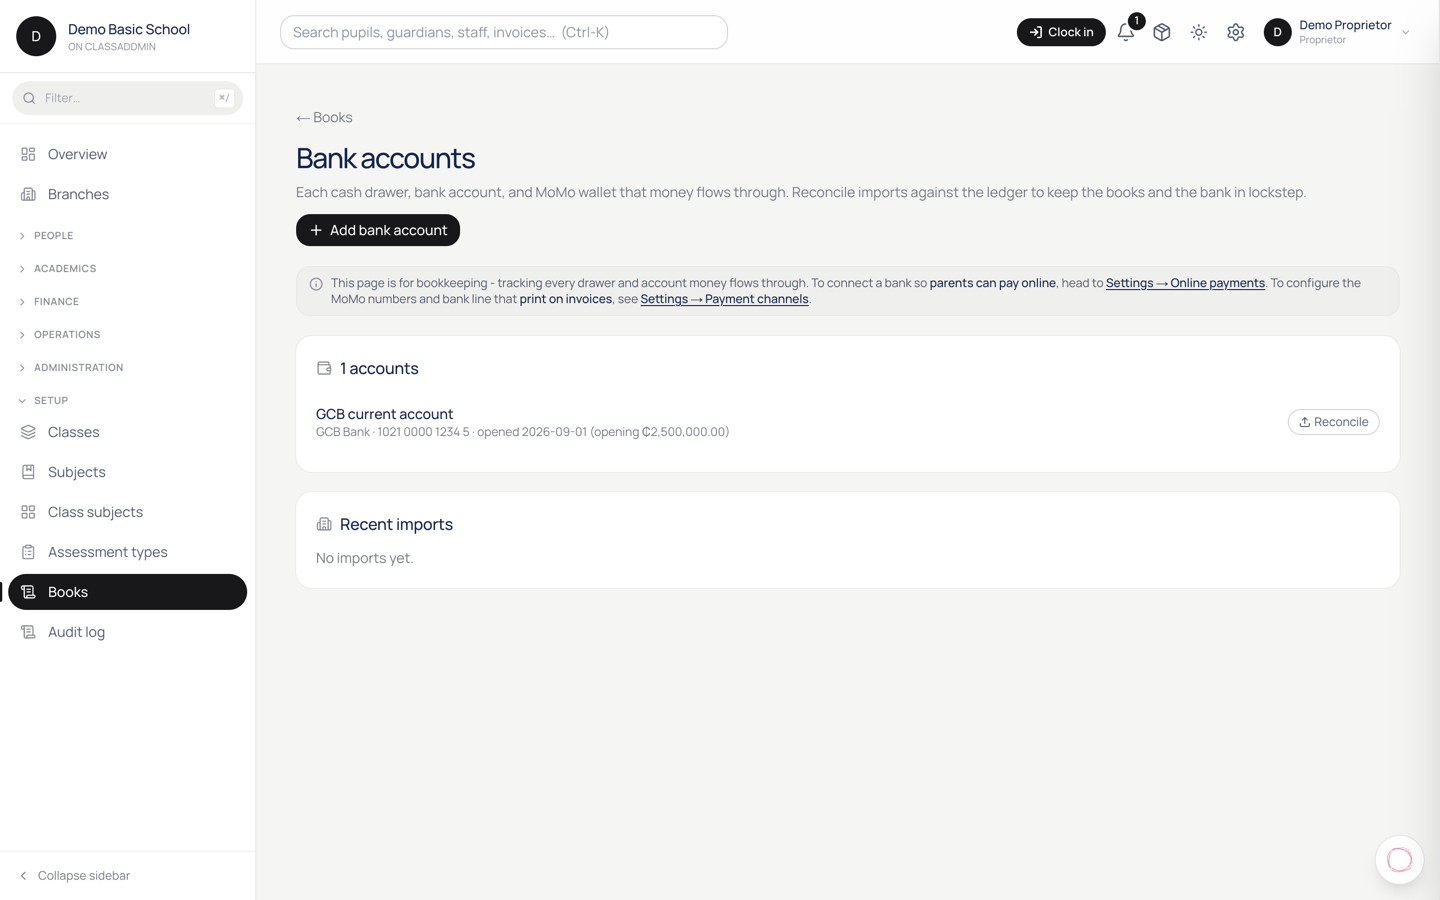
Each cash drawer, bank account, and MoMo wallet that money passes through should be set up in Books → Bank accounts. That's what lets the bank reconciliation match your bank statement against the ledger.

Steps

  1. Open Books → Bank accounts in the sidebar (under Finance).
  2. Click Add bank account (top right).
  3. Fill the form:
    • Display name - what you'll see in dropdowns. E.g. Stanbic Current or MoMo Wallet.
    • Ledger account - pick a sub-account of Current Assets. The seeded chart already has 1100 Cash on Hand, 1200 Bank Accounts, 1310 Mobile Money. If you have two Stanbic accounts, create separate sub-accounts under 1200 first (Books → Chart of accounts → Add account).
    • Bank name - optional, just for display (e.g. Stanbic Bank Ghana).
    • Account number - optional, for your reference.
    • Opening balance - what was in the account on the opening date.
    • Opening date - the day before you start tracking in ClassAddmin. Often 31 December of the previous year.
  4. Click Add. ClassAddmin posts an opening-balance journal automatically - debit Bank Account, credit Owner's Capital. The balance sheet picks it up immediately.

Why bother with opening balance?

If you skip it, the bank account starts at zero in the books, but your real bank statement has money in it. Every reconciliation will be off by exactly the opening balance, forever.

Even a rough opening balance is better than zero - you can correct it later by reversing the opening-balance journal and posting a new one.

Common setup for a Ghanaian school

Bank account Ledger account
Petty cash drawer 1110 Petty Cash
Front-desk cash float 1100 Cash on Hand
Stanbic Current 1210 (create under 1200 Bank Accounts)
MTN MoMo Merchant 1310 (or create 1311 under 1300)
Vodafone Cash 1320 (create under 1300)

The exact codes don't matter - what matters is each real-world account maps to one ledger account, and never two real accounts to the same ledger row.

18.Post a manual journal entry

Post a manual journal entry — screen

Most journals post automatically when you record a payment, expense, or finalise payroll. Manual journals are for everything else: depreciation, bad-debt write-offs, owner's draws, accruals, adjustments, error corrections.

When to post a manual journal

  • Depreciation at month-end: debit Depreciation expense, credit Accumulated depreciation.
  • Bad debt - a parent skips town owing fees: debit Bad debt expense, credit Accounts Receivable.
  • Owner draw - proprietor takes money out of the school for personal use: debit Owner's capital, credit Cash.
  • Accrual - you used electricity in March but the bill arrives in April: debit Utilities expense, credit Accrued expenses. When the bill comes, you reverse the accrual.
  • Correcting an auto-posted entry - better to reverse the original, then post a fresh correct one. Don't edit posted journals.

Steps

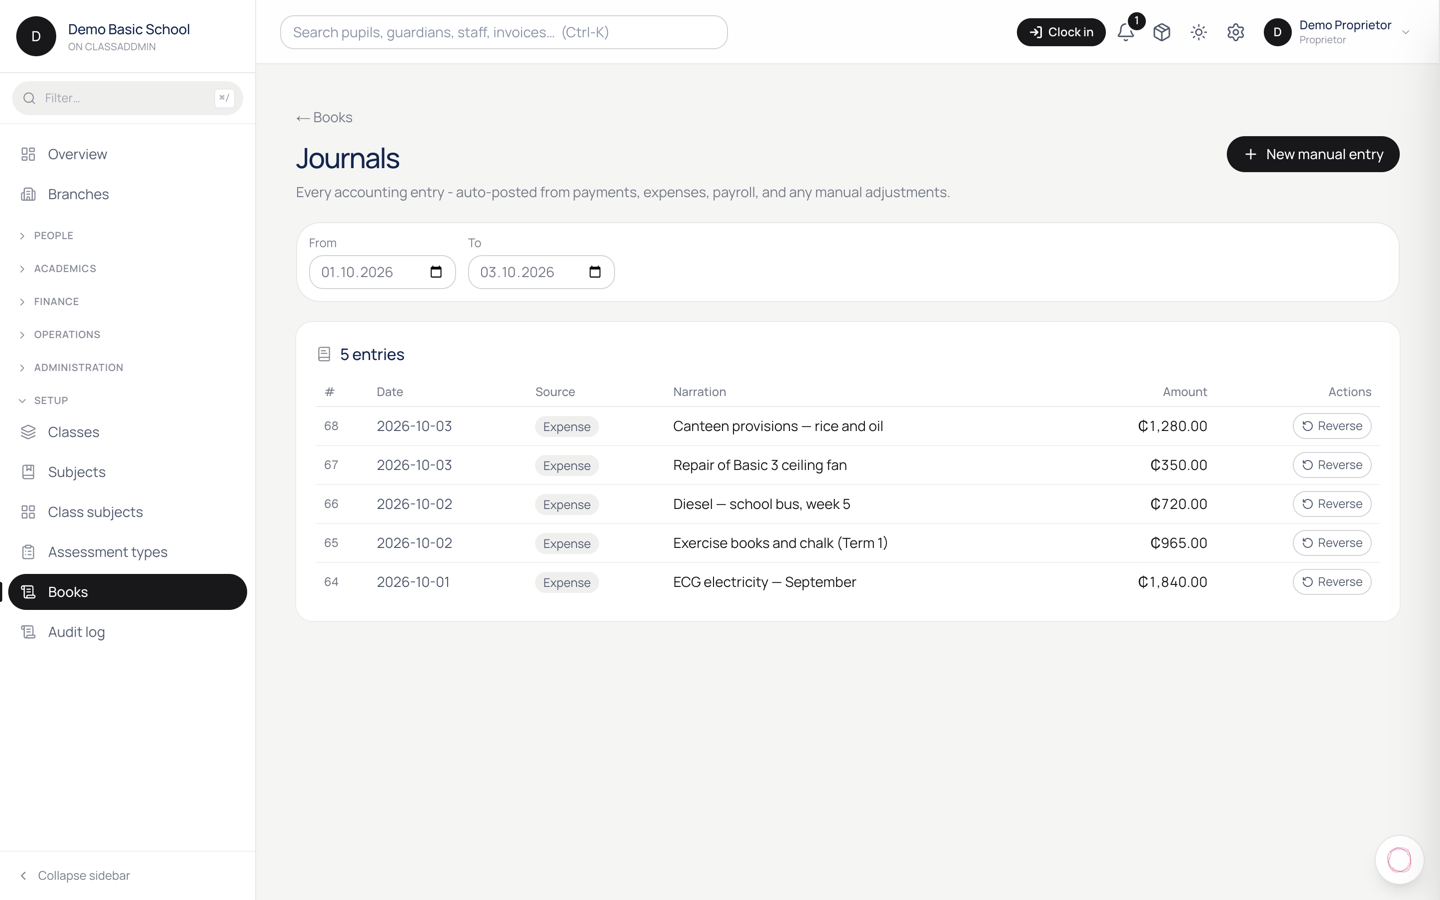
  1. Open Books → Journals in the sidebar.
  2. Click New manual entry (top right).
  3. Set the Date - usually today, or the last day of the period the entry belongs to.
  4. Write a clear Narration - future-you will thank you. "Apr depreciation" is better than "Adjustment".
  5. Add at least two lines:
    • Pick the account from the dropdown.
    • Put the amount in Debit (GHS) or Credit (GHS) - never both on one line.
    • (Optional) Add a Memo for that line.
  6. The bottom-right shows Balanced in green when debits equal credits. You can't post an out-of-balance journal - that's not a ClassAddmin rule, it's bookkeeping itself.
  7. Click Post journal.

What if I post a wrong journal?

You can't edit it after posting (the audit log would lose meaning). Instead, click Reverse on the journal row. ClassAddmin creates a balancing journal dated today that exactly undoes the original. Then post the correct one fresh.

Period locks

If a journal's date falls in a locked or closed fiscal period, the post is rejected. Either:

  • Reopen the period (Books → Periods → Reopen) if it's locked, or
  • Post the entry in the current open period instead. Date it today and use the narration to explain "(adjust for March)".

You can't reopen a year-end-closed period - only post an adjusting entry in the current period.

19.Reconcile a bank statement

Reconcile a bank statement — screen

Bank reconciliation matches every line on your bank/MoMo statement to a journal entry in ClassAddmin. By the end, every withdrawal and deposit is accounted for, and you've spotted any missing entries.

Do this once a month, right after the statement period closes.

What you need

  • A CSV export of the statement from your bank's online portal (Stanbic, Ecobank, MTN MoMo all support this).
  • The bank account already set up in Books → Bank accounts (see Add a bank account).
  • The right permission - bursars get it by default; others need accounting.reconcile_bank.

Steps

  1. Open Books → Bank accounts.
  2. Click Reconcile on the row for the account.
  3. Click Import statement.
  4. Drag in (or click to pick) your CSV file.
  5. The form will auto-fill the statement from / to dates from the file. Adjust if needed.
  6. Click Import.

ClassAddmin will:

  • Parse every line out of the CSV.
  • Try to auto-match each line to an existing journal entry (same amount, within 3 days, no other candidate). Auto-matches are conservative - if two ledger entries have the same amount, neither is auto-matched.
  • Tell you how many were auto-matched.

Working through the lines

After import, you're on the review page. Filter by Pending to see only the lines that still need attention.

For each pending line:

  • It's already in the ledger → click Match, find the journal, click Pick. Then click the green checkbox to mark it reconciled.
  • It's missing from the ledger - usually a bank fee, interest, or a payment that wasn't recorded. Two options:
    1. Go to Payments or Expenses and record it normally; that posts a journal. Come back here and match.
    2. Use Books → Journals → New manual entry to post a journal directly. Useful for bank fees and interest.
  • It's a duplicate - sometimes statements include both a credit and the reversal. Match each to its corresponding ledger entry; don't try to make one cancel the other.

When you're done

Filter by Pending and look at the count. Zero pending = reconciled. If you can't get to zero in a sitting, that's fine - the reconciliation state is saved per line, you can come back tomorrow.

Good habits

  • Reconcile monthly, not annually. The longer you wait, the harder it is to remember what each line was for.
  • Don't reconcile a single account in two browser tabs at once - one tab's changes will overwrite the other's.
  • If you're new to this, start with the petty cash drawer; it's the smallest statement and the easiest to learn on.

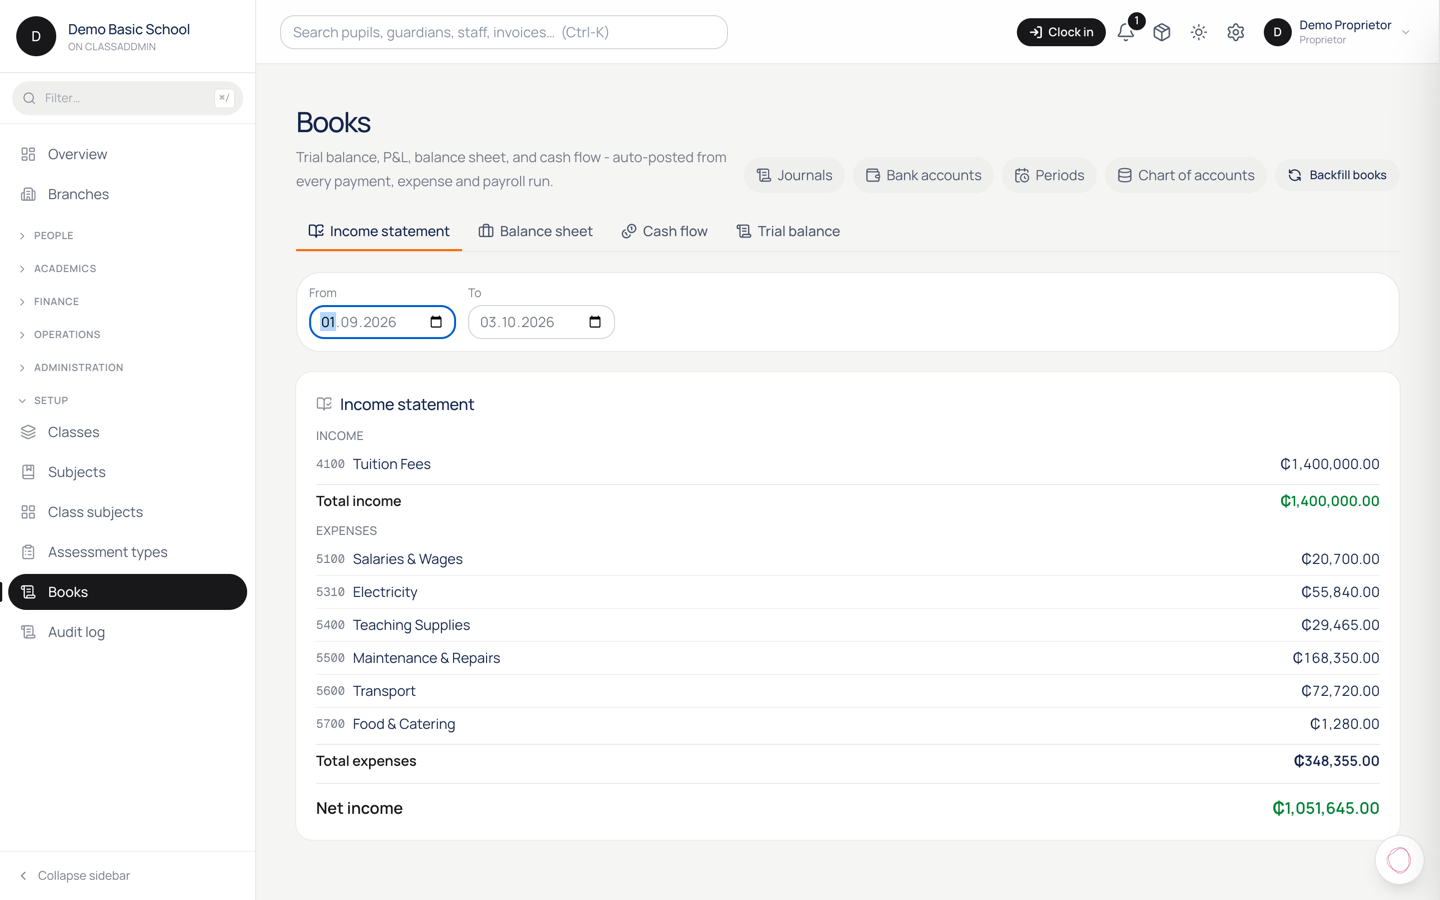
20.How to read the income statement (P&L)

How to read the income statement (P&L) — screen

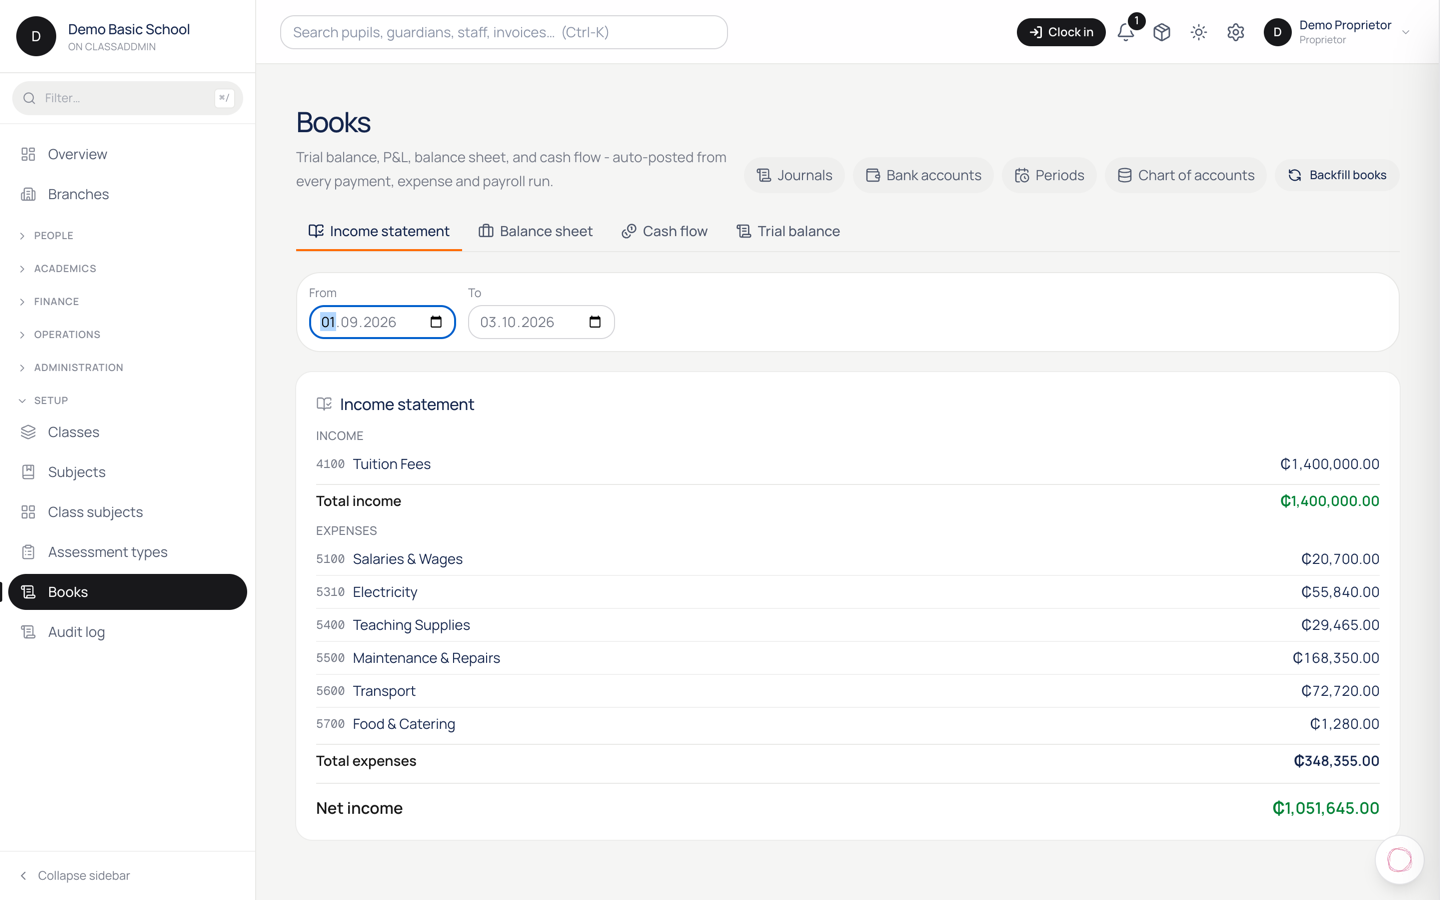
The Income Statement - also called the P&L (Profit & Loss) - shows whether the school made or lost money over a date range you choose.

Structure

  • Income - all the money the school earned: tuition fees, registration fees, exam fees, activity fees, transport fees, other income.
  • Expenses - all the money the school spent: salaries, rent, utilities, supplies, maintenance, transport, food, events.
  • Net Income - Income minus Expenses. Green if positive, red if negative.

Picking a period

Use the From and To date pickers. Common ones:

  • This month - first day of the current month to today.
  • Last term - start of the term to its end.
  • Year-to-date - January 1 of this year to today.
  • Quarter - first day of the quarter to its end.

The numbers refresh as soon as you change a date.

What to look for

  1. Is the net income positive? That's the headline. If yes, the school made money in this period.
  2. Which expense is biggest? Salaries almost always lead. Compare against last month - a 30 % jump usually means a new hire or a bonus run.
  3. Is income smooth or lumpy? Schools typically collect most fees in the first month of each term. If May income is tiny, that's normal - don't read it as a crisis.

Drill in

Click any row to see which journal entries made up that total. That's how you investigate "why are Utilities up 50 %?" - you'll see each individual electricity bill.

Important caveat

The P&L uses cash-basis by default. That means:

  • A payment received in May counts as May income, even if it covers next term's fees.
  • An expense recorded in May counts as May expense, even if you bought the supplies for next term.

If you want to match income to the period it was earned (accrual basis), you'll need to post manual journals to move it. Most Ghanaian schools run cash-basis happily.

21.How to read the balance sheet

How to read the balance sheet — screen

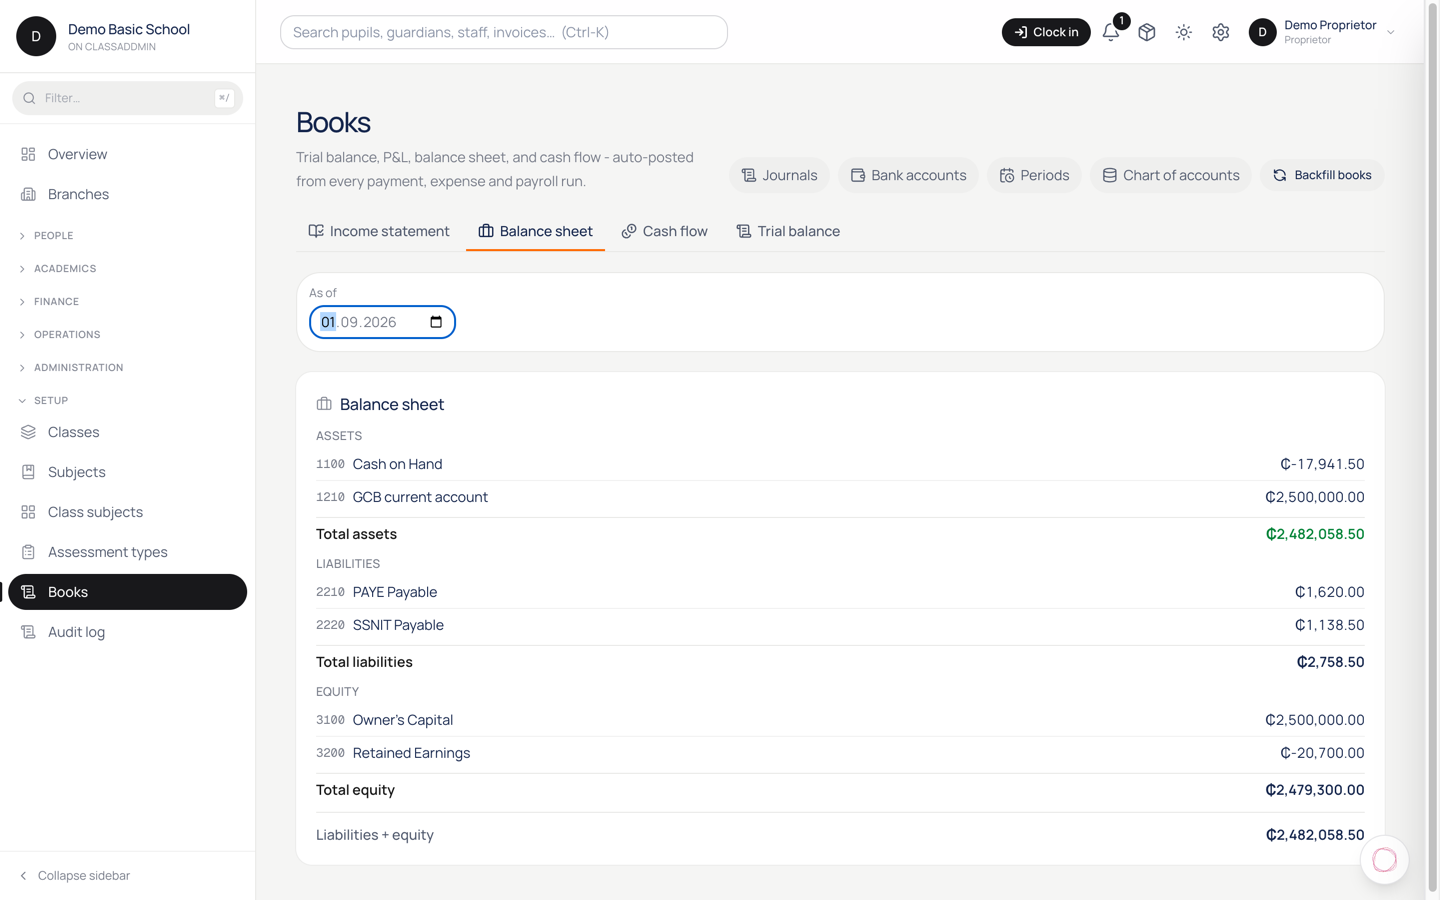
The Balance Sheet is a snapshot of what your school owns, owes, and is worth on a specific date.

Three sections

  • Assets - what the school owns: cash in bank accounts, money parents owe (Accounts Receivable), buildings, vehicles, equipment.
  • Liabilities - what the school owes: unpaid bills (Accounts Payable), tax withheld but not yet paid (PAYE, SSNIT), loans.
  • Equity - the school's net worth: opening capital plus everything you've ever earned and not paid out.

The rule that always holds

Assets = Liabilities + Equity. If they don't match, ClassAddmin shows a yellow warning at the bottom - that means a journal has been edited or imported badly. Don't panic; open Trial Balance to find the offending entry.

Reading it day to day

  • Total Assets - sum of all your bank balances plus what parents still owe. If this is dropping month-to-month, you're spending faster than you're collecting.
  • Total Liabilities - keep this small. Big numbers here usually mean unpaid PAYE/SSNIT (we made that easy to forget - see Paying PAYE and SSNIT).
  • Retained Earnings - the cumulative profit of the school since you started using ClassAddmin. Goes up when you make a profit, down when you don't. (Owner draws also reduce it.)

What "as of" means

The date picker at the top sets the as-of date - the snapshot moment. "As of yesterday" includes every transaction posted up to and including yesterday; today's transactions don't appear until the date moves forward.

If you want a quarterly view, just pick the last day of the quarter. Year-end? Pick December 31.

Common questions

Why is Cash on Hand bigger than what's in the safe? Probably because some payments were recorded as cash that actually landed in the bank. Use bank reconciliation to find them and re-classify.

Why are Accounts Receivable not going down even though parents are paying? ClassAddmin defaults to cash-basis accounting - payments credit Income directly, not AR. So AR only moves if you use the accrual flow (issuing invoices to set up the AR). If you don't bill in advance, AR will stay near zero.

22.Close a fiscal month

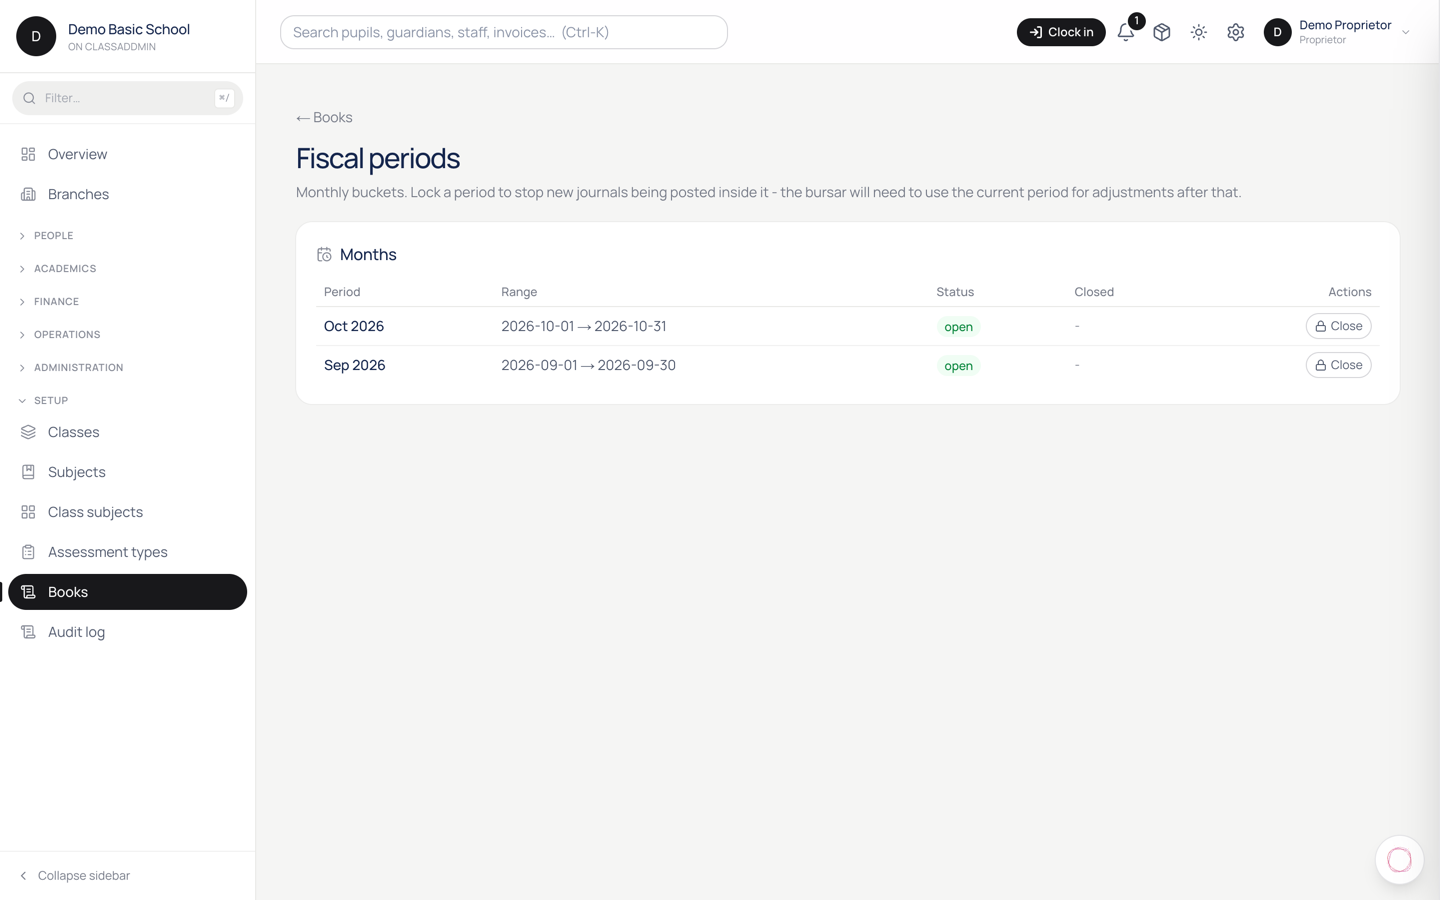
Close a fiscal month — screen

Closing a month locks it so no new journals can be dated inside it. That's how you keep last month's numbers from quietly changing while you're working on this month.

When to close

Close a month after:

  1. Every cash and MoMo payment for the month is recorded.
  2. Every expense is recorded.
  3. Payroll is finalised.
  4. Each bank account is reconciled to zero pending.

If something is still messy, fix it first - closing then immediately reopening is more work.

Steps

  1. Open Books → Periods.
  2. Find the month - they're listed newest first.
  3. Click Close on the row. Confirm.
  4. The status flips to locked. Any attempt to post a journal dated inside it (manual or auto) is rejected.

What "locked" means

  • Auto-posting still works for new payments dated today - they go into the current open period as expected.
  • Manual journals dated within the locked period are blocked with an error message ("Cannot post a journal dated 2026-04-15 - that period is locked").
  • Reports still work - you can still look at last month's P&L and Balance Sheet for any date.

Reopening

If you discover a missing entry after closing, click Reopen. Status goes back to open, you post the fix, then close again.

You can reopen any locked period. Closed (year-end) periods are one-way - see below.

Year-end close

There's no special button for year-end. When December's reconciliation is done, close December. Your Retained Earnings automatically include the year's net income (it's computed on the fly from income/expense balances).

Later, you can mark the period as closed (vs locked) - that's the one-way step. Don't do it until you're truly done with the year, and your accountant has signed off if you use one. After that, the only way to correct an error from that period is to post an adjusting journal in the current period.