ClassAddmin
← All guides

Handbook

Class Teacher Handbook

Teachers who own a class register and write report cards.

Download PDF18 topics across 7 chapters

Getting started

Your first week: signing in and finding your class.

1.Welcome to ClassAddmin

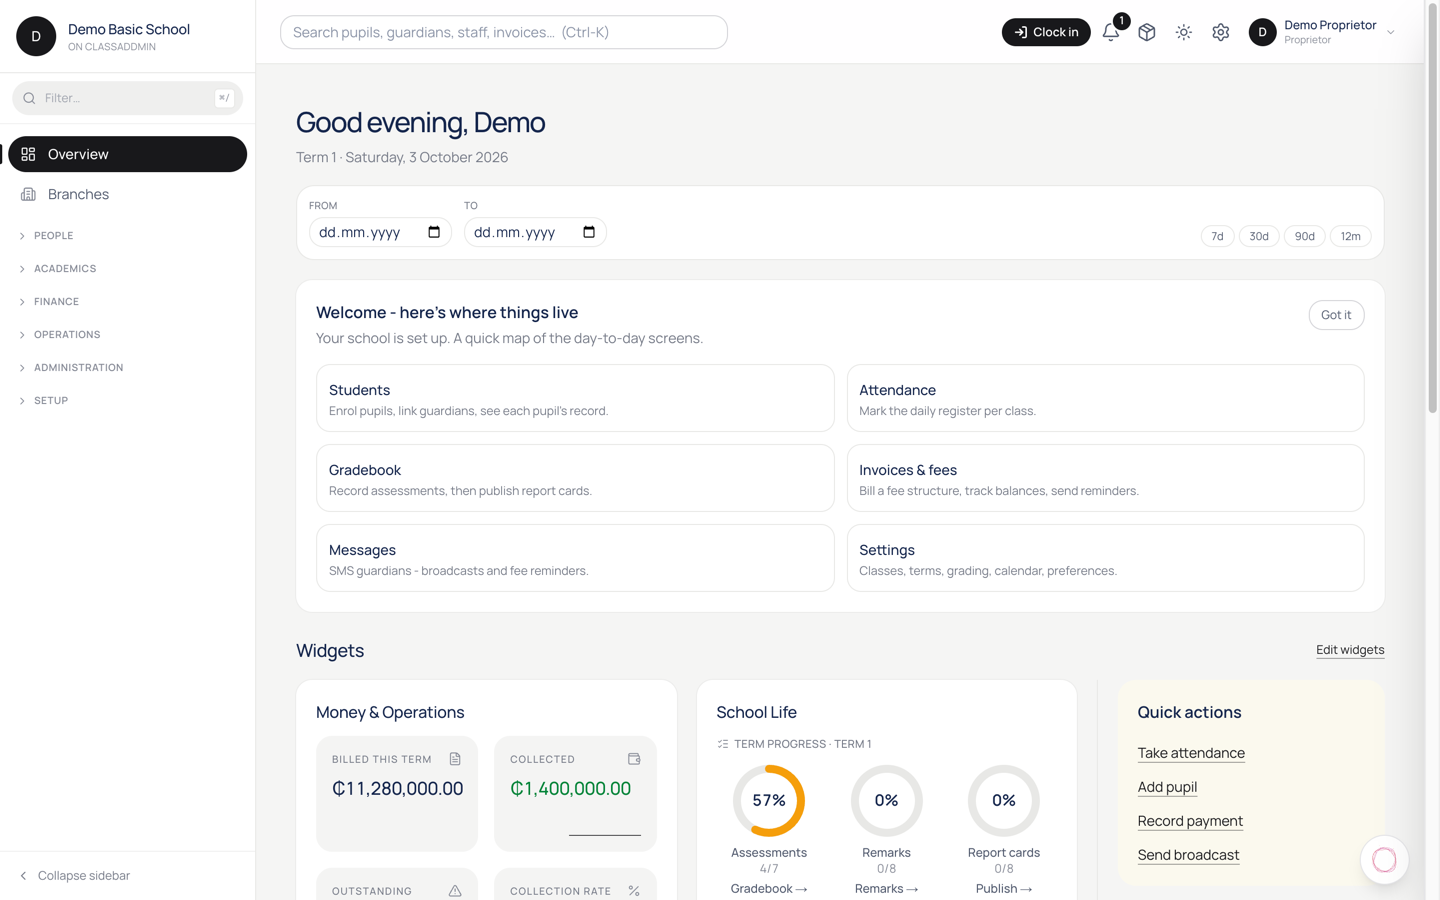
Welcome to ClassAddmin — screen

ClassAddmin is your school's day-to-day operations cockpit. From a single dashboard you'll track admissions, mark attendance, send invoices, collect MoMo payments, message parents, and run payroll.

The first time you sign in, head to Overview - that's the home screen. It shows today's collections, this week's absences, anything that needs your attention, and shortcuts to the things you'll touch every day.

You don't need to be a computer expert. Everything lives in the left sidebar: People, Academics, Finance, Operations, Administration. If you can find the right section, you can do the task - every page is built around one job.

Three things to do on day one

  1. Add your school's logo and contact details under Settings → School. They appear on invoices, receipts and report cards.
  2. Invite your team under Settings → Staff. Each person gets a sign-in link by email, SMS or shareable URL.
  3. Open the Help button (bottom-right corner of every page) any time you're stuck. It searches our guides and can answer questions in plain English.

That's it - explore the sidebar at your own pace. If you ever get lost, the back button works the same as in any browser, and clicking the ClassAddmin logo (top-left) takes you home.

2.A tour of the sidebar

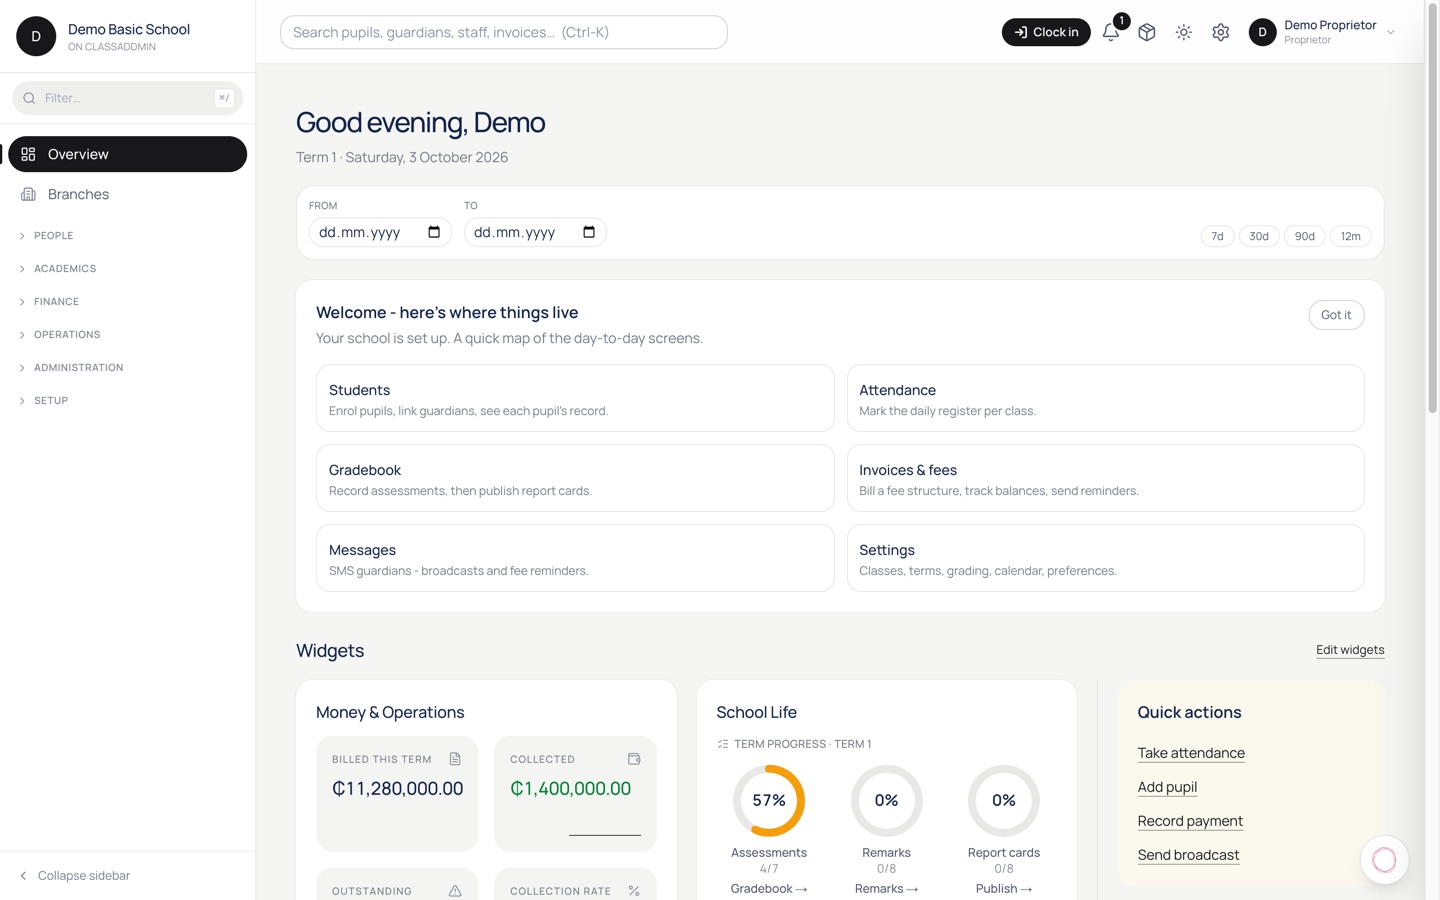
A tour of the sidebar — screen

The sidebar on the left is split into six sections. You only see the items your role gives you access to - a class teacher's sidebar looks shorter than a proprietor's.

People

  • Admissions - applications from new pupils. Review, accept, reject.
  • Students - every enrolled pupil. Profile, fees, attendance history.
  • Guardians - parents and caregivers, with their pupils and contact details.

Academics

  • Attendance - mark today's register. One tap per pupil.
  • Gradebook - assessments, scores, comments, report cards.
  • Discipline - log incidents and follow-ups.
  • Timetable - period schedule per class.
  • My Teaching - for teachers: just your classes and lessons.

Finance

  • Finance - overview of money in and out.
  • Fee Structures - what fees each class pays per term.
  • Invoices - what you've billed.
  • Payments - what's been collected (cash, MoMo, bank).
  • Payroll - staff salaries.
  • Books - accounting reports (proprietors and bursars only).
  • Expenses - what the school spends.

Operations

  • Transport - vehicles, routes, who rides which bus.
  • Messages - broadcast SMS to guardians.
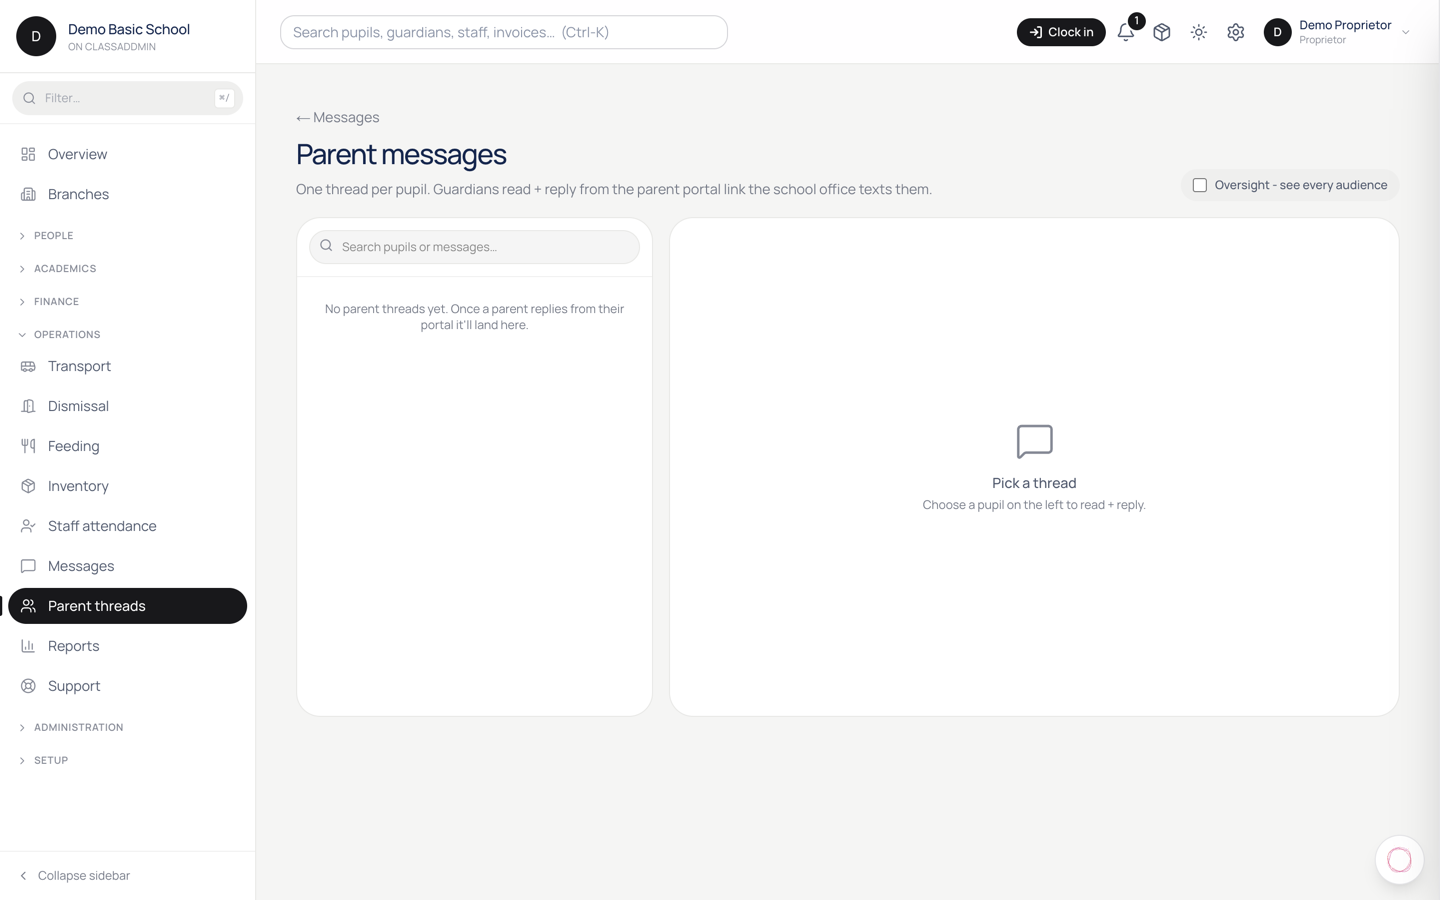
  • Parent threads - two-way chat with each pupil's parents.

Administration

  • Reports - exportable PDFs and dashboards.
  • Staff - invite, edit, remove.
  • Promotion - end-of-year class promotion.
  • Audit log - who changed what.
  • Support - open a ticket with us.
  • Subscription - your plan and billing.
  • Settings - everything else.

Search and help

The search bar at the top finds pupils, guardians, invoices and staff instantly. The bell icon shows alerts that need attention. The profile menu (top-right) is where you sign out.

Every morning

The register, and what happens to parents when you save it.

3.Mark today's attendance register

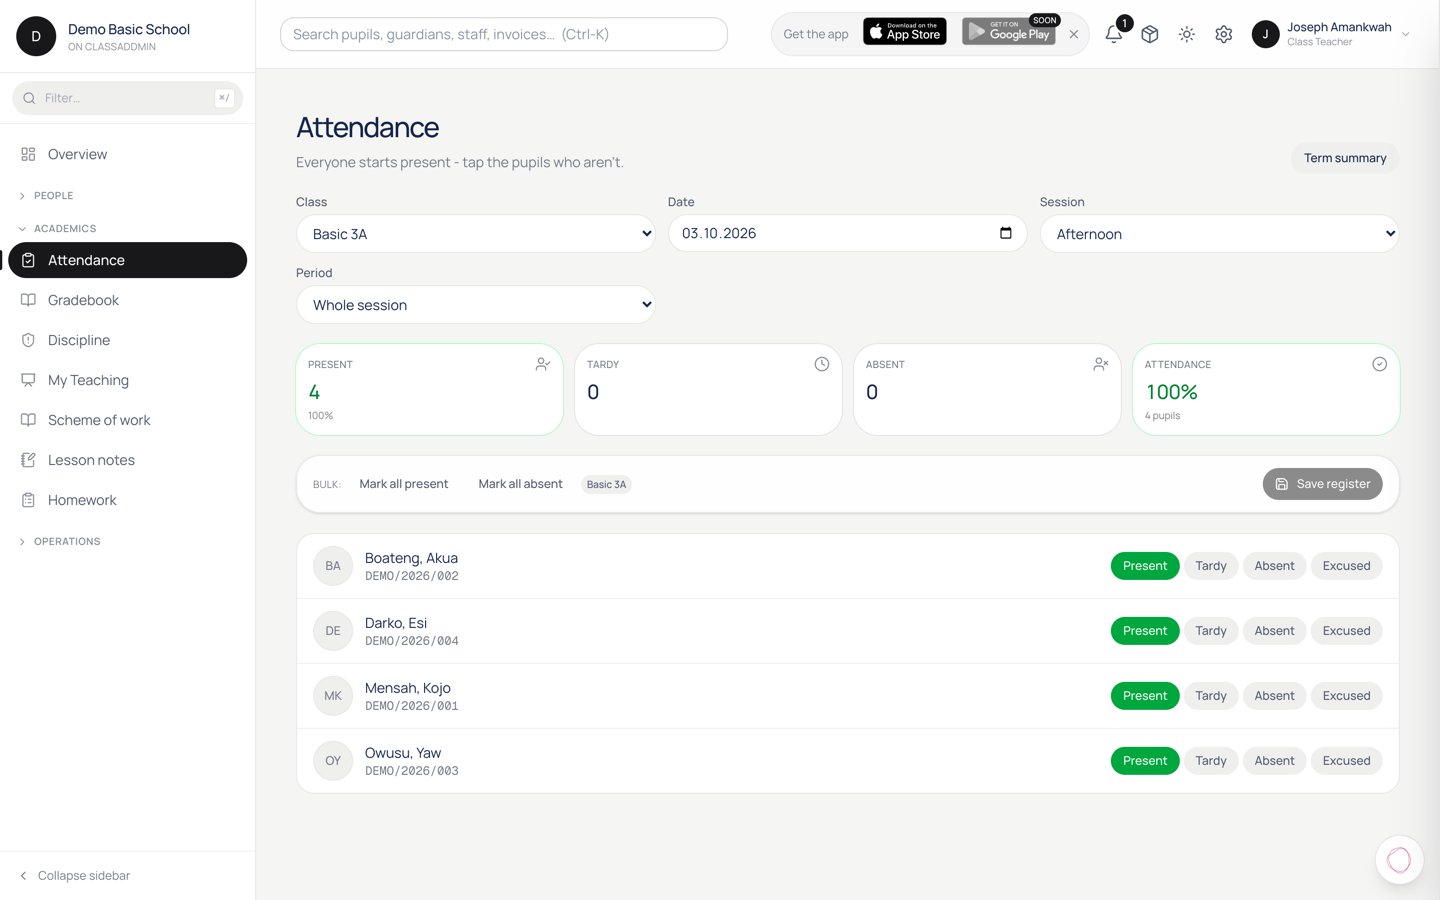
Mark today's attendance register — screen

The attendance register is the single most-touched page in ClassAddmin - class teachers tap it every morning. The whole class fits on one screen; one tap per pupil.

Steps

  1. Attendance in the sidebar (or, for class teachers, My Teaching → Today's register).
  2. Pick your class from the dropdown (your default class is pre-selected if you're a class teacher with only one).
  3. Pupils appear as a list. By default everyone is Present - green dot.
  4. For each pupil who isn't present, tap their row to cycle the status:
    • Tap once → Absent (red).
    • Tap again → Late (amber).
    • Tap again → Excused (blue).
    • Tap again → back to Present.
  5. (Optional) Long-tap a pupil to add a note - "left at 10am for dentist", "uniform issue".
  6. Click Save.

That's it. The register is saved against today's date. You can come back later (during the same school day) and adjust if a pupil arrives late.

What happens after you save

  • Absent pupils' guardians get an SMS within 30 minutes, via the absence sweep cron. The SMS is only sent if the school has the absence notifications feature on (Settings → Communications → Absence SMS).
  • Class statistics update on the Overview page - today's attendance rate.
  • Termly attendance rolls up automatically in the gradebook and on report cards.

Marking past attendance

If you forgot yesterday or someone changes a status retroactively, use Attendance → History → pick the date. You'll need the attendance.edit_past permission - by default only proprietors and head teachers have it. The change is audit-logged.

Common gotchas

  • No pupils show in the list - the pupils aren't actively enrolled in the chosen class. Check Students → pupil → Enrolment tab.
  • "This register is locked" - someone has already saved and the day's window has closed (after 6pm). Use the History flow to edit.
  • Absence SMS isn't sending - Settings → School → Subscription must include SMS credits, and the school must have an sms_sender_id configured.

Assessment

Setting work, marking it, and turning marks into reports.

4.Create an assessment in the gradebook

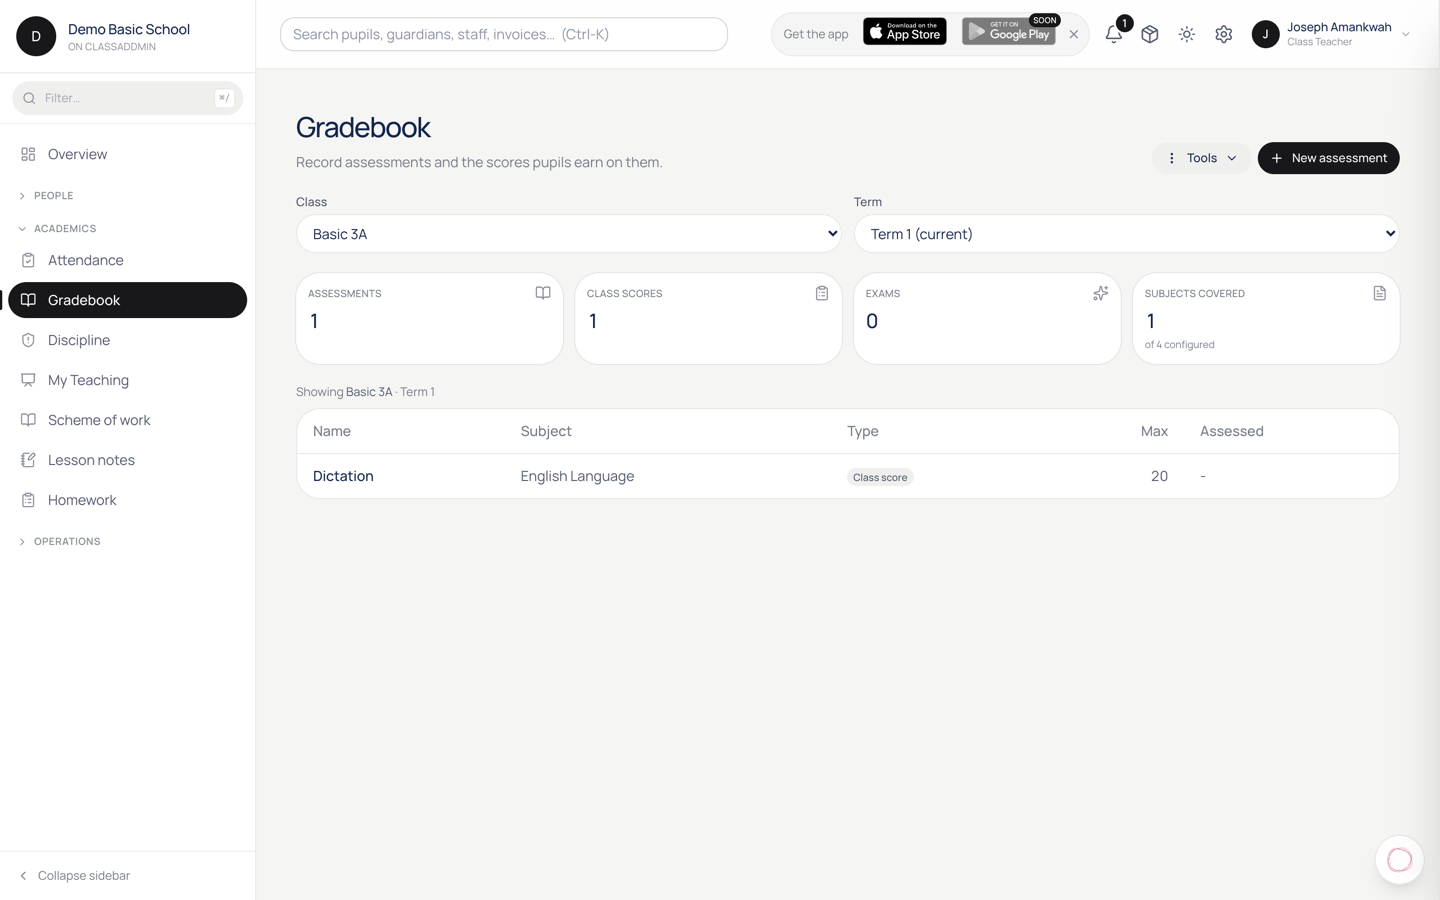
Create an assessment in the gradebook — screen

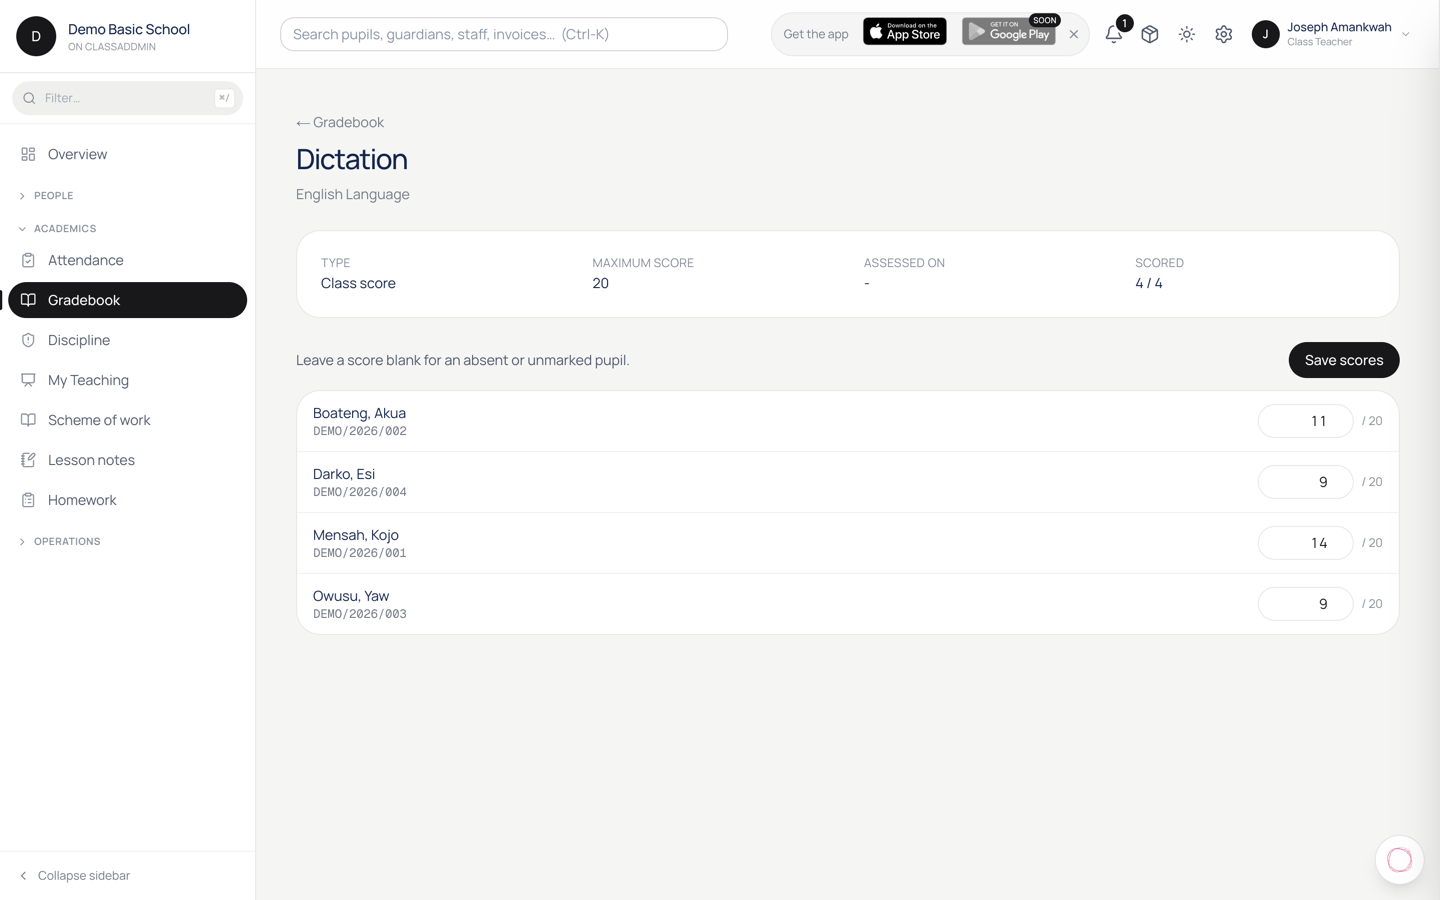
An assessment is anything you give a pupil a score for - a class quiz, an end-of-term exam, a worksheet. You create the assessment once, then enter scores against it.

Steps

  1. Gradebook in the sidebar (or My Teaching → Gradebook for subject teachers).
  2. Pick the class and the subject.
  3. Click New assessment (top right).
  4. Fill:
    • Name - what teachers and parents see. "Mid-Term Test", "Week 4 Quiz", "End-of-Term Exam".
    • Component - which slot on the report card this assessment feeds. Most schools use Classwork, Tests, Exam. The component decides how it's weighted on the final report card.
    • Total marks - what scoring out of. 10, 20, 50, 100 - whatever you use.
    • Date - when the assessment was given. Used for sorting + the gradebook history view.
  5. (Optional) Tick Lock after publish - once you publish report cards for the term, this assessment becomes read-only for everyone except the head teacher.
  6. Click Save.

The assessment appears on the gradebook's score sheet for that class+subject. Every enrolled pupil shows as a blank row, ready for scores.

Components and weighting

Components are set up under Settings → Grading:

  • Classwork - usually 30% of the report card mark.
  • Tests - usually 30%.
  • Exam - usually 40%.

Add as many assessments to a component as you like; the report card averages them per pupil within the component, then applies the component weight to compute the final.

Common gotchas

  • "Component is required" - Settings → Grading → make sure you've set up at least one component for the current academic year.
  • Assessment doesn't show in My Teaching - you're not assigned to teach this subject in this class. Settings → Class Subjects → assign yourself or ask the head teacher.
  • Wrong total marks - edit the assessment from the gradebook header (pencil icon) and change total. Scores you've already entered are NOT rescaled - you'd need to re-enter them. Be careful.

5.Enter scores for an assessment

Enter scores for an assessment — screen

You've created the assessment. Now enter the scores - there are three ways, pick whichever matches how you graded.

Option A - Type them in

Use this for short quizzes.

  1. Gradebook → pick class → pick subject → click the assessment.
  2. Click into each pupil's score cell and type the mark.
  3. Press Tab to move to the next pupil, or Enter to drop down a row.
  4. Scores auto-save as you go - there's no save button. A small grey check appears next to each saved cell.

Option B - Paste from Excel

Use this for end-of-term exams when you marked on paper and tallied in Excel.

  1. In Excel, sort by the same order ClassAddmin uses (alphabetical by last name) or by admission number - whichever matches.
  2. Select the column of scores. Copy.
  3. In ClassAddmin, click the first pupil's cell.
  4. Press Cmd-V / Ctrl-V.
  5. Scores fill down the column. Review the orange-highlighted cells - those didn't match (wrong format, score above total, etc).

Option C - CSV upload (advanced)

For large assessments or when you graded centrally:

  1. Gradebook → assessment → Import scores.
  2. Download the template - it has admission numbers pre-filled.
  3. Fill the score column in Excel.
  4. Save as CSV. Upload.
  5. Review the preview (any conflicts shown). Click Import.

Out-of-total or absent

  • Score above total - the system stops you. Either correct the score or raise the assessment total.
  • Pupil absent for the test - type A (or click the absent toggle). The assessment won't count toward their report card.
  • Pupil exempt - type E. Same treatment as absent but printed differently on the report.

Comments

Some assessments allow per-pupil comments (e.g. end-of-term exam):

  1. Click the speech-bubble icon next to a pupil's row.
  2. Pick from the comment bank or type free-form.
  3. Save.

Comments show on the report card next to the subject mark.

Common gotchas

  • Scores don't save - check your internet connection. The small grey check next to each cell goes red if a save fails; the cell will retry every few seconds.
  • "Locked" - the head teacher has published the report cards; further changes need them to unlock first.
  • Wrong total - see Create an assessment about changing total after entry. The short version: don't.

6.Use the comments bank for report cards

Use the comments bank for report cards — screen

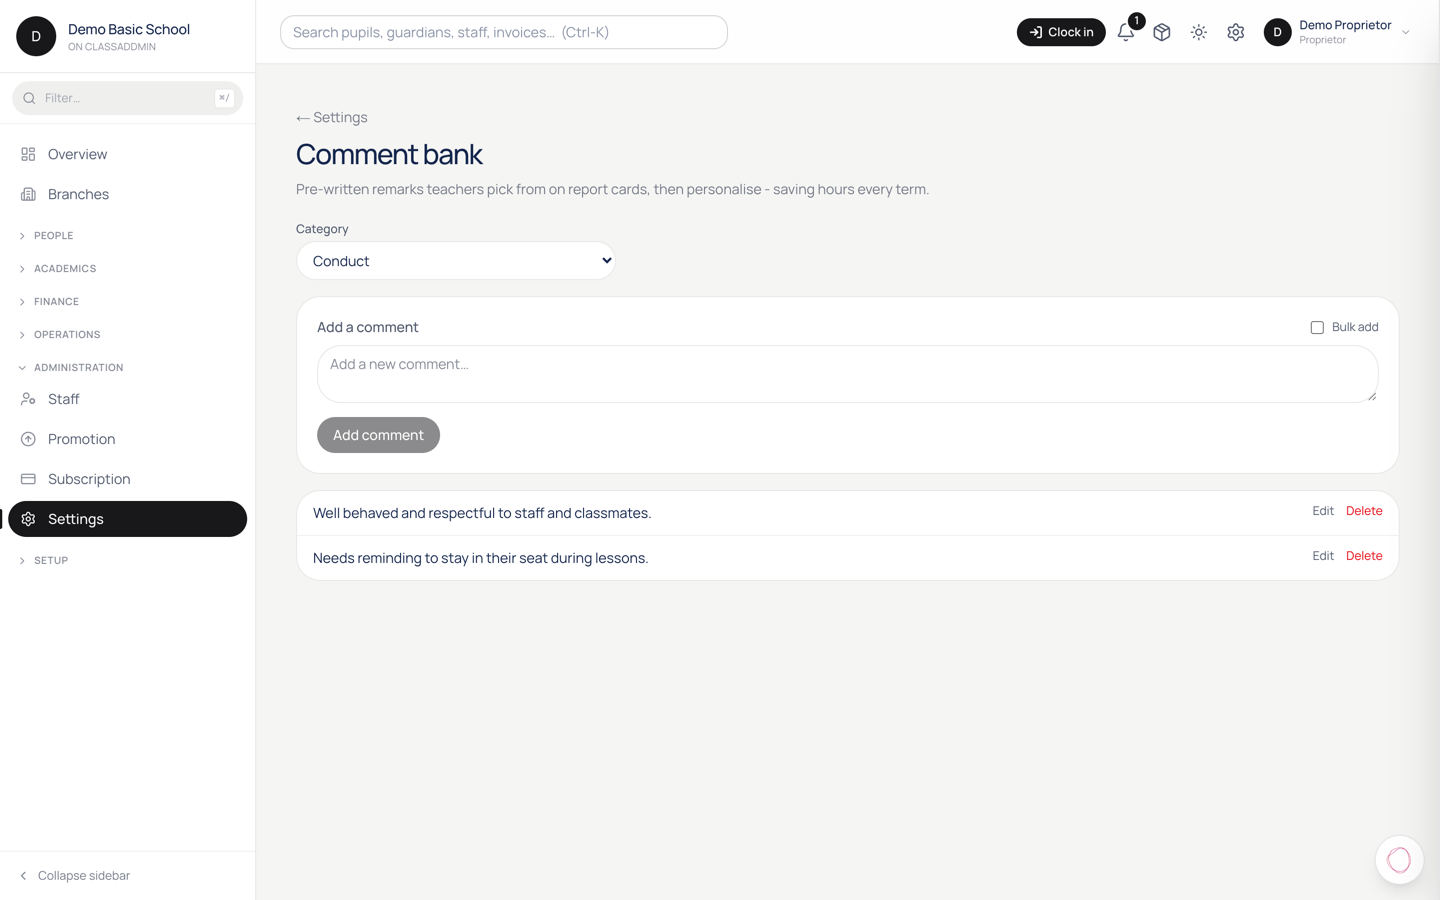
End-of-term comments are a tax on every class teacher. ClassAddmin gives you a comments bank - a library of reusable phrases tagged by subject + performance band - so teachers can compose a personalised paragraph from drop-ins instead of starting from scratch for each of 40 pupils.

How it works

Each comment has:

  • Subject (optional) - Maths, English, "any subject".
  • Band - excellent / good / average / weak / concern.
  • Body - the actual phrase. Use {name} and {he_she} as placeholders.

Example body:

{name} continues to demonstrate strong problem-solving skills and a willingness to take on challenging exercises. {he_she_cap} should be encouraged to attempt the extension problems each week.

When the teacher writes a pupil's report card and clicks Insert from bank, the system filters the bank by the pupil's subject and performance band, replaces the placeholders with the right values, and drops the phrase into the comment field. The teacher edits if needed.

Add a comment to the bank

  1. Settings → Comments (under Academics).
  2. Click New comment.
  3. Fill:
    • Subject - pick or "Any subject" for general phrases.
    • Band - pick the performance band this phrase suits.
    • Body - the comment text with placeholders.
  4. Click Save.

Repeat. Aim for at least 5 comments per band, per subject - that gives variety so every pupil's report doesn't read identical.

Placeholders

  • {name} → pupil's first name. → "Adwoa"
  • {he_she} → lowercase pronoun. → "she"
  • {he_she_cap} → capitalised pronoun. → "She"
  • {his_her} → possessive. → "her"
  • {his_her_cap} → capitalised possessive. → "Her"

The pronouns come from the pupil's sex field; pupils with other default to "they/them".

Bulk import

If you have a list of comments from your old system or your head teacher:

  1. Settings → Comments → Import.
  2. Download the template. Fill the columns: subject, band, body.
  3. Upload.

Quicker than typing 60 phrases one-by-one.

Use in the gradebook

While writing report card comments:

  1. Open a pupil → Comments field.
  2. Click Insert from bank (the small library icon).
  3. Filter by band - the pupil's average is shown to remind you.
  4. Click a phrase to insert. You can stack multiple phrases.
  5. Edit to personalise - name a specific test, mention a parent meeting, whatever.

Why this matters

40 pupils × 6 subjects × 100 words of comment = 24,000 words per term per class teacher. With the bank, that drops to ~4,000 words of true writing - the rest is choosing from your tested phrases.

Keep the phrases honest - generic, encouraging, specific to what the band actually means. Bland boilerplate makes parents stop reading the comments at all.

7.Publish term report cards

Publish term report cards — screen

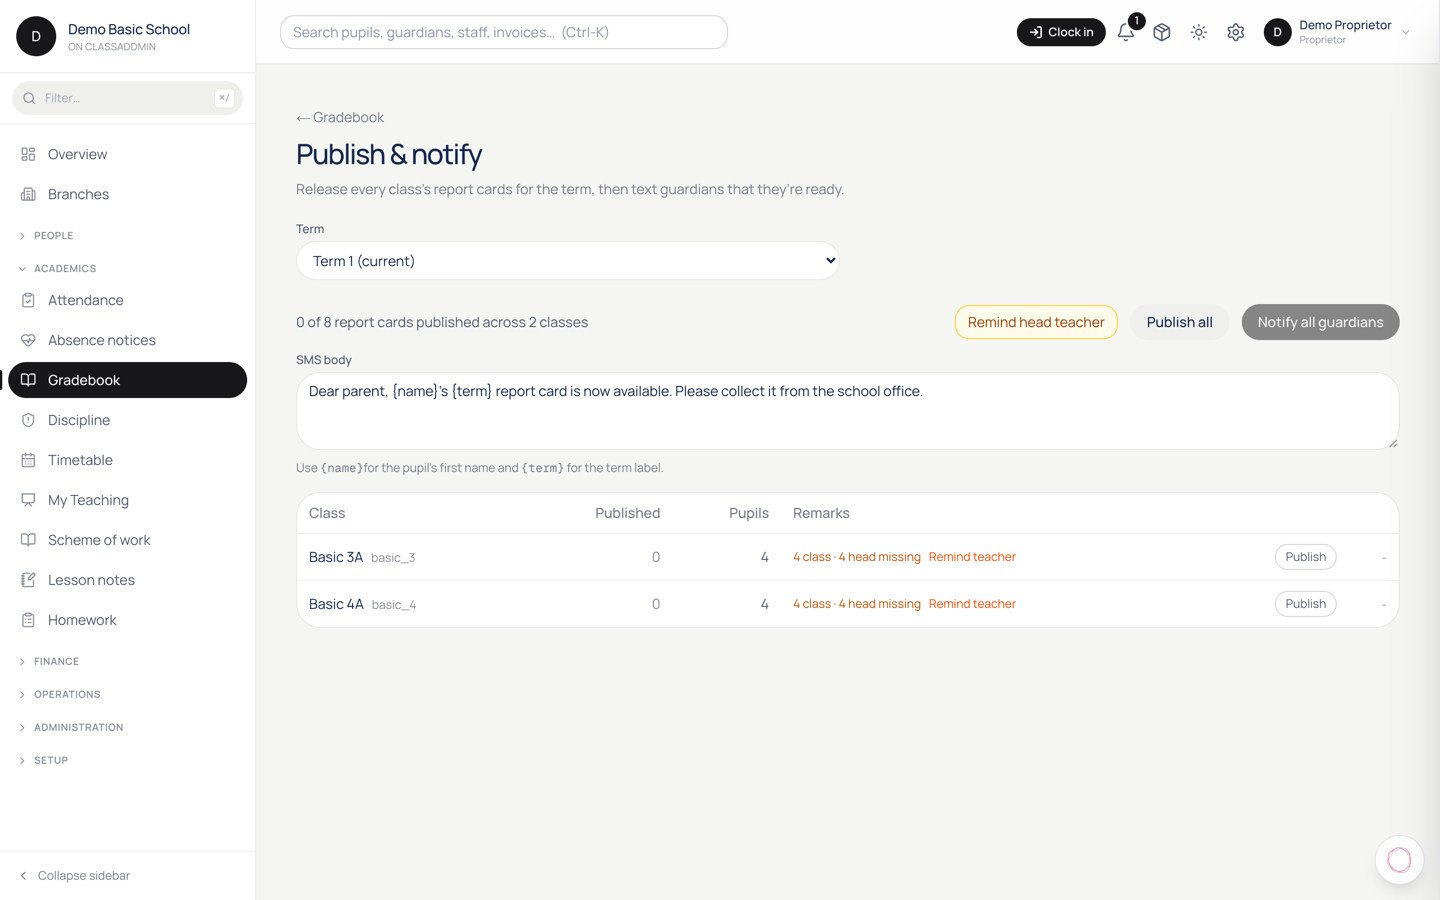
Publishing report cards is the last thing you do at the end of a term. It locks every assessment for the term, generates a PDF per pupil, and lets parents view them through the portal.

Before you start

Check that:

  • All assessments for the term have scores. Anything blank counts as zero unless you marked it absent (A) or exempt (E).
  • Class teacher comments are written for every pupil in their class.
  • Head teacher comments are written for every pupil in the school (or you've delegated this to class teachers).
  • Attendance for the term is up to date - that figure prints on the report.
  • The next term's reopening date is set under Settings → Calendar.

If any of these are missing, the publish dialog will tell you.

Steps

  1. Gradebook → Report Cards (left rail) or Reports → Report Cards.
  2. Pick the term to publish.
  3. Pick the class(es) - leave all ticked to publish the whole school.
  4. Click Preview. The system shows:
    • How many cards will be generated.
    • Pupils whose data is incomplete (missing scores, missing comments).
    • A sample PDF for one pupil so you can sanity-check the layout.
  5. Resolve any incomplete pupils (or tick Publish anyway to mark them with placeholder text - not recommended).
  6. Click Publish.

The system generates PDFs in the background - for a 500-pupil school, ~3 minutes. You'll see a progress bar.

What happens after

  • PDFs are stored in the school's storage bucket. They're available on the pupil's profile and on each guardian's parent portal.
  • Guardians get an SMS (if SMS-on-publish is enabled in Settings → Communications): "Adwoa's Term 2 report card is ready. View it: [link]".
  • Assessments lock. Teachers can no longer edit scores. Only the head teacher can unlock.
  • The previous term's report is replaced if you re-publish; otherwise both versions stay accessible.

Republish after a correction

If you spot an error after publishing:

  1. Unlock the term - Gradebook → Report Cards → click the published term → Unlock. This requires gradebook.publish permission.
  2. Fix the score or comment.
  3. Click Re-publish.
  4. The PDF regenerates and the parent portal updates immediately. Guardians get a second SMS only if you tick Notify parents about correction.

Common gotchas

  • "Component weights don't add up to 100" - Settings → Grading → fix the weights for the affected components.
  • PDF generation fails for some pupils - usually a missing photo or a non-UTF-8 character in a comment. Open the pupil, remove special characters, regenerate just that pupil from their profile.
  • Parents say they can't see the report - check their portal link is still valid. SMS portal links expire after 30 days; re-send from Messages → Send portal link.

Behaviour

Recording an incident so it reaches the right people.

8.Log a discipline incident

Log a discipline incident — screen

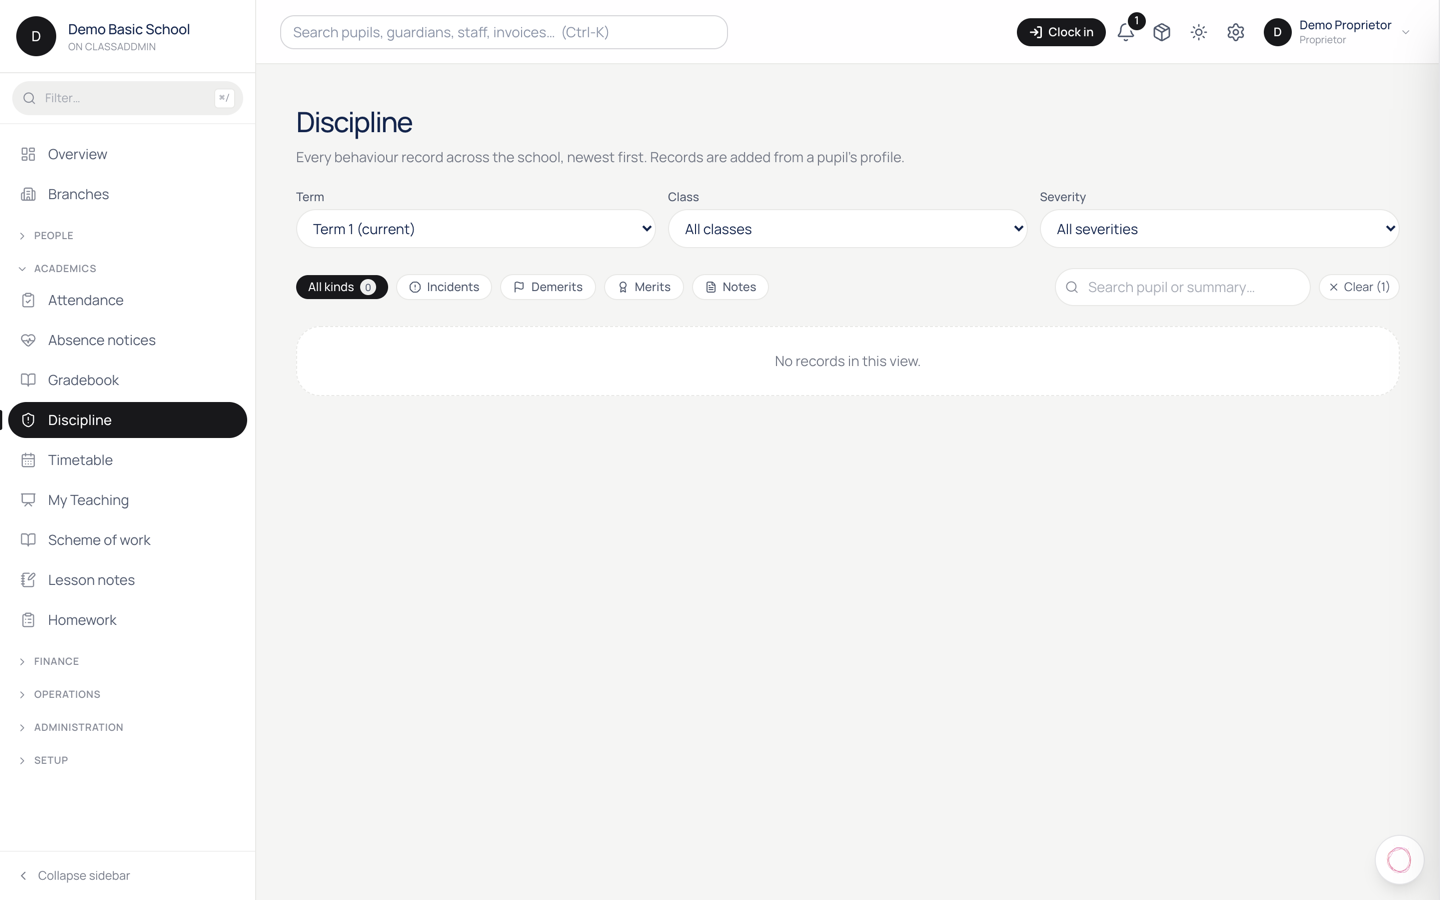
Discipline records are how you keep an honest history of a pupil's behaviour over time - both the rough patches and the wins. The record shows up on the report card (summary), in the pupil profile (full history), and on the parent thread (when shared).

Steps

  1. Discipline in the sidebar (or Students → pupil → Discipline tab).
  2. Click Log incident (top right).
  3. Fill:
    • Pupil - search by name or admission number.
    • Kind - incident (negative) or merit (positive). Merits keep things balanced.
    • Severity - for incidents: minor, moderate, serious. Skip for merits.
    • Occurred on - today's date by default. Backdate if you're catching up on the register.
    • Summary - one-line headline. "Fighting in the playground", "Won inter-class debate".
    • Details - what happened, who was involved, what was said. Long-form. Future-you reading this in 6 months should understand the context.
    • Action taken - optional. "Detention Friday", "Awarded star sticker".
  4. (Optional) Tick Share with parent. This makes the incident visible in the parent portal AND on the parent thread for that pupil. Otherwise it's internal-only.
  5. Click Save.

Sharing with parents

Sharing is a separate toggle from logging. By default incidents stay internal - useful when you're still investigating.

If you tick Share with parent:

  • The incident shows up on the parent's mobile app + portal under their child's screen.
  • A push notification goes to the guardian (Family/Plus tier).
  • The parent can acknowledge the incident - useful proof that they saw it.

You can also share later: open the incident → tick "Share" → save. The parent gets the notification then.

Follow-up

Discipline isn't fire-and-forget. When you log a follow-up:

  1. Open the incident.
  2. Click Add follow-up.
  3. Note what happened - "spoke to pupil", "parent meeting Friday", "behaviour improved this week".
  4. Save.

Follow-ups stack chronologically. The pupil's discipline trend on the report card uses the latest status, not the original.

Term summary on report cards

When you publish term report cards, the discipline section shows:

  • Total incidents by severity.
  • Total merits.
  • Class teacher's note - written separately on the gradebook page; usually a one-paragraph summary of the term's conduct.

If you don't want raw incidents on the report card (some schools prefer a single qualitative paragraph), set Discipline summary mode under Settings → Grading to qualitative - the count disappears and only the class teacher's note prints.

Common gotchas

  • "Pupil already has 3 incidents this week" - there's a soft cap that asks you to confirm before logging the 4th. Lots of incidents on one pupil usually means a bigger conversation is needed.
  • Wrong pupil logged - open the incident → Delete (proprietor/head teacher only). The audit log keeps the original.
  • Parent says they didn't see the incident - check it was marked Share with parent. Internal incidents stay internal.

Parents

Replying to a family without giving out your own number.

9.Reply on a parent thread

Reply on a parent thread — screen

Each pupil has one thread that runs the length of their time at the school. Staff send messages, the pupil's guardians reply. Everyone with messaging access at the school sees the same thread for that pupil - so a class teacher's message and a bursar's reply both live in one place.

Open a thread

  1. Messages → Parent threads in the sidebar.
  2. The inbox shows one row per pupil thread, newest activity first. Unread threads (a parent replied since anyone last opened it) have an orange dot.
  3. Click a thread to open it.

You can also start a thread from a pupil's profile - click their name in the Students list, then Message parents.

Send a message

  1. Type in the box at the bottom.
  2. Press Enter (or click Send). Shift-Enter adds a line break without sending.

The parent will:

  • See the message immediately if they have the parent app open.
  • Get a push notification if they have the app installed.
  • Get an SMS notification with a link to the message, if their school is on the Family or Plus tier. The SMS only carries a short hint ("New message from {school}") - the full message stays inside the app for privacy.

Read receipts

The header of the thread shows:

  • Parent last read at … - when the guardian last opened the thread.
  • School last read at … - when any staff member last opened it.

If a parent hasn't read your message in a couple of days and it's urgent, follow up with an SMS broadcast or a phone call.

Etiquette

  • Don't paste sensitive data (parents read messages on phones that family members borrow). For fee balances and report card highlights, link to the parent portal page instead.
  • Identify yourself in the first reply - "Hello, this is Mrs. Mensah, Adwoa's class teacher." Subsequent replies the parent already knows who you are.
  • Long replies are fine - there's no SMS character limit here.

On your phone

The mobile app, for when you are not at a desk.

10.Sign in with your phone number

The ClassAddmin parent app uses your phone number to sign in - no password, no email. The school adds your number as a guardian; you enter it once, get a code by SMS, and you're in.

First sign-in

  1. Open the app.
  2. Tap Sign in.
  3. Enter your phone number in the format your school has on file. Ghanaian numbers can be 0244XXXXXX or +233244XXXXXX - both work; the app normalises.
  4. Tap Send code.
  5. Check your SMS. You should get a 6-digit code from CLASSADDMIN (or your school's sender) within 30 seconds.
  6. Type the code into the verification screen.
  7. Tap Verify.

You're in. The app remembers your number on this phone - next time you open it, you go straight to the Children tab.

"No code arrived"

Three things to check:

  1. Wait a full 60 seconds - Ghanaian SMS sometimes lags.
  2. Check spam / blocked numbers - some Android phones filter unknown senders into a separate Other tab.
  3. Try the resend button on the verification screen. Resend is free.

If you've waited 5 minutes and still nothing, your number might not be on file at your child's school:

  1. Walk in to the school office.
  2. Ask them to confirm your phone number is recorded as a guardian under your child's profile.
  3. Try sign-in again with whichever number they have on file.

Sign out

  1. More tab → Sign out at the bottom.
  2. Confirm.

You'll need to sign in again with your phone number the next time you open the app.

Sign in on a new phone

  1. Install the app on the new phone.
  2. Sign in with your phone number as above.
  3. You're in. Your old phone's session stays valid - you can be signed in on multiple phones at once.

Sign in on a borrowed phone

Don't, ideally. If you must:

  1. Sign in.
  2. Use the app for whatever you needed.
  3. Sign out before handing the phone back - otherwise the next person sees your child's data.

For your own phone, enable App lock (see Lock the app with Face ID) so even if someone borrows your unlocked phone, they can't open ClassAddmin without your face/fingerprint.

Common gotchas

  • "This number isn't registered" - the school doesn't have you as a guardian. Speak to the school office.
  • Code expired - codes are valid for 5 minutes. Resend.
  • Wrong format error - start with 0 (e.g. 0244...) or +233 (e.g. +233244...). No spaces, no dashes.

11.Your teacher app at a glance

The ClassAddmin teacher app puts your class day on your phone - the register, your gradebook, and parent messages, wherever you are. Everything you do here syncs with the school's web dashboard instantly.

What each area is for

  • Today - your timetable for the day, plus quick actions. Tap a lesson to take the register or jot a lesson note. It's the first screen you land on.
  • Gradebook - create assessments and enter scores; class, mid-term and exam totals are worked out for you.
  • Messages - chat with the parents of pupils you teach.
  • Calendar - school events and term dates.
  • More - your profile, notifications settings, and the Help you're reading now.

Good to know

  • You only see the classes, pupils and periods you actually teach - nothing else from the school.
  • Turn on Face ID / fingerprint under More → Account → Security so you're one tap away each morning.
  • Anything you record (attendance, scores, remarks) reaches the office and parents in real time - no re-typing on the computer later.

12.Take the attendance register

Take the daily register from your phone in under a minute. Open a lesson on the Today screen and tap the attendance quick action, or open Attendance directly.

Steps

  1. Open Attendance (from Today, or the attendance quick action on a lesson).
  2. Pick the class at the top if it isn't already the one you want. It defaults to the class for your current lesson.
  3. Mark each pupil: tap Present, Absent, or Late.
    • In a hurry? Tap All present to mark the whole class present, then change only the few who aren't.
  4. For anyone Absent or Late, add a short Reason if you have one (e.g. "Called in sick", "Came at 9:15") - optional, but it helps the office and parents.
  5. Tap Save.

Taking a register per period

If your school runs period-by-period registers, tap Take by period instead and choose the period. Otherwise the register covers the whole day.

What happens after you save

  • The office sees the register immediately.
  • Parents who reported an absence in advance are matched up automatically, so a child who was already excused isn't flagged as a no-show.
  • You can reopen the same class later in the day to update it.

13.Enter scores in the gradebook

Record class scores, mid-term and exam marks from the Gradebook - the term total and grade are worked out for you.

Create an assessment

  1. Open Gradebook.
  2. Tap New assessment.
  3. Choose the class and subject, give it a name, set the maximum score, and pick the type (class score, mid-term, or exam).
  4. Save it - the assessment opens as a score sheet.

Enter the scores

  1. Open the assessment (from the Gradebook list, or straight after creating it).
  2. Type each pupil's score in their row. Scores can't go above the maximum you set.
  3. Entries save automatically as you go - you'll see a saved confirmation. There's no separate Save button to remember.

How totals work

  • Each subject's term result combines your assessments using the school's weighting (for example Class 30% · Mid 20% · Exam 50%).
  • Totals and letter grades recalculate the moment you enter a score - no manual maths.
  • When every subject is scored, you're ready to add remarks and publish report cards.

14.Publish term report cards

When a class's scores and remarks are in, publish its report cards so parents can see them in their own app.

Steps

  1. Open Gradebook → Publish results.
  2. You'll see each class in the current academic year, with how complete it is (scores entered, remarks written).
  3. Pick the class (and term) you want to release.
  4. Make sure the remarks are done - class-teacher and head-teacher comments. If any are missing, the screen flags them.
  5. Tap Publish for that class.

Before you publish

  • Scores for every subject should be in (see Enter scores in the gradebook).
  • Remarks matter: a report card without the teacher's comment looks unfinished to parents. If you're the class teacher, add yours; if you're waiting on the head teacher, you can send a reminder from the same screen.

After you publish

  • Parents see the report card in their app immediately, and can open the full PDF.
  • Published results are locked from accidental edits. Need to fix something? Ask the office to unpublish, correct it, and publish again.

15.Understand the This-week charts

Every child's page has a This week widget at the top. Tap it and you land on the This-week screen: three quick cards for Attendance, Homework and the Latest score. Each card can show its data in a few different chart shapes - pick whichever helps you read it fastest.

The four chart shapes

At the top of the This-week screen is a small toggle: Spark / Line / Bar / Pie. Every card flips shape at once.

Spark - the quick glance

A tiny line with no numbers on the sides. Left is oldest, right is newest. The dot at the far right is this week. Use it when you just want a rough "is it going up or down?" read.

Line - the trend, spelt out

The same shape as the spark, but bigger, with a 25 / 50 / 75% reference grid in the background. The dot on the far right is highlighted. Best when you want to see whether a big drop or jump is real, or just a wobble.

Bar - one bar per week

Each bar is one week's percentage - oldest on the left, this week on the right. Older bars are faded; the current-week bar is solid so your eye finds it first. Use it when you want to compare individual weeks.

Pie - this week's share

The pie only shows this week, not the trend. It splits the week into slices:

  • Attendance: how many days present vs absent.
  • Homework: how many pieces are done, overdue, or still to do.

Under each pie is a small legend telling you exactly what each slice means. The number in the middle is the same ratio spelt out ("4/5" for attendance, "2/3" for homework).

Reading the labels

Alongside each chart the card shows two small labels:

  • The value - a plain-language sentence: "Present 4 of 5 days", "2 of 3 done".
  • The trend word - one of improving, steady, slipping, falling behind, or new. It's picked automatically from the numbers: small week-to-week wobble counts as steady so a one-off blip doesn't panic the app.

If your child has an overdue homework, a red overdue pill sits under the homework value with the count.

Latest score

The Latest score card is a bit different. It's not a trend - it's the most recent graded assessment your child's teacher has published: subject, assessment name, and score out of the total. Tap it to open Live progress where every subject's mark for the term is laid out with the actual trend line.

Tap to dig deeper

Every card is tappable. Attendance opens the Attendance screen for the term; Homework opens the homework list where you can tick items done; Latest score opens Live progress.

The charts are the summary. The screens they open are the whole story.

16.Message a parent

Reach the parents of the pupils you teach right from your phone - no personal numbers exchanged.

Steps

  1. Open Messages.
  2. Find the conversation: type a pupil or message in the search box, or scroll the list of recent threads.
  3. Tap the thread to open it.
  4. Type your message and send it. The parent gets it in their own ClassAddmin app (and a notification).

Good to know

  • You can only message parents of pupils in your classes - the school controls who's connected.
  • Replies come back into the same thread; you'll see a notification and a badge on Messages.
  • Keep it about the pupil and school matters. For anything the whole class needs, use a broadcast instead of messaging parents one by one.
  • Mute noisy notification types under More → Notifications if messages are coming through at odd hours.

17.Lock the app with Face ID or fingerprint

App lock asks for your face or fingerprint every time you open ClassAddmin from the background - so a borrowed phone can't see your child's fees or messages.

Turn it on

  1. Tap More (bottom tab).
  2. Under Security, tap the App lock toggle.
  3. Approve the biometric prompt (Face ID, Touch ID, or fingerprint depending on your phone). This confirms biometrics actually work on your device.

That's it - next time you switch to another app and come back, ClassAddmin will ask you to authenticate before showing anything.

Turn it off

Same toggle. The app will ask you to authenticate again before letting you switch it off - to stop a stolen phone from disabling protection while it's unlocked.

If biometrics fail

  • The OS lets you fall back to your phone's passcode automatically.
  • If neither works, sign out from More and sign back in with your phone number.

What's NOT locked

  • Push notifications still display their content unless you turn off lock-screen previews in your phone's settings.
  • The Paystack payment page uses its own session - but you'd already be inside the app to start a payment.

If you don't see the toggle

Your phone may not have a biometric sensor configured. On iOS, set up Face ID under System Settings → Face ID & Passcode. On Android, enable a fingerprint under Settings → Security → Fingerprint. Then come back to the ClassAddmin More tab - the toggle will be active.

Planning and records

Lesson notes, lesson plans, schemes of work and your own attendance.

18.Schemes of work, lesson plans, lesson notes and signing in

Schemes of work, lesson plans, lesson notes and signing in — screen

Four things a teacher keeps alongside the register. They're separate on purpose — they answer different questions, at different times.

Question When
Scheme of work What will I cover this term? Before term
Lesson plan How will I teach this lesson? Before the lesson
Lesson notes What actually happened? After the lesson
Staff attendance Was I at school? Daily

My Teaching

My Teaching is a teacher's own starting point — the classes and subjects you teach, today's lessons, and what's waiting for you. Start here rather than hunting through the sidebar.

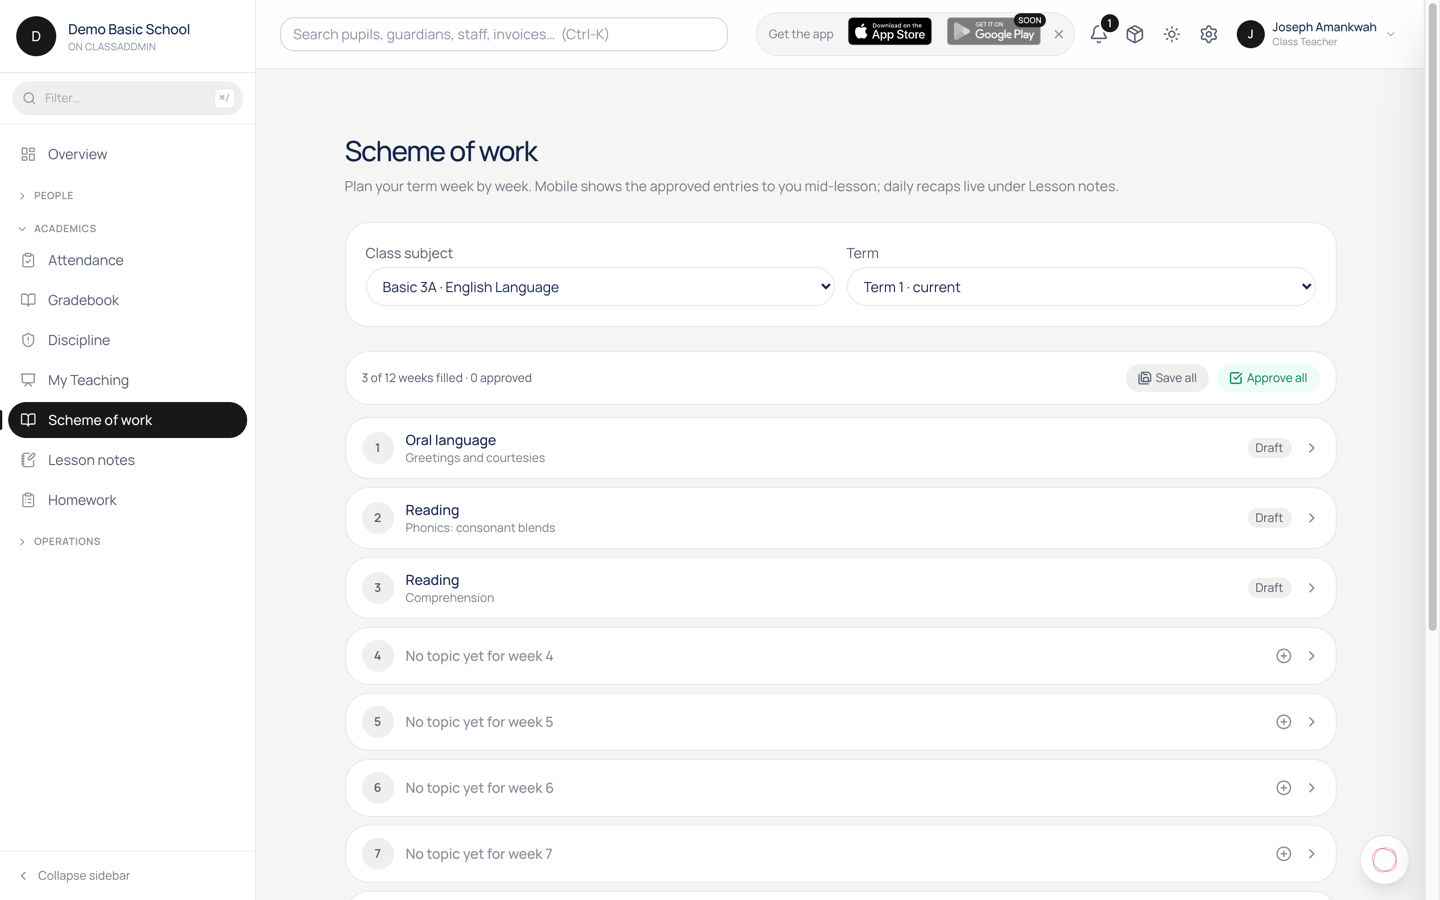
Scheme of work

A term-long plan for one class + subject + term, written week by week.

  1. Scheme of work.
  2. Pick the class, subject and term.
  3. Fill in the weeks — twelve rows, one per week of term.

The head teacher approves it. That's the point of doing it up front: agreeing the term's coverage before the term rather than discovering in week 9 that a topic was missed.

It's readable on the mobile app too, so you can check next week's topic without a computer.

Lesson plans

A plan for a single lesson, laid out in GES phases.

Plans go to the head for approval at Lesson plans → Approvals, where they can read a plan and either approve it or reopen it for changes. Approvals are for proprietors and head teachers.

Lesson notes

What actually happened in the lesson — written after, not before.

  1. Lesson notes.
  2. The date defaults to today; your lessons for that day are listed.
  3. Write against the lesson.

Past dates work for catching up. Future dates don't — a note is a record of a lesson that has happened, and pre-writing them would make the record worthless.

This is also what feeds the "In class today" line a parent sees, so a note written the same day reaches the family while it's still relevant.

Signing in (staff attendance)

Staff attendance has a sign-in button for you, and your own history.

Location is requested but never required. If you refuse the permission, or your phone can't get a fix, you still sign in — it's simply recorded without a location. A sign-in that fails because of a poor GPS signal would break on exactly the days it matters most: heavy rain, a power cut, a phone that won't settle.

There's a monthly export for whoever handles payroll.

Common gotchas

  • No lessons on the lesson-notes page. No timetable for you that day — check the date, then the timetable.
  • You can't write a note for next week. By design. Notes are a record, not a plan; use a lesson plan.
  • Your scheme of work isn't approved. Approval is the head's. Submit it, then ask.
  • A lesson plan came back reopened. The head wants changes. Edit it and it goes back for approval.
  • You signed in but it shows no location. Expected if permission was denied. The sign-in still counts.
  • My Teaching is empty. You aren't assigned to any class subjects yet — that's set in Settings → Class subjects.