ClassAddmin
← All guides

Handbook

Head Teacher Handbook

Heads and assistant heads running academics day to day.

Download PDF28 topics across 9 chapters

Getting started

Finding your way around and knowing what your staff can see.

1.Welcome to ClassAddmin

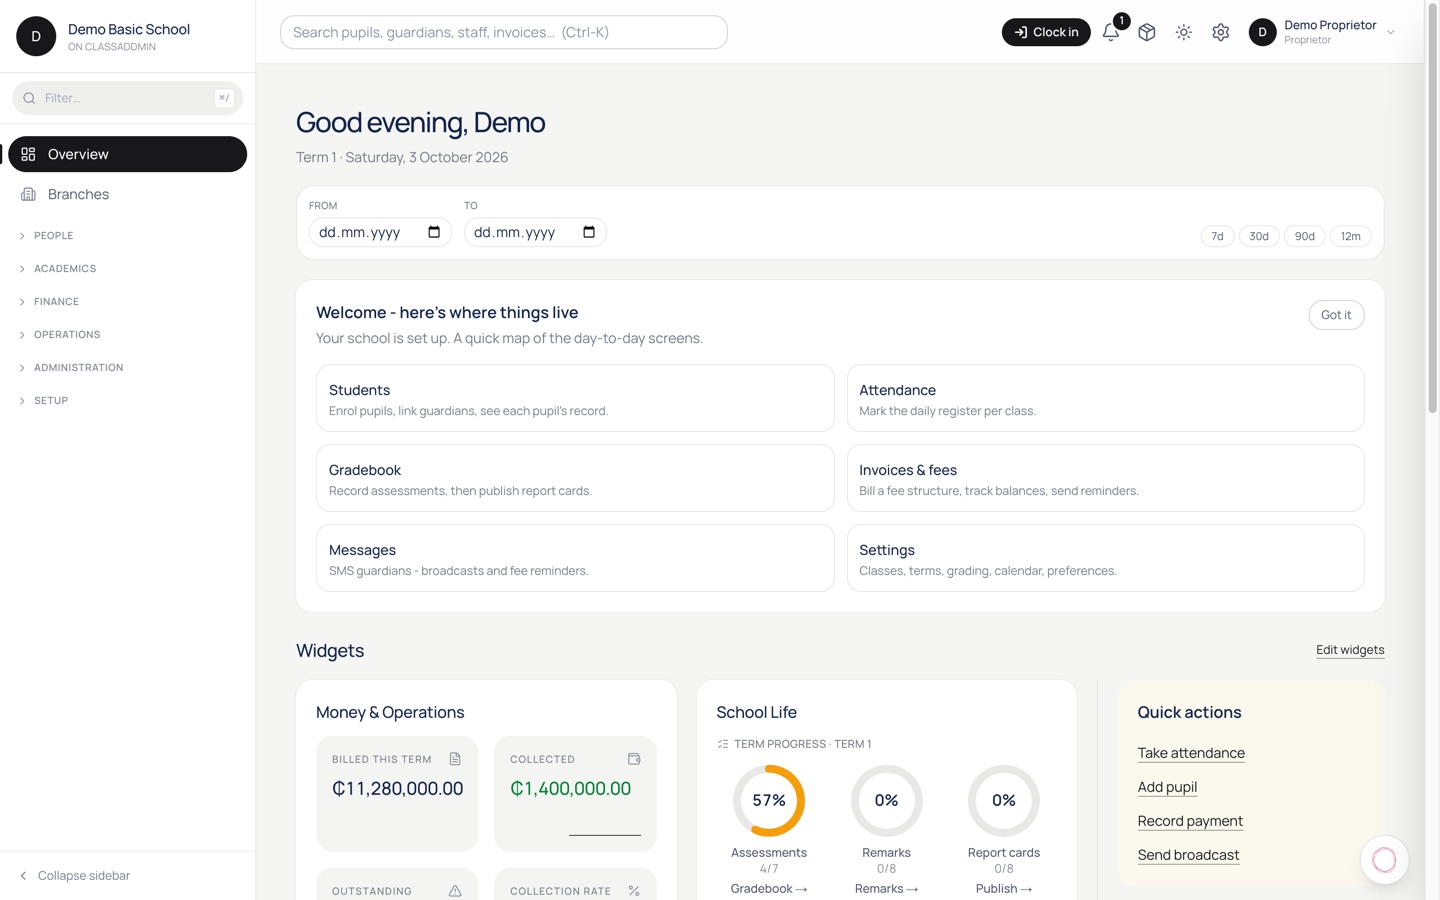
Welcome to ClassAddmin — screen

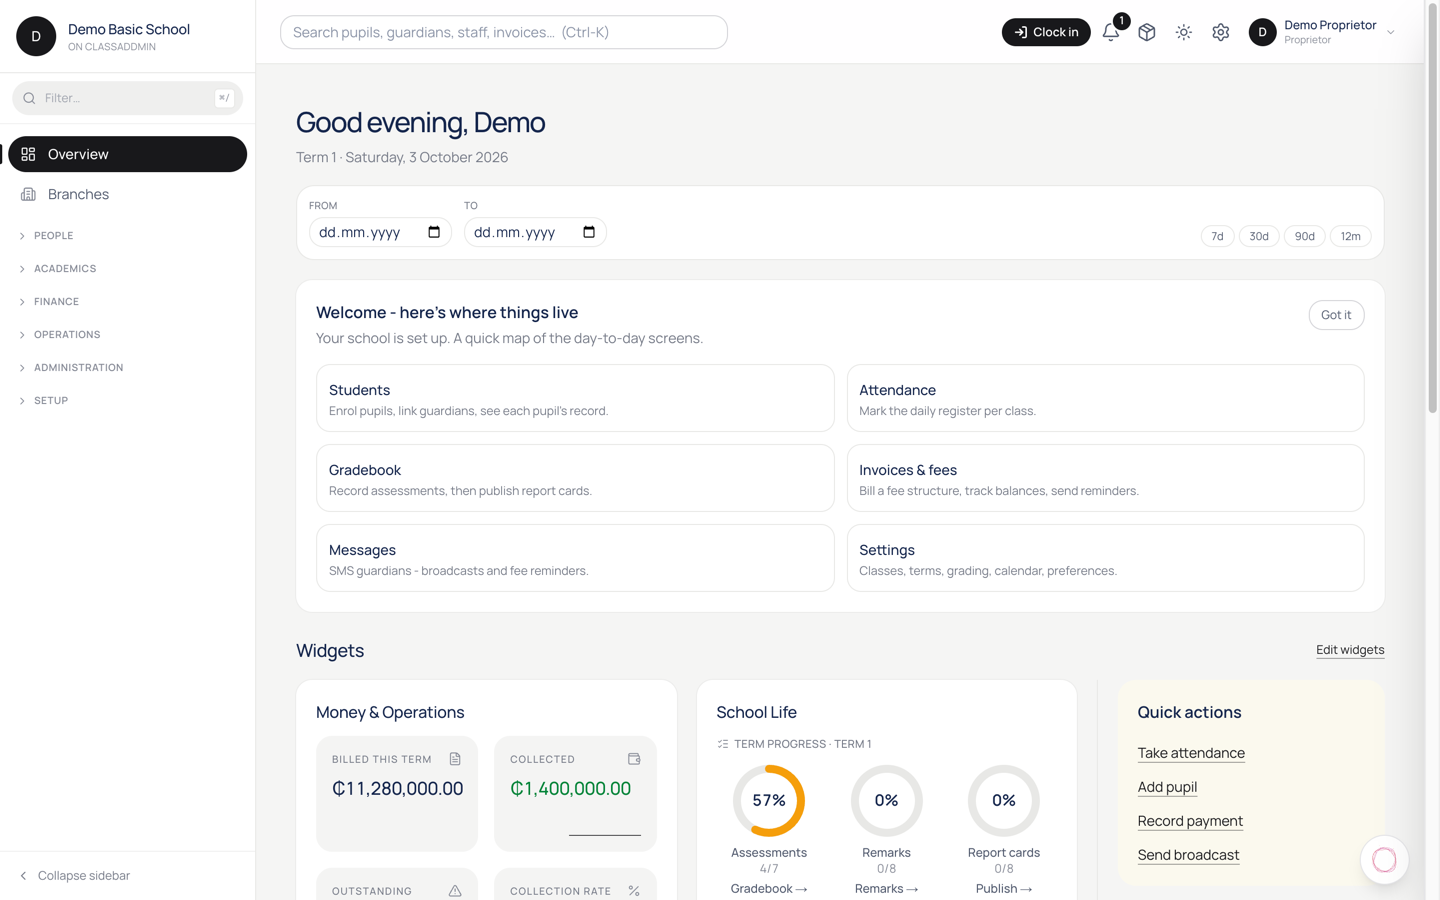
ClassAddmin is your school's day-to-day operations cockpit. From a single dashboard you'll track admissions, mark attendance, send invoices, collect MoMo payments, message parents, and run payroll.

The first time you sign in, head to Overview - that's the home screen. It shows today's collections, this week's absences, anything that needs your attention, and shortcuts to the things you'll touch every day.

You don't need to be a computer expert. Everything lives in the left sidebar: People, Academics, Finance, Operations, Administration. If you can find the right section, you can do the task - every page is built around one job.

Three things to do on day one

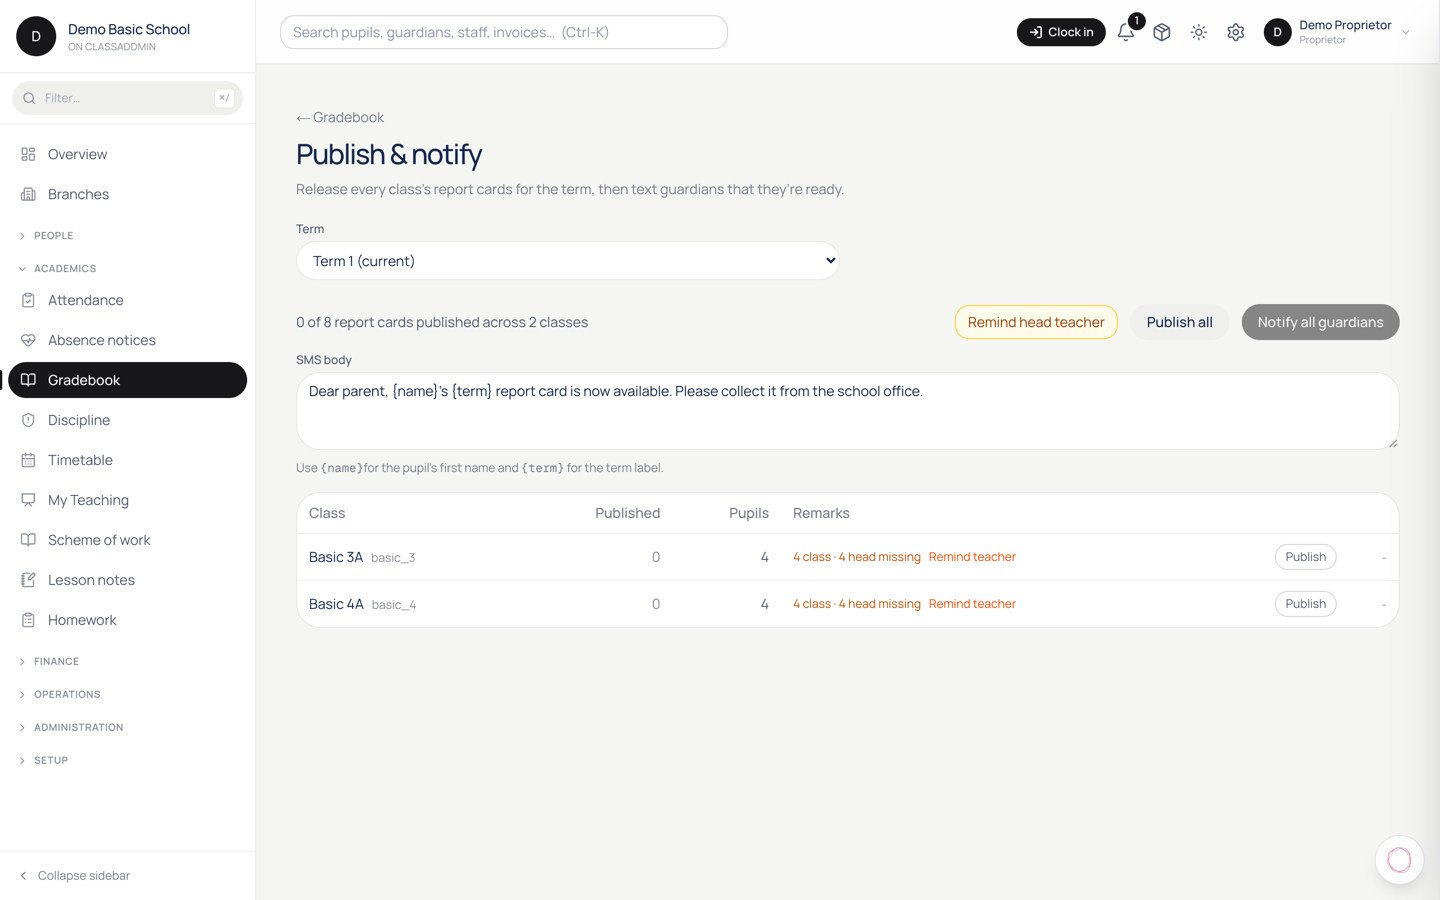
  1. Add your school's logo and contact details under Settings → School. They appear on invoices, receipts and report cards.
  2. Invite your team under Settings → Staff. Each person gets a sign-in link by email, SMS or shareable URL.
  3. Open the Help button (bottom-right corner of every page) any time you're stuck. It searches our guides and can answer questions in plain English.

That's it - explore the sidebar at your own pace. If you ever get lost, the back button works the same as in any browser, and clicking the ClassAddmin logo (top-left) takes you home.

2.A tour of the sidebar

A tour of the sidebar — screen

The sidebar on the left is split into six sections. You only see the items your role gives you access to - a class teacher's sidebar looks shorter than a proprietor's.

People

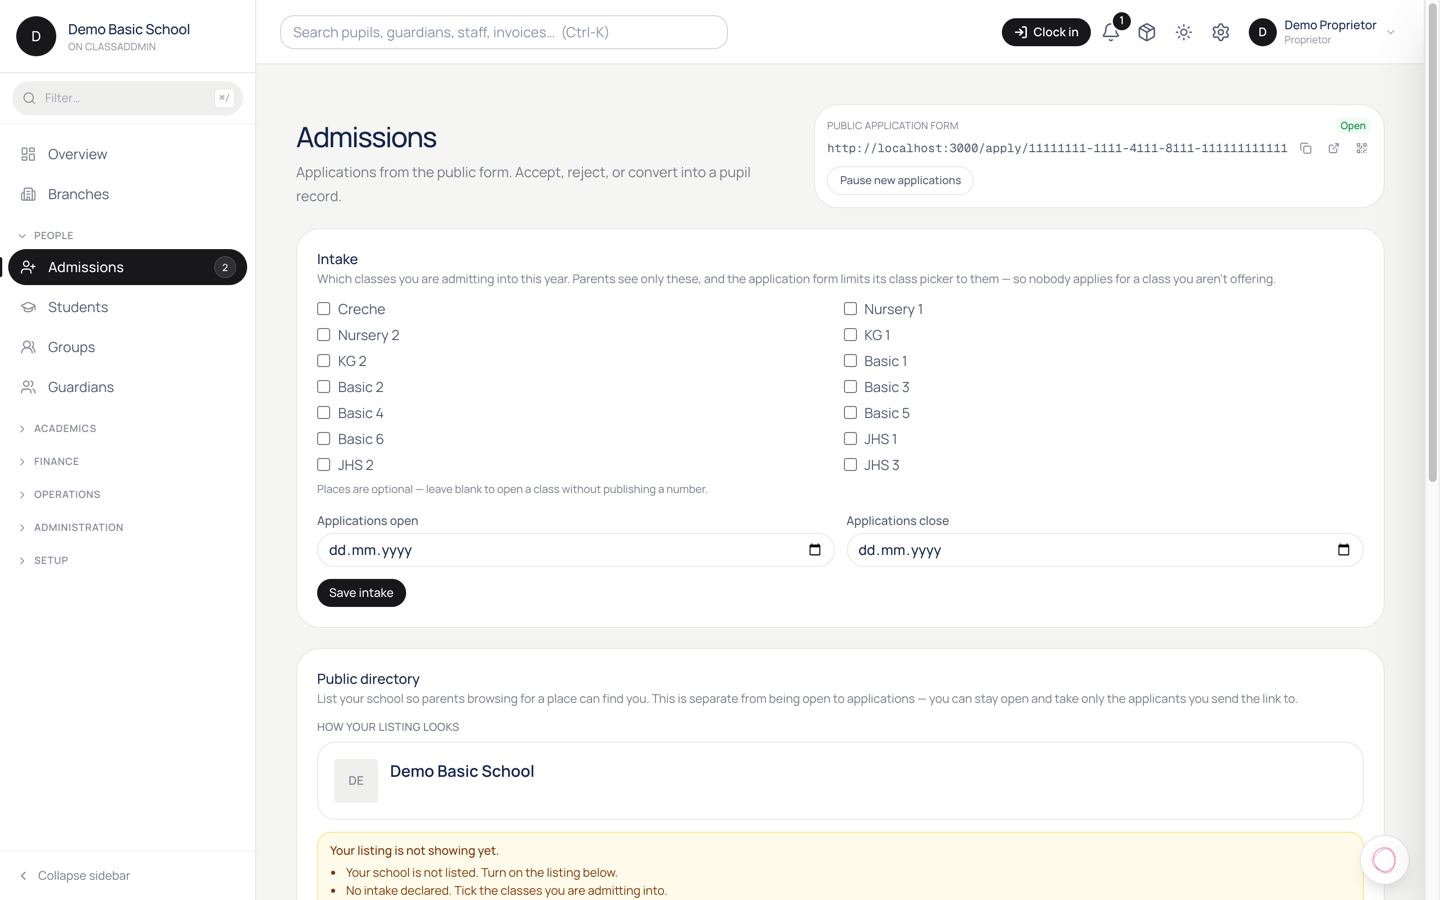
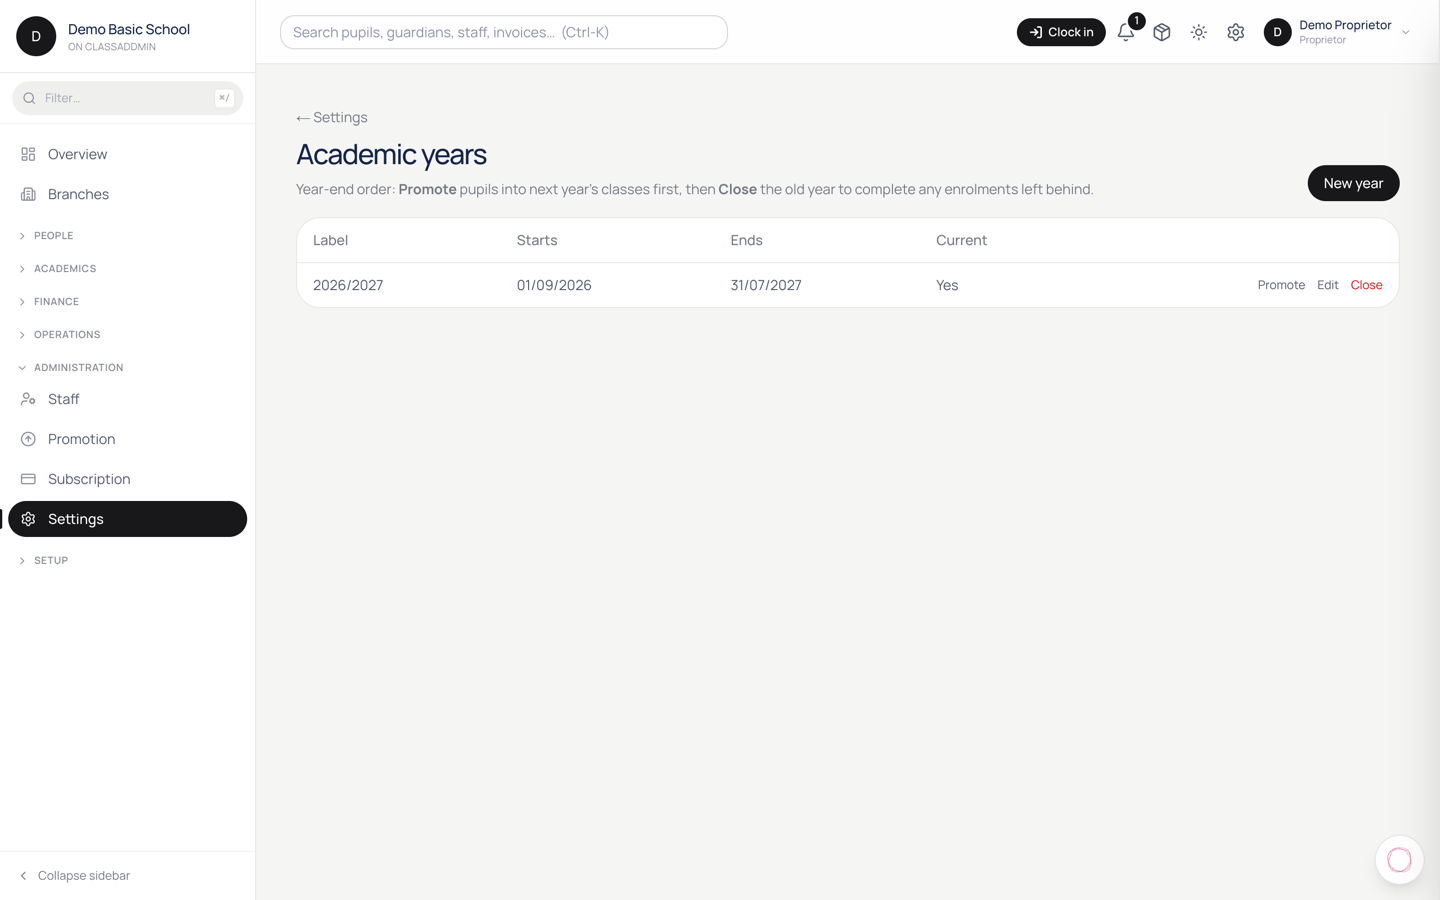
  • Admissions - applications from new pupils. Review, accept, reject.
  • Students - every enrolled pupil. Profile, fees, attendance history.
  • Guardians - parents and caregivers, with their pupils and contact details.

Academics

  • Attendance - mark today's register. One tap per pupil.
  • Gradebook - assessments, scores, comments, report cards.
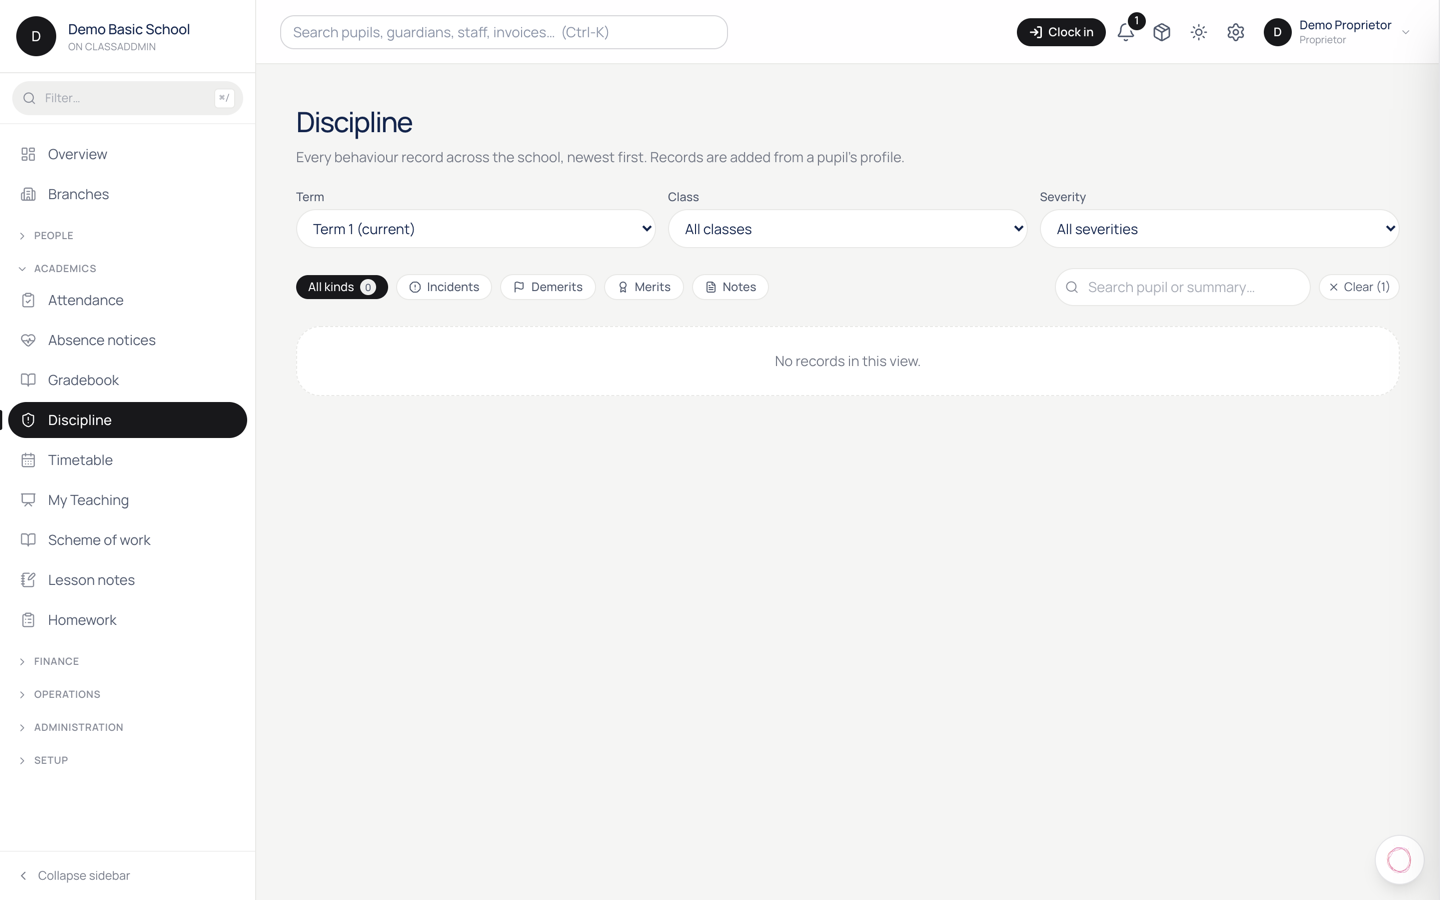
  • Discipline - log incidents and follow-ups.
  • Timetable - period schedule per class.
  • My Teaching - for teachers: just your classes and lessons.

Finance

  • Finance - overview of money in and out.
  • Fee Structures - what fees each class pays per term.
  • Invoices - what you've billed.
  • Payments - what's been collected (cash, MoMo, bank).
  • Payroll - staff salaries.
  • Books - accounting reports (proprietors and bursars only).
  • Expenses - what the school spends.

Operations

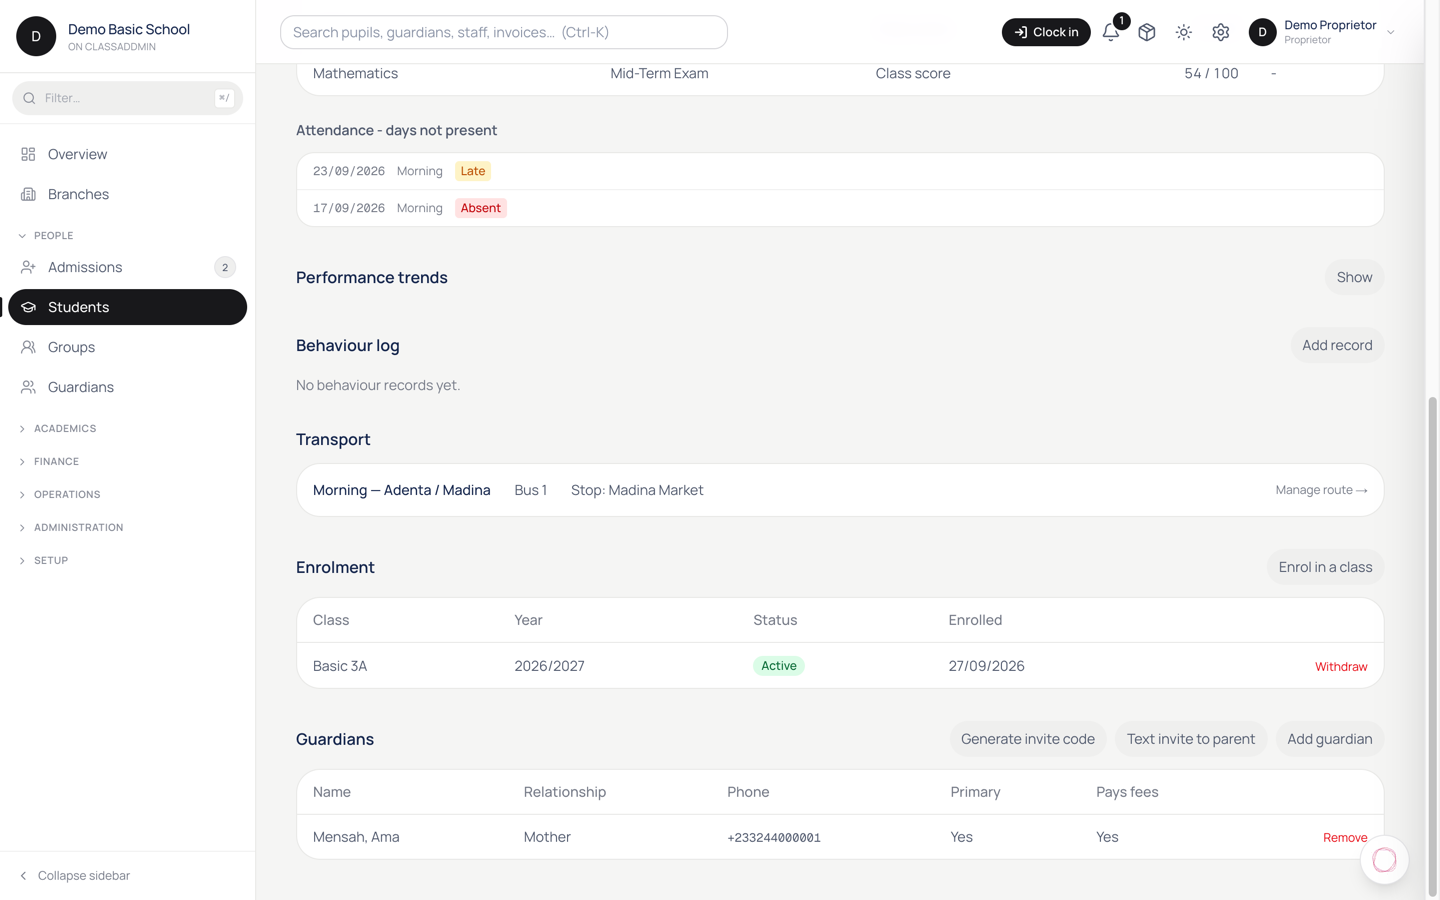
  • Transport - vehicles, routes, who rides which bus.
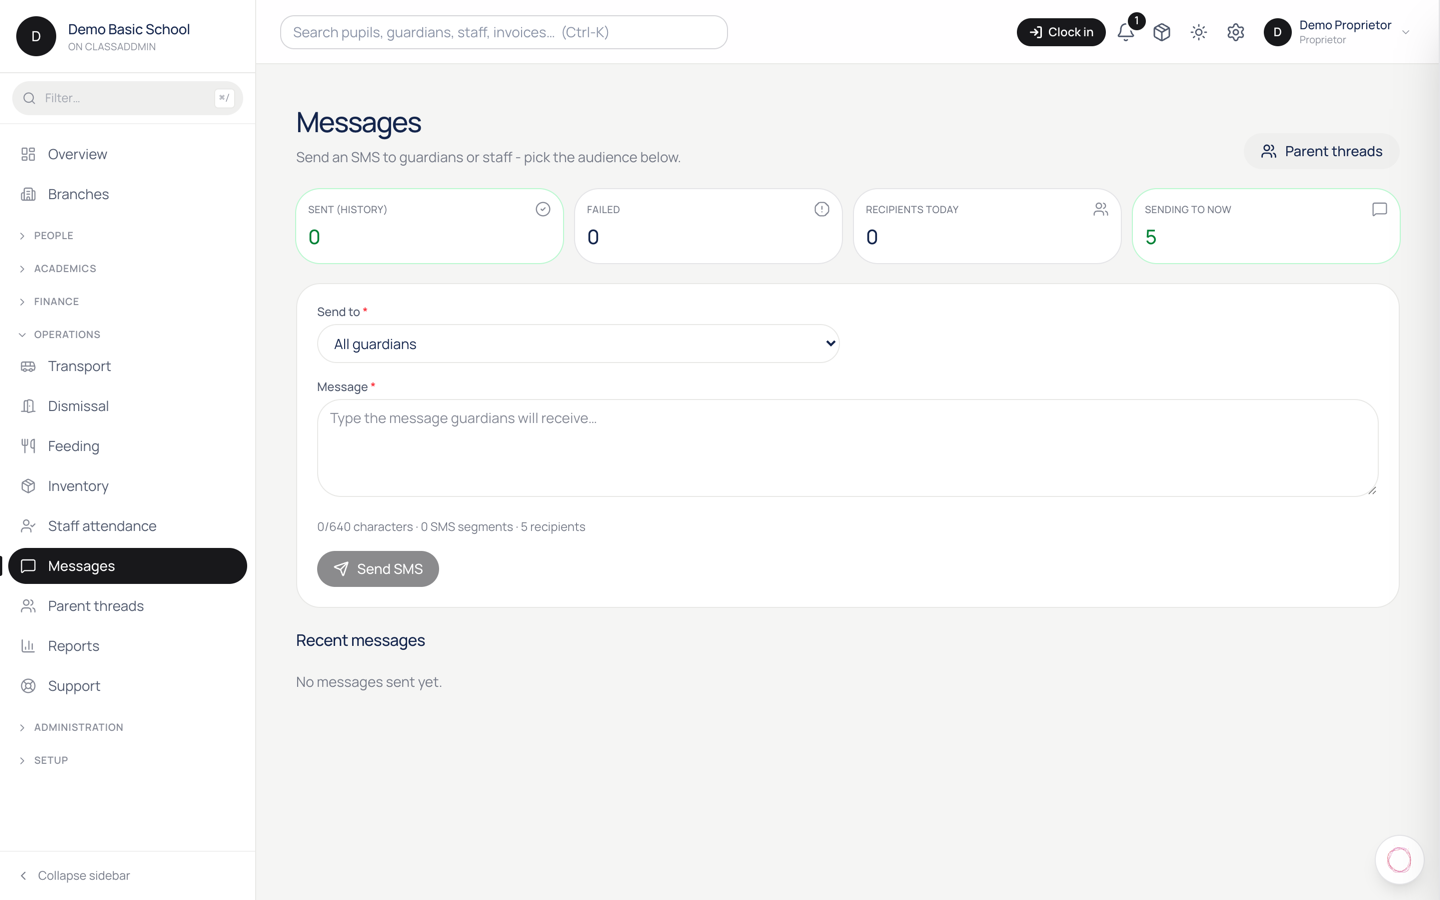
  • Messages - broadcast SMS to guardians.
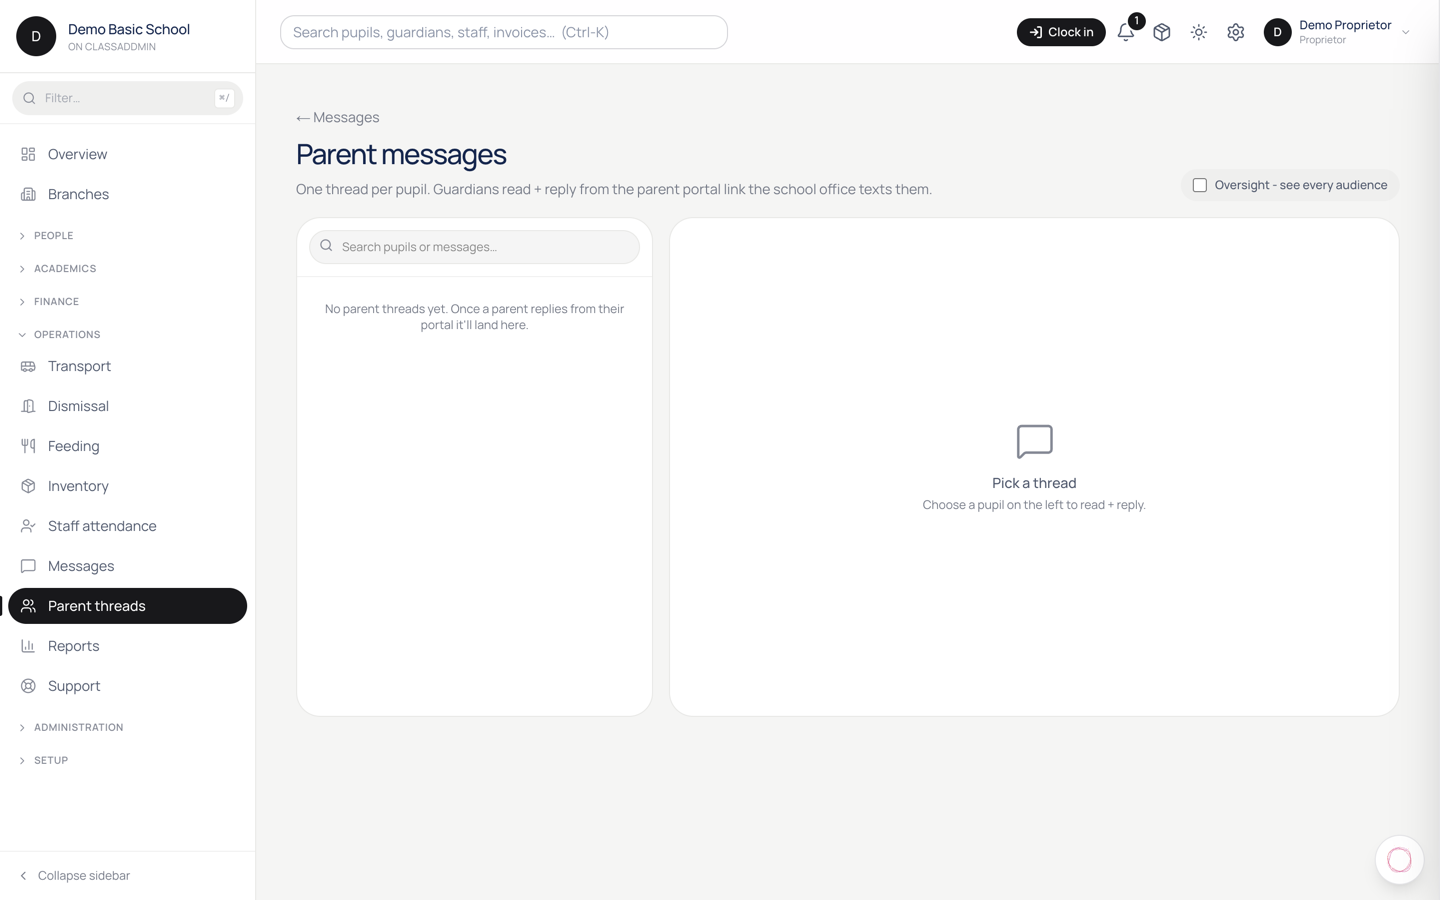
  • Parent threads - two-way chat with each pupil's parents.

Administration

  • Reports - exportable PDFs and dashboards.
  • Staff - invite, edit, remove.
  • Promotion - end-of-year class promotion.
  • Audit log - who changed what.
  • Support - open a ticket with us.
  • Subscription - your plan and billing.
  • Settings - everything else.

Search and help

The search bar at the top finds pupils, guardians, invoices and staff instantly. The bell icon shows alerts that need attention. The profile menu (top-right) is where you sign out.

3.Who can do what - roles explained

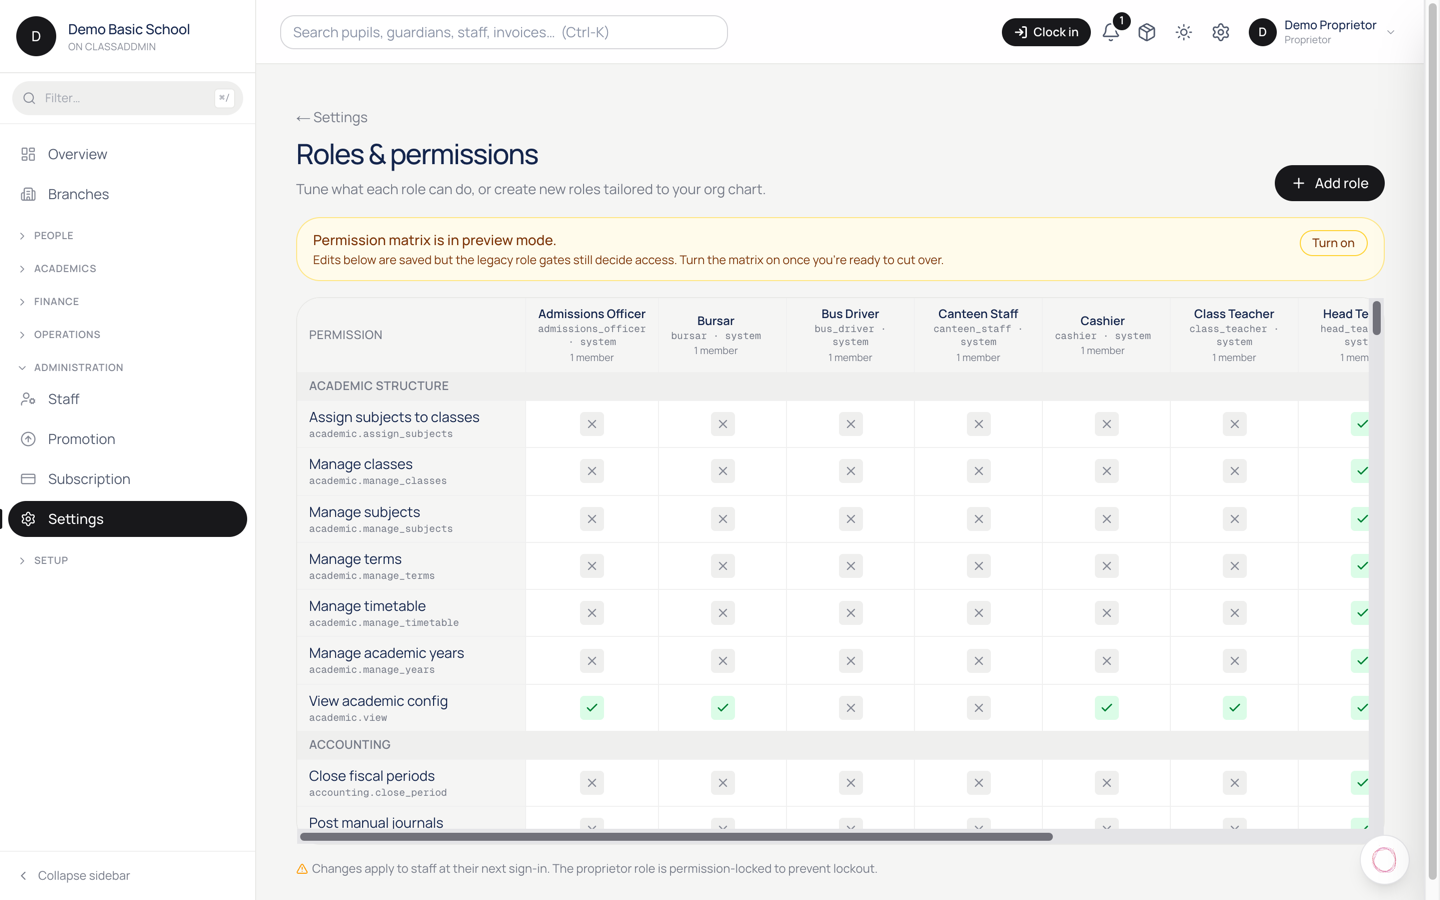
Who can do what - roles explained — screen

ClassAddmin ships with seven default roles. Each role's sidebar and buttons change to match what they're allowed to do. A proprietor doesn't have to see the gradebook composer; a class teacher doesn't have to see payroll.

Role Sees / does
Proprietor Everything - billing, books, role matrix, branding. The owner's view.
Head Teacher Almost everything except billing knobs (subscription, branding, deleting staff).
Bursar Finance - invoices, payments, payroll, expenses, books, reports.
Cashier Just receiving payments - record cash, MoMo, see today's totals.
Admissions Officer The admissions pipeline + adding new pupils.
Class Teacher Their class roster, attendance, gradebook, parent threads.
Subject Teacher Just the classes they teach and their scoresheets.

Custom roles and overrides

If the defaults don't fit, go to Settings → Roles. You can:

  • Tick or untick individual permissions for any role (the matrix).
  • Create a brand-new role (e.g. "Sports Coordinator").
  • Assign multiple permissions in one click.

A change takes effect the next time the affected user reloads the page - they don't need to sign out.

How to think about it

When you're deciding who should do a task, ask "what's the smallest grant that lets them do it?" Don't give a sports coach access to fees just because it's faster. Smaller grants mean fewer accidental edits and a cleaner audit log.

Pupils and families

Getting people onto the system and keeping records straight.

4.Add a new student

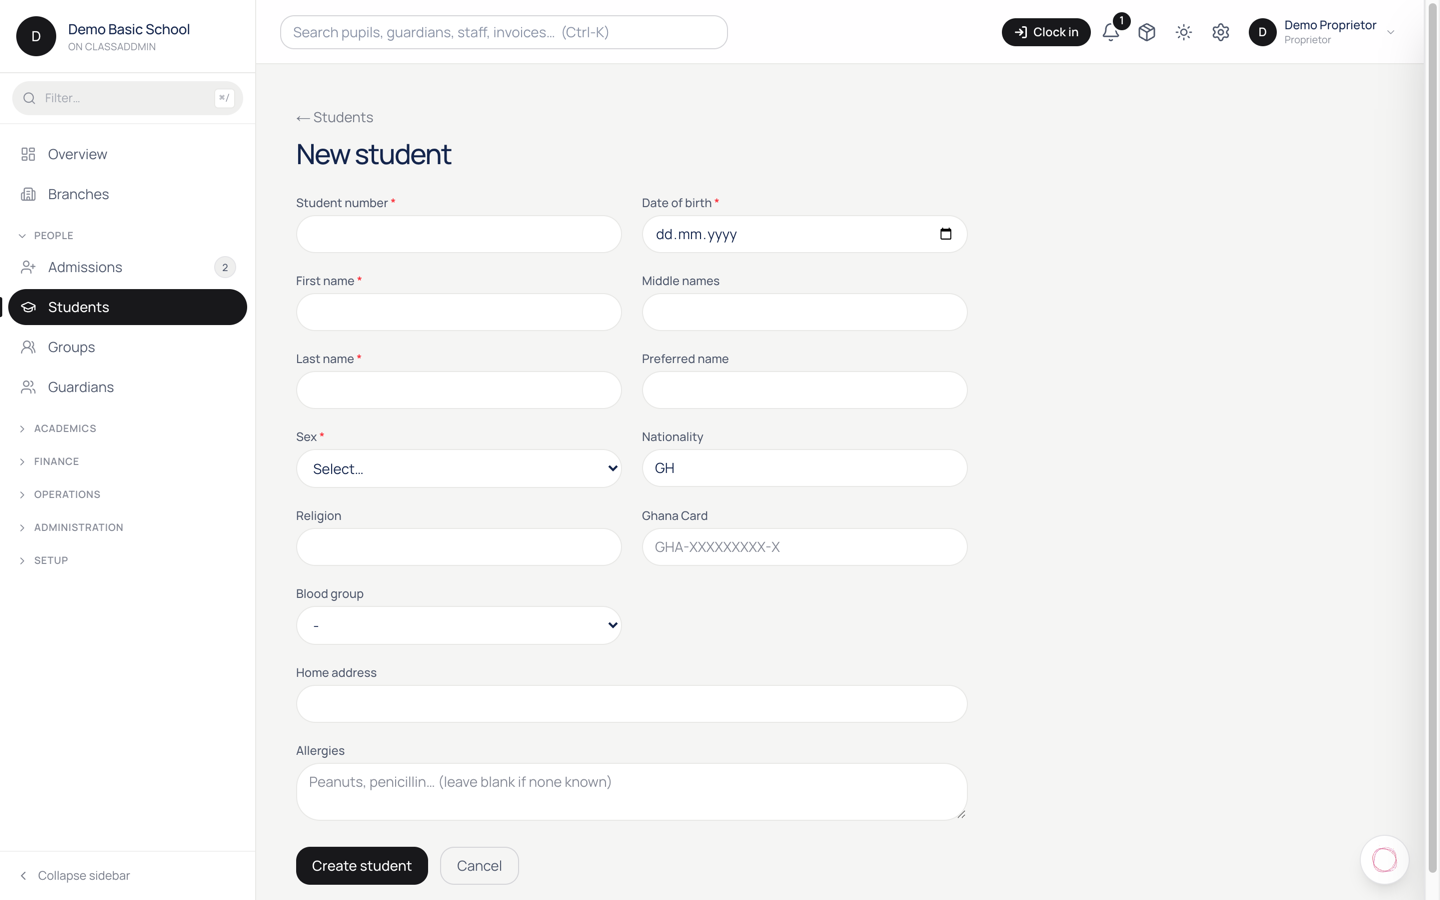
Add a new student — screen

When a child joins your school mid-term or under-the-radar (i.e. without going through the admissions form), you create them directly from Students → New student.

For a child who came through the admissions queue, don't create them here - use Admit an applicant instead so their application history isn't lost.

Steps

  1. Students → New student (top right).
  2. Fill the required fields:
    • First name and Last name - as they appear on the birth certificate.
    • Date of birth.
    • Sex.
    • Admission number - leave blank to auto-generate, or set your own format.
  3. Fill the optional fields if you have them: middle name, photo, blood group, allergies, address.
  4. Pick the class the pupil is joining. This creates an active enrolment under the current academic year.
  5. (Optional) Add a guardian in the same form - name, phone, email, relationship. You can also link guardians later (see Link a guardian to a student).
  6. Click Save.

The pupil now appears in the Students list and is enrolled in the chosen class.

What happens next

  • Attendance picks up the pupil from tomorrow's register (today's register is already locked in by then - see Mark attendance).
  • Fees depend on whether the class has a fee structure for the current term. If yes, you can issue them an invoice from the pupil's profile → Fees tab.
  • Gradebook assessments are auto-linked to all pupils in the class; the new pupil sees the same blank score sheet as the rest.
  • Parent threads are created the first time staff message - no need to set them up here.

Common gotchas

  • "Pupil already exists with this admission number" - pick a different number or leave the field blank to auto-generate.
  • Class dropdown is empty - you haven't set up classes for the current academic year yet (Settings → Classes).
  • No date of birth on the certificate - use the date the parent verbally confirms; you can correct later from the pupil's profile.

5.Bulk import students from a CSV

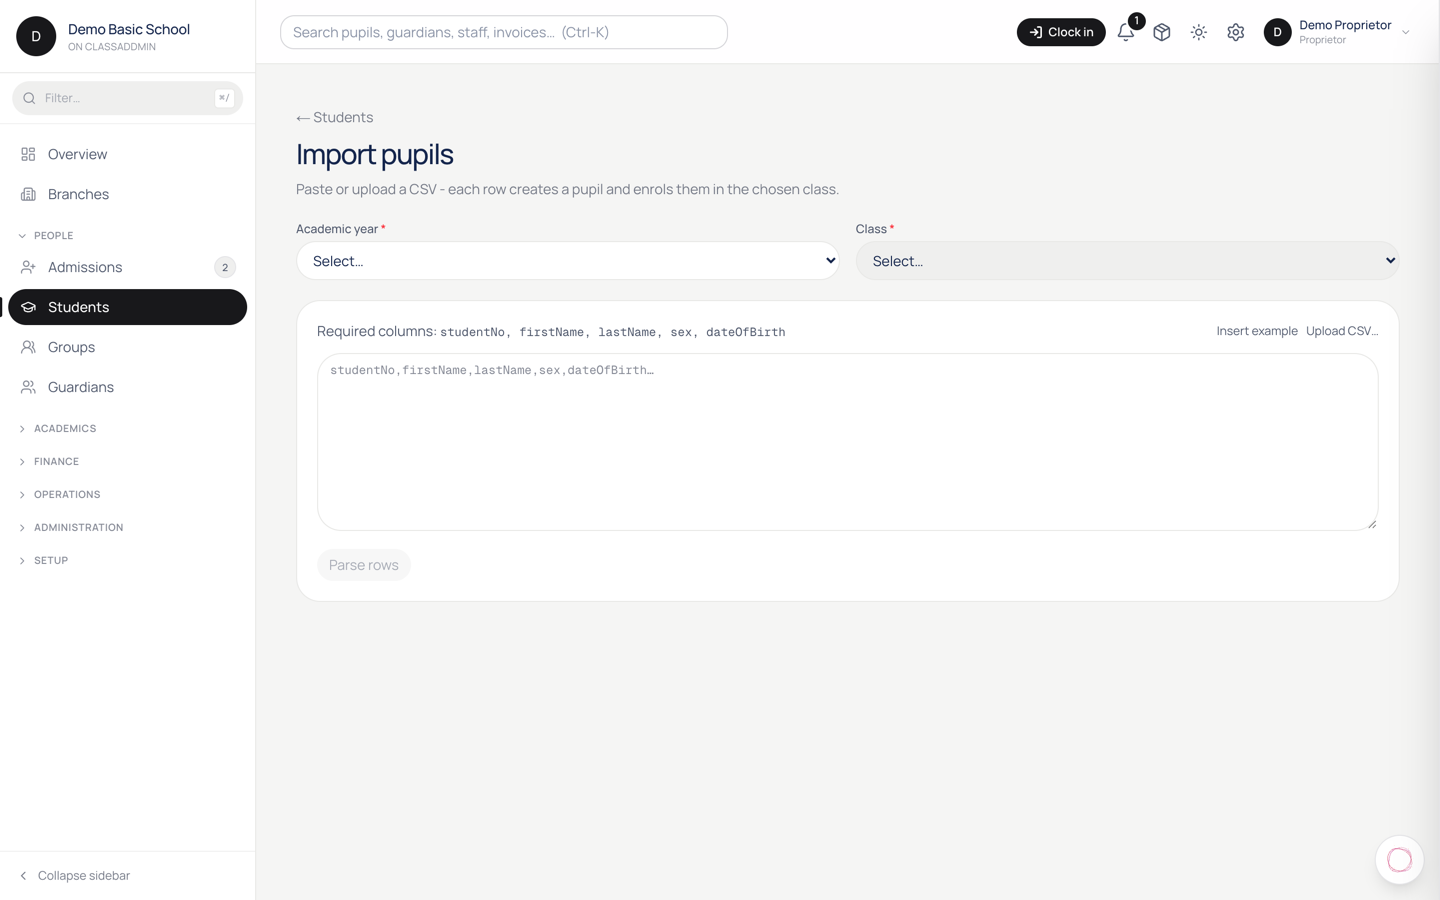
Bulk import students from a CSV — screen

When you're onboarding from another system (or back-from-paper-registers), upload a CSV instead of typing each pupil. The importer handles 1000+ rows comfortably.

What the CSV should look like

Download the template from Students → Import → Download template.

Required columns:

Column What goes in
first_name Pupil's first name
last_name Pupil's last name
date_of_birth YYYY-MM-DD or DD/MM/YYYY
sex male, female, or other
class_display_name Class name as it appears in your school (e.g. "Basic 3 A")

Optional columns:

  • middle_name
  • admission_number - leave blank to auto-generate
  • student_no - same as admission_number, alias
  • blood_group
  • allergies
  • address
  • guardian_1_name, guardian_1_phone, guardian_1_email, guardian_1_relationship - same shape for guardian_2_* if a second guardian.

The class name in class_display_name must match a class that already exists. If you haven't set up your classes for the current academic year, do that first under Settings → Classes.

Steps

  1. Students → Import (top right).
  2. Drop the CSV file in (or click to pick).
  3. The system parses it and shows a preview: how many rows it'll create, how many guardians it'll link, and any rows that look problematic.
  4. Review the conflicts section:
    • Duplicate admission number - already exists in your school.
    • Class not found - you misspelt the class name in the CSV.
    • Invalid date of birth - wrong format.
  5. Either:
    • Fix the CSV and re-upload, or
    • Skip the problem rows and import the rest.
  6. Click Import.

The job runs in the foreground. For 100 rows it takes ~10 seconds; 1000 rows ~90 seconds. Don't close the tab.

After

  • Pupils appear in the Students list immediately.
  • Each pupil's enrolment in the chosen class is active.
  • Guardians are linked. If two pupils share a guardian (same phone), the existing guardian is linked - not duplicated.

Common gotchas

  • "Sex" must be lowercase - Male or M won't match. Use male.
  • Encoding - save as UTF-8 in Excel, not the default Windows ANSI. Otherwise Akan names come through as ? or ??.
  • Class display name has trailing spaces - match exactly, including capitalisation. Copy from the Classes list to be safe.
  • Phone formats - 0244XXXX, +233244XXXX, and 233244XXXX are all accepted; the system normalises them on import.

7.Admit an applicant - turn an application into a pupil

Admit an applicant - turn an application into a pupil — screen

Once a parent fills the public application form, their submission lands in Admissions with status pending. To turn an approved applicant into a pupil, you don't re-type anything - the system carries every field across.

Steps

  1. Admissions in the sidebar. Filter by pending if you have a backlog.
  2. Click the applicant to open their card.
  3. Review the application - entrance test scores, sibling information, custom questions you defined for the form.
  4. Click Decide → Accept (top right).
  5. A side panel opens:
    • Class - pick which class to enrol them in.
    • Academic year - defaults to current.
    • Admission number - leave blank to auto-generate (recommended).
    • Optional: starting term, fee structure override (if this pupil pays a different rate from the class default - e.g. siblings, scholarships).
  6. Click Accept and enrol.

The system will:

  • Create the students row.
  • Copy guardian details into guardians and link them via student_guardians.
  • Create an active enrollments row in the chosen class.
  • Stamp the applicant status = converted so it leaves the pending queue but stays in the history.
  • Send the parent a welcome email with their portal link (if Resend is configured).

Steps to reject

If the applicant isn't a fit:

  1. Open the card.
  2. Click Decide → Reject.
  3. Pick a reason - class full, didn't meet criteria, withdrew.
  4. (Optional) Send a courtesy email.
  5. Click Reject.

The applicant moves to history with status = rejected. You can still reopen and re-decide later.

Bulk admit

If you've decided on a batch (e.g. the whole next-term intake list), use the bulk action at the top of the Admissions list:

  1. Tick the applicants.
  2. Bulk → Accept.
  3. Pick the class - same class applies to all selected; if they should go to different classes, accept them one-by-one.

Common gotchas

  • "No enrolment year exists yet" - go to Settings → Academic Years and add the year first.
  • Guardian phone is already on file under another student - that's fine. The system links the existing guardian rather than duplicating.
  • Parent never got the welcome email - check Settings → Communications → Email and confirm Resend is configured. The portal link can also be sent by SMS from the pupil's profile.

The academic term

Attendance, assessment, and getting report cards out.

8.Set up classes for an academic year

Set up classes for an academic year — screen

Before you can enrol pupils, mark attendance, or bill fees, you need the classes for the current academic year. ClassAddmin doesn't pre-create these - every school's structure is different.

Plan first

Decide:

  • Levels - KG, Lower Primary, Upper Primary, JHS, SHS - whatever your school uses.
  • Streams per level - single class, or A/B/C streams.
  • Naming convention - "Basic 3", "Class 3A", "P3 Blue". Pick one and stick to it; this is what teachers and parents see everywhere.

Write it on paper before you click anything. Renaming later is fine but it ripples through reports and parent communications.

Open the academic year

  1. Settings → Academic Years.
  2. If the current year doesn't exist, click Add academic year. Pick the start date (usually the first day of first term).
  3. The current year auto-becomes the "active" one once its start date passes.

Add classes

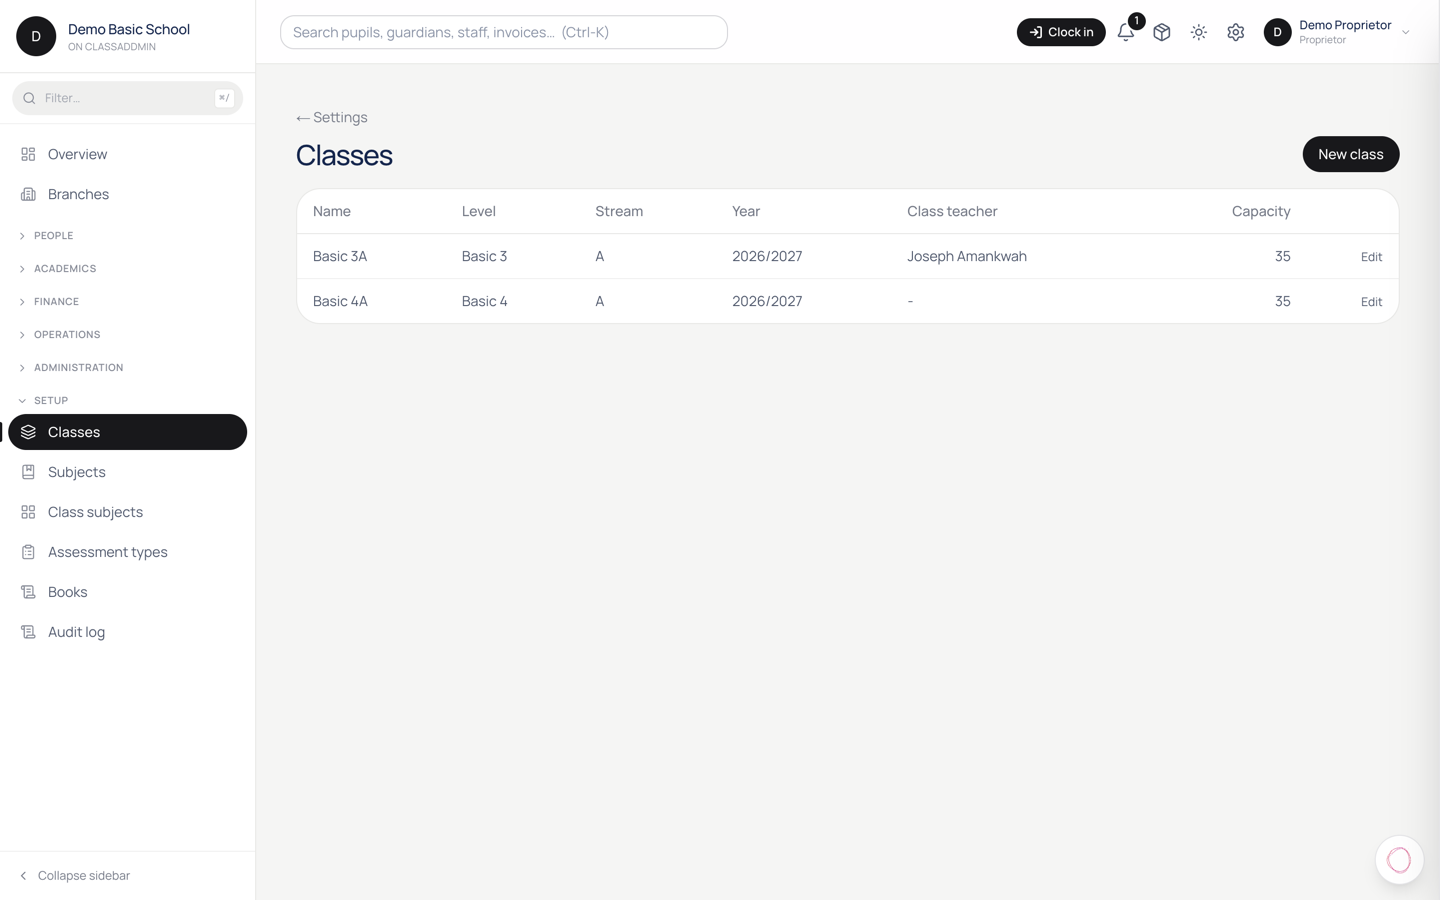
  1. Settings → Classes (under Academics).
  2. Click Add class (top right).
  3. Fill:
    • Display name - "Basic 3 A", "JHS 1 Blue". This is what shows in dropdowns.
    • Level - the broader grouping (e.g. "Basic 3"). Used for fee structure inheritance and reports.
    • Class teacher - pick a staff member with the Class Teacher role. They'll see this class on their My Teaching tab.
    • Capacity - optional. Caps how many pupils can be enrolled.
  4. Click Save.

Repeat for every class.

Class subjects

Each class needs a list of subjects taught. Either:

  • Inherit from level - set up subjects once on the level, and every class in that level inherits. Easiest.
  • Override per class - useful when one stream offers an extra subject.

Set up subjects under Settings → Subjects, then attach them to classes under Settings → Class Subjects.

Promotion at year-end

When the academic year ends, you don't manually move pupils between classes:

  1. Settings → Promotion (under Administration).
  2. Pick the next academic year.
  3. The system suggests promotions - "Basic 3 A → Basic 4 A", "JHS 3 → graduated".
  4. Override individual pupils if needed (held back, transferring out).
  5. Click Promote.

Enrolments flip overnight; the new year's classes go live on the first day of first term.

Common gotchas

  • "Class display name already exists" - same string somewhere else this year. Make it unique even if just by stream letter.
  • Teacher dropdown is empty - the staff member doesn't have the Class Teacher role. Settings → Staff → edit role.
  • Capacity blocks an enrolment - set capacity higher, or admit the pupil into a different stream.

9.Set up subjects taught at the school

Set up subjects taught at the school — screen

Subjects are the master list of what your school teaches. You create each subject once; later you attach them to classes and assign teachers per class.

If you follow Ghana's NaCCA framework, the standard subjects are pre-suggested in the wizard - accept what applies, skip the rest.

Add a subject

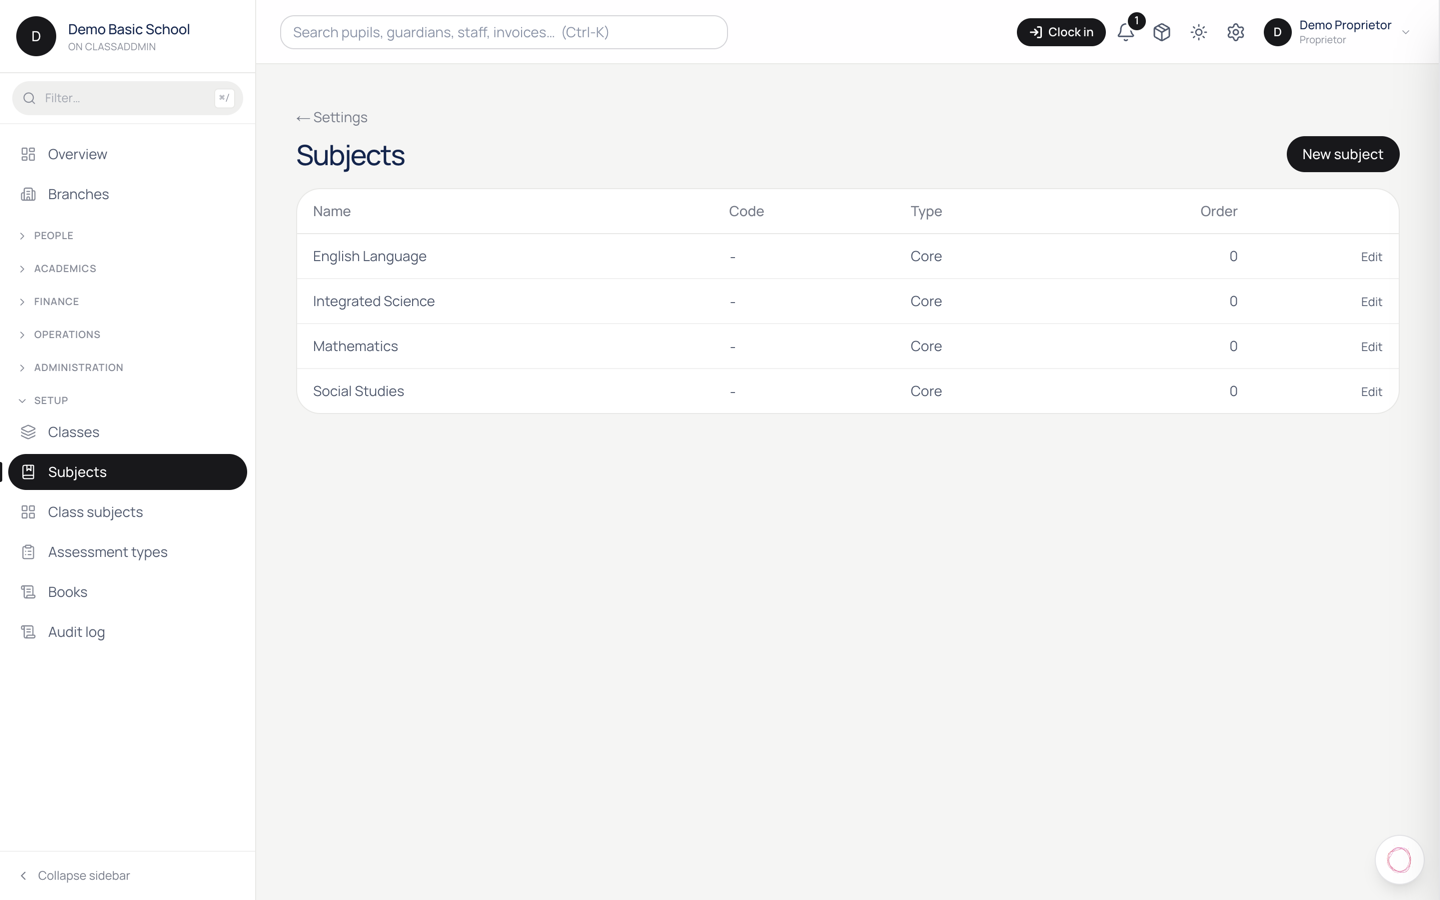
  1. Settings → Subjects (under Academics).
  2. Click New subject.
  3. Fill:
    • Name - what teachers and parents see. "Mathematics", "Religious & Moral Education", "Our World, Our People".
    • Short code - abbreviation, max 6 chars. "MATH", "RME", "OWOP". Used in compact tables and gradebook headers.
    • Level - basic / JHS / SHS / cross-cutting. Drives which classes can pick this subject.
    • NaCCA strand (optional) - the official curriculum strand if applicable.
  4. Click Save.

Repeat for each subject the school teaches.

Attach subjects to classes

After subjects exist, you assign them to classes:

  1. Settings → Class Subjects.
  2. Pick a class.
  3. Tick the subjects taught in that class.
  4. For each tick, pick the subject teacher (a staff member with the Subject Teacher role).
  5. Save.

The class teacher's gradebook now shows score sheets for the assigned subjects; the subject teacher's My Teaching tab shows the class.

Inherit from level

Setting up Basic 1 through Basic 6 with the same subjects? Don't tick them six times:

  1. Settings → Subjects → Level templates.
  2. Pick "Basic" level → tick the subjects every basic class teaches.
  3. Save.
  4. When you set up a new class, it inherits the level template automatically. You can override per class (untick a subject, add an extra).

Reorder subjects on the report card

Report cards show subjects in a specific order:

  1. Settings → Subjects → drag-handle to reorder.
  2. The order applies to every report card published from now on. Previously published cards keep their order.

Convention is core subjects first (Maths, English, Science, RME), then content-rich subjects (Social Studies, Computing), then arts/PE/extras.

Common gotchas

  • Subject doesn't appear on a class's gradebook - it's not attached to that class. Settings → Class Subjects → tick it.
  • "Short code already exists" - short codes are unique per school. Pick a different abbreviation.
  • Wrong NaCCA strand - strand metadata only affects report card grouping (some schools group by strand). If you don't group, the strand is just a label.

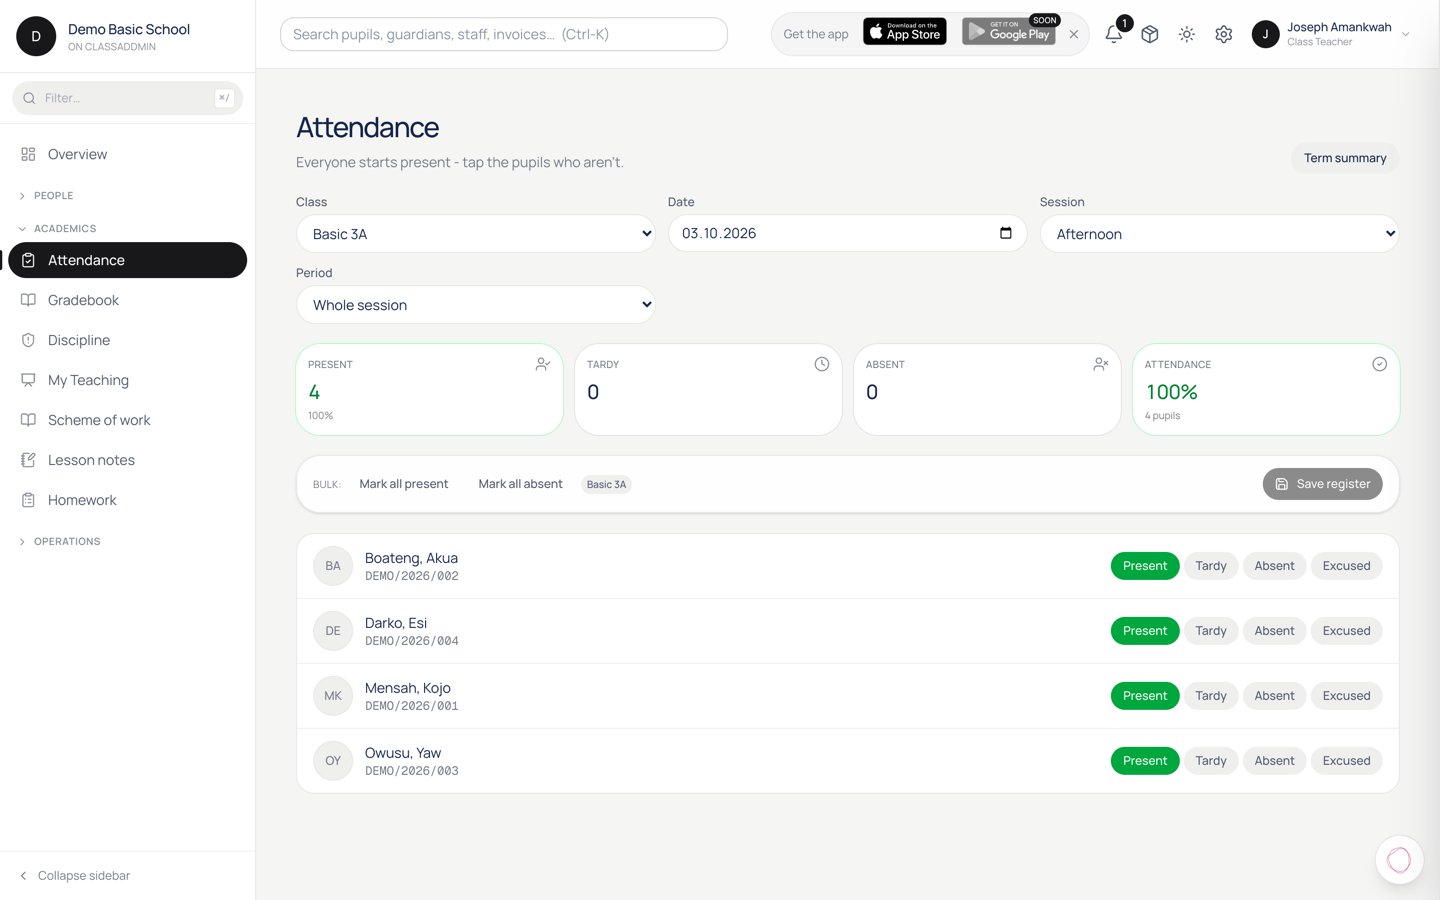
10.Mark today's attendance register

Mark today's attendance register — screen

The attendance register is the single most-touched page in ClassAddmin - class teachers tap it every morning. The whole class fits on one screen; one tap per pupil.

Steps

  1. Attendance in the sidebar (or, for class teachers, My Teaching → Today's register).
  2. Pick your class from the dropdown (your default class is pre-selected if you're a class teacher with only one).
  3. Pupils appear as a list. By default everyone is Present - green dot.
  4. For each pupil who isn't present, tap their row to cycle the status:
    • Tap once → Absent (red).
    • Tap again → Late (amber).
    • Tap again → Excused (blue).
    • Tap again → back to Present.
  5. (Optional) Long-tap a pupil to add a note - "left at 10am for dentist", "uniform issue".
  6. Click Save.

That's it. The register is saved against today's date. You can come back later (during the same school day) and adjust if a pupil arrives late.

What happens after you save

  • Absent pupils' guardians get an SMS within 30 minutes, via the absence sweep cron. The SMS is only sent if the school has the absence notifications feature on (Settings → Communications → Absence SMS).
  • Class statistics update on the Overview page - today's attendance rate.
  • Termly attendance rolls up automatically in the gradebook and on report cards.

Marking past attendance

If you forgot yesterday or someone changes a status retroactively, use Attendance → History → pick the date. You'll need the attendance.edit_past permission - by default only proprietors and head teachers have it. The change is audit-logged.

Common gotchas

  • No pupils show in the list - the pupils aren't actively enrolled in the chosen class. Check Students → pupil → Enrolment tab.
  • "This register is locked" - someone has already saved and the day's window has closed (after 6pm). Use the History flow to edit.
  • Absence SMS isn't sending - Settings → School → Subscription must include SMS credits, and the school must have an sms_sender_id configured.

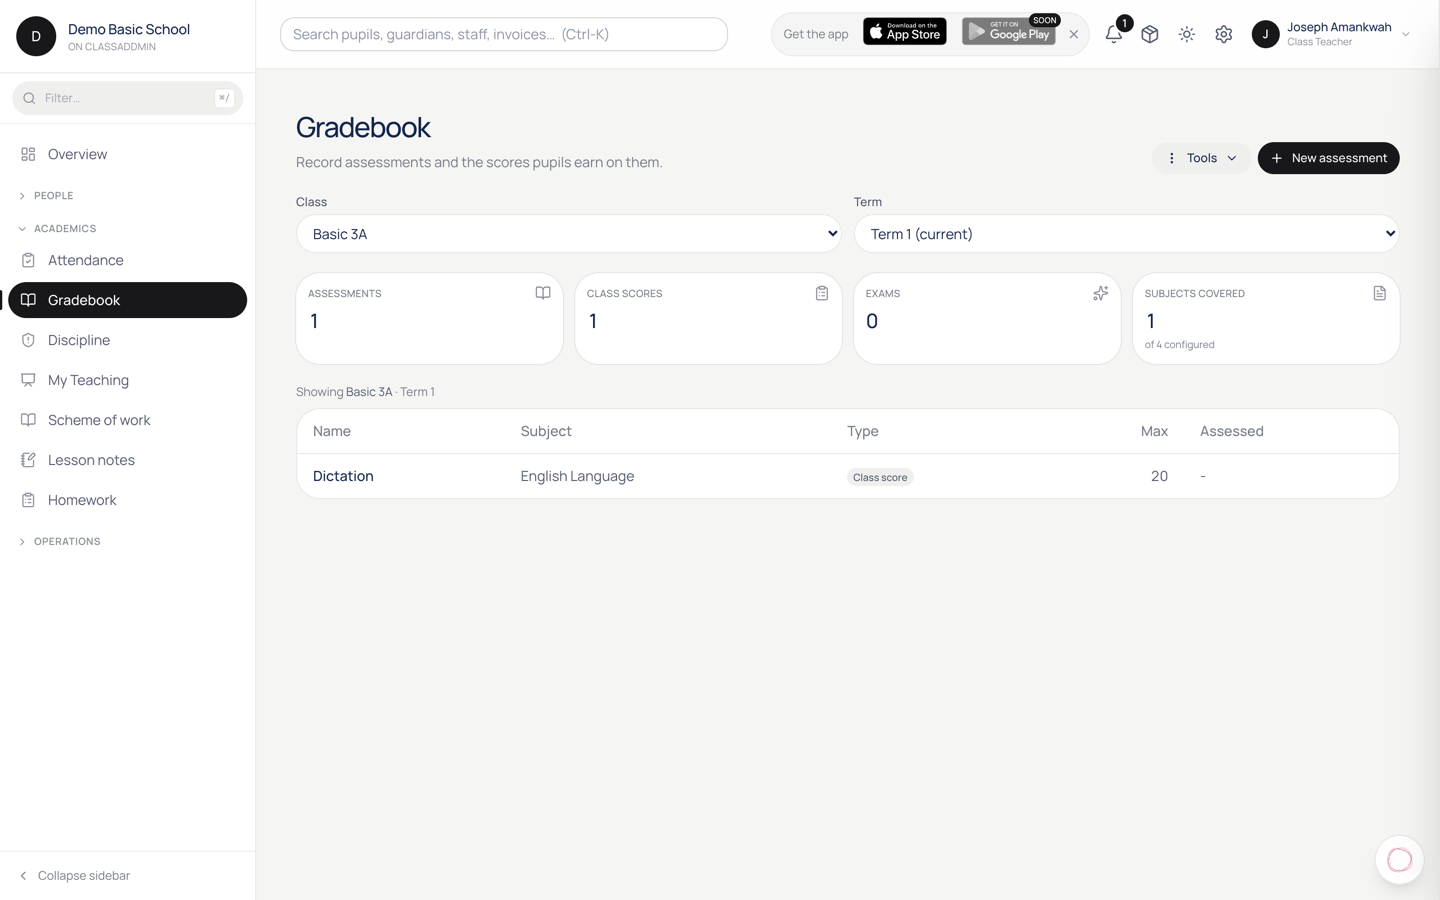
11.Create an assessment in the gradebook

Create an assessment in the gradebook — screen

An assessment is anything you give a pupil a score for - a class quiz, an end-of-term exam, a worksheet. You create the assessment once, then enter scores against it.

Steps

  1. Gradebook in the sidebar (or My Teaching → Gradebook for subject teachers).
  2. Pick the class and the subject.
  3. Click New assessment (top right).
  4. Fill:
    • Name - what teachers and parents see. "Mid-Term Test", "Week 4 Quiz", "End-of-Term Exam".
    • Component - which slot on the report card this assessment feeds. Most schools use Classwork, Tests, Exam. The component decides how it's weighted on the final report card.
    • Total marks - what scoring out of. 10, 20, 50, 100 - whatever you use.
    • Date - when the assessment was given. Used for sorting + the gradebook history view.
  5. (Optional) Tick Lock after publish - once you publish report cards for the term, this assessment becomes read-only for everyone except the head teacher.
  6. Click Save.

The assessment appears on the gradebook's score sheet for that class+subject. Every enrolled pupil shows as a blank row, ready for scores.

Components and weighting

Components are set up under Settings → Grading:

  • Classwork - usually 30% of the report card mark.
  • Tests - usually 30%.
  • Exam - usually 40%.

Add as many assessments to a component as you like; the report card averages them per pupil within the component, then applies the component weight to compute the final.

Common gotchas

  • "Component is required" - Settings → Grading → make sure you've set up at least one component for the current academic year.
  • Assessment doesn't show in My Teaching - you're not assigned to teach this subject in this class. Settings → Class Subjects → assign yourself or ask the head teacher.
  • Wrong total marks - edit the assessment from the gradebook header (pencil icon) and change total. Scores you've already entered are NOT rescaled - you'd need to re-enter them. Be careful.

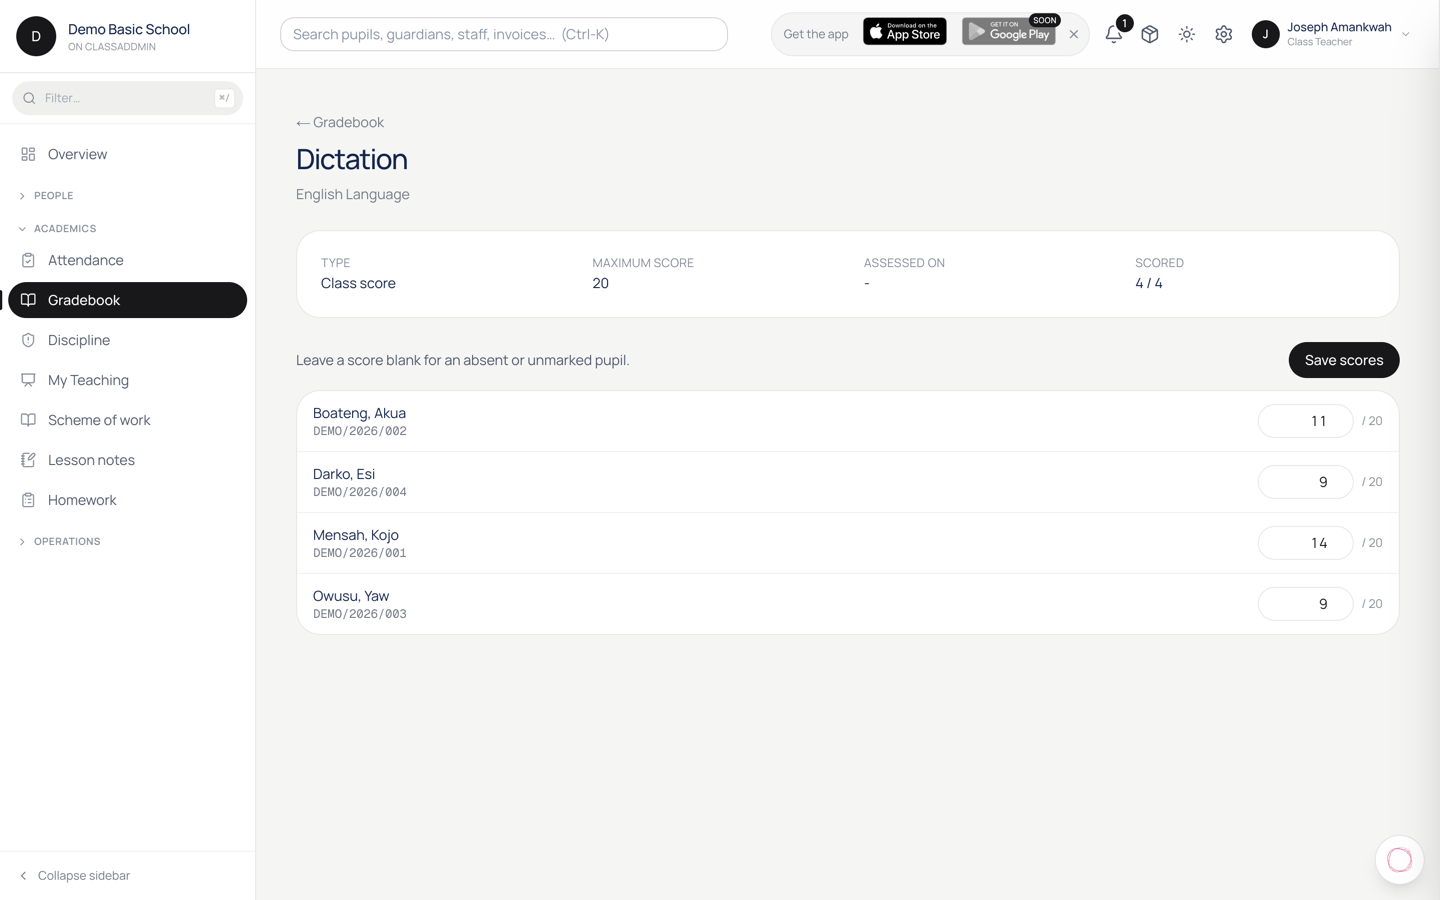
12.Enter scores for an assessment

Enter scores for an assessment — screen

You've created the assessment. Now enter the scores - there are three ways, pick whichever matches how you graded.

Option A - Type them in

Use this for short quizzes.

  1. Gradebook → pick class → pick subject → click the assessment.
  2. Click into each pupil's score cell and type the mark.
  3. Press Tab to move to the next pupil, or Enter to drop down a row.
  4. Scores auto-save as you go - there's no save button. A small grey check appears next to each saved cell.

Option B - Paste from Excel

Use this for end-of-term exams when you marked on paper and tallied in Excel.

  1. In Excel, sort by the same order ClassAddmin uses (alphabetical by last name) or by admission number - whichever matches.
  2. Select the column of scores. Copy.
  3. In ClassAddmin, click the first pupil's cell.
  4. Press Cmd-V / Ctrl-V.
  5. Scores fill down the column. Review the orange-highlighted cells - those didn't match (wrong format, score above total, etc).

Option C - CSV upload (advanced)

For large assessments or when you graded centrally:

  1. Gradebook → assessment → Import scores.
  2. Download the template - it has admission numbers pre-filled.
  3. Fill the score column in Excel.
  4. Save as CSV. Upload.
  5. Review the preview (any conflicts shown). Click Import.

Out-of-total or absent

  • Score above total - the system stops you. Either correct the score or raise the assessment total.
  • Pupil absent for the test - type A (or click the absent toggle). The assessment won't count toward their report card.
  • Pupil exempt - type E. Same treatment as absent but printed differently on the report.

Comments

Some assessments allow per-pupil comments (e.g. end-of-term exam):

  1. Click the speech-bubble icon next to a pupil's row.
  2. Pick from the comment bank or type free-form.
  3. Save.

Comments show on the report card next to the subject mark.

Common gotchas

  • Scores don't save - check your internet connection. The small grey check next to each cell goes red if a save fails; the cell will retry every few seconds.
  • "Locked" - the head teacher has published the report cards; further changes need them to unlock first.
  • Wrong total - see Create an assessment about changing total after entry. The short version: don't.

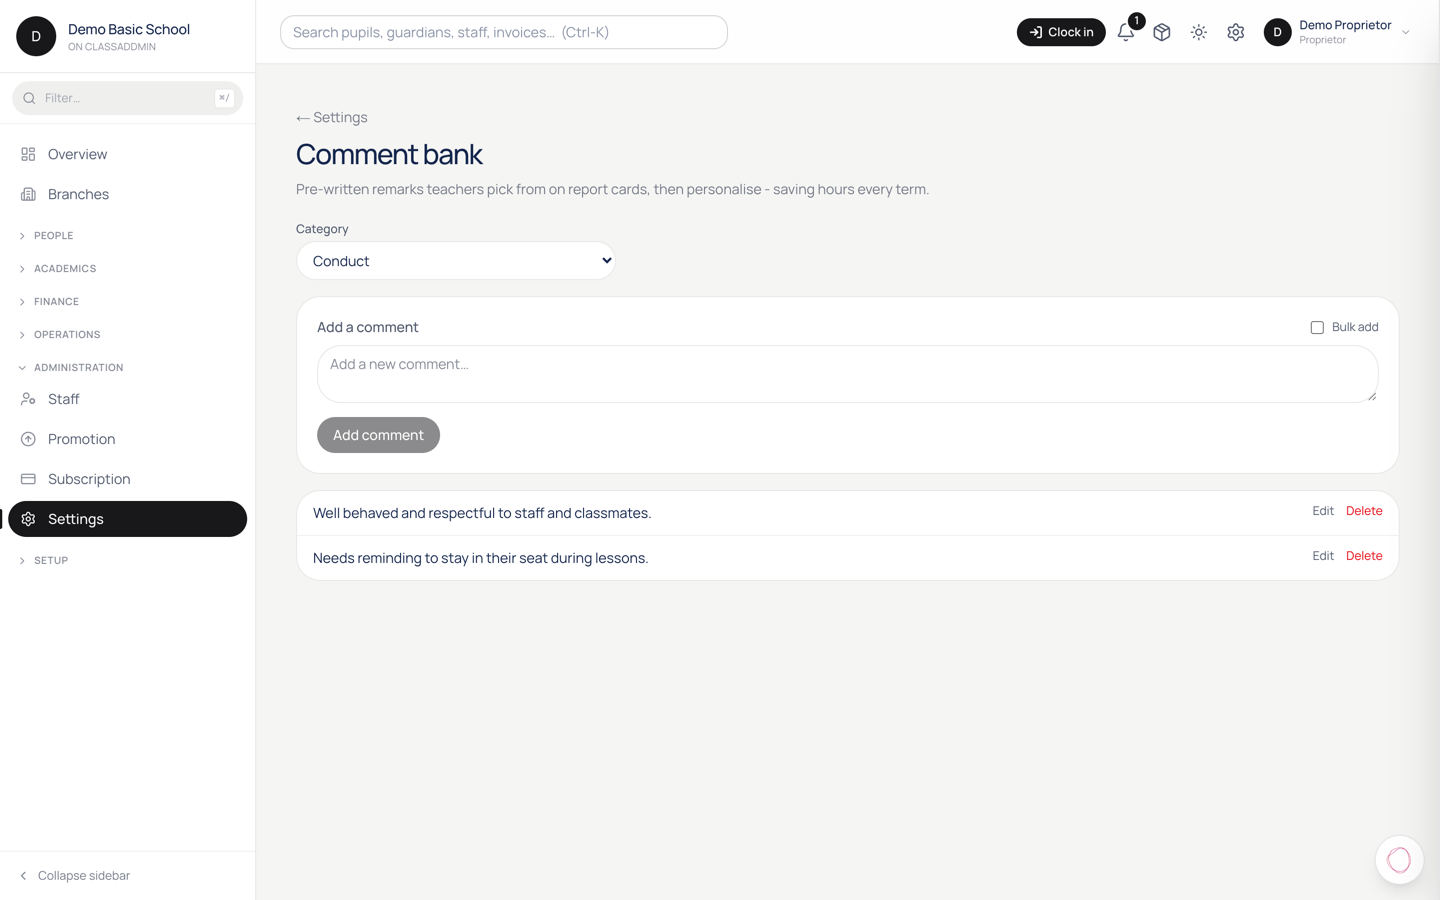
13.Use the comments bank for report cards

Use the comments bank for report cards — screen

End-of-term comments are a tax on every class teacher. ClassAddmin gives you a comments bank - a library of reusable phrases tagged by subject + performance band - so teachers can compose a personalised paragraph from drop-ins instead of starting from scratch for each of 40 pupils.

How it works

Each comment has:

  • Subject (optional) - Maths, English, "any subject".
  • Band - excellent / good / average / weak / concern.
  • Body - the actual phrase. Use {name} and {he_she} as placeholders.

Example body:

{name} continues to demonstrate strong problem-solving skills and a willingness to take on challenging exercises. {he_she_cap} should be encouraged to attempt the extension problems each week.

When the teacher writes a pupil's report card and clicks Insert from bank, the system filters the bank by the pupil's subject and performance band, replaces the placeholders with the right values, and drops the phrase into the comment field. The teacher edits if needed.

Add a comment to the bank

  1. Settings → Comments (under Academics).
  2. Click New comment.
  3. Fill:
    • Subject - pick or "Any subject" for general phrases.
    • Band - pick the performance band this phrase suits.
    • Body - the comment text with placeholders.
  4. Click Save.

Repeat. Aim for at least 5 comments per band, per subject - that gives variety so every pupil's report doesn't read identical.

Placeholders

  • {name} → pupil's first name. → "Adwoa"
  • {he_she} → lowercase pronoun. → "she"
  • {he_she_cap} → capitalised pronoun. → "She"
  • {his_her} → possessive. → "her"
  • {his_her_cap} → capitalised possessive. → "Her"

The pronouns come from the pupil's sex field; pupils with other default to "they/them".

Bulk import

If you have a list of comments from your old system or your head teacher:

  1. Settings → Comments → Import.
  2. Download the template. Fill the columns: subject, band, body.
  3. Upload.

Quicker than typing 60 phrases one-by-one.

Use in the gradebook

While writing report card comments:

  1. Open a pupil → Comments field.
  2. Click Insert from bank (the small library icon).
  3. Filter by band - the pupil's average is shown to remind you.
  4. Click a phrase to insert. You can stack multiple phrases.
  5. Edit to personalise - name a specific test, mention a parent meeting, whatever.

Why this matters

40 pupils × 6 subjects × 100 words of comment = 24,000 words per term per class teacher. With the bank, that drops to ~4,000 words of true writing - the rest is choosing from your tested phrases.

Keep the phrases honest - generic, encouraging, specific to what the band actually means. Bland boilerplate makes parents stop reading the comments at all.

14.Publish term report cards

Publish term report cards — screen

Publishing report cards is the last thing you do at the end of a term. It locks every assessment for the term, generates a PDF per pupil, and lets parents view them through the portal.

Before you start

Check that:

  • All assessments for the term have scores. Anything blank counts as zero unless you marked it absent (A) or exempt (E).
  • Class teacher comments are written for every pupil in their class.
  • Head teacher comments are written for every pupil in the school (or you've delegated this to class teachers).
  • Attendance for the term is up to date - that figure prints on the report.
  • The next term's reopening date is set under Settings → Calendar.

If any of these are missing, the publish dialog will tell you.

Steps

  1. Gradebook → Report Cards (left rail) or Reports → Report Cards.
  2. Pick the term to publish.
  3. Pick the class(es) - leave all ticked to publish the whole school.
  4. Click Preview. The system shows:
    • How many cards will be generated.
    • Pupils whose data is incomplete (missing scores, missing comments).
    • A sample PDF for one pupil so you can sanity-check the layout.
  5. Resolve any incomplete pupils (or tick Publish anyway to mark them with placeholder text - not recommended).
  6. Click Publish.

The system generates PDFs in the background - for a 500-pupil school, ~3 minutes. You'll see a progress bar.

What happens after

  • PDFs are stored in the school's storage bucket. They're available on the pupil's profile and on each guardian's parent portal.
  • Guardians get an SMS (if SMS-on-publish is enabled in Settings → Communications): "Adwoa's Term 2 report card is ready. View it: [link]".
  • Assessments lock. Teachers can no longer edit scores. Only the head teacher can unlock.
  • The previous term's report is replaced if you re-publish; otherwise both versions stay accessible.

Republish after a correction

If you spot an error after publishing:

  1. Unlock the term - Gradebook → Report Cards → click the published term → Unlock. This requires gradebook.publish permission.
  2. Fix the score or comment.
  3. Click Re-publish.
  4. The PDF regenerates and the parent portal updates immediately. Guardians get a second SMS only if you tick Notify parents about correction.

Common gotchas

  • "Component weights don't add up to 100" - Settings → Grading → fix the weights for the affected components.
  • PDF generation fails for some pupils - usually a missing photo or a non-UTF-8 character in a comment. Open the pupil, remove special characters, regenerate just that pupil from their profile.
  • Parents say they can't see the report - check their portal link is still valid. SMS portal links expire after 30 days; re-send from Messages → Send portal link.

Behaviour and welfare

Recording incidents and handling absence notices.

15.Log a discipline incident

Log a discipline incident — screen

Discipline records are how you keep an honest history of a pupil's behaviour over time - both the rough patches and the wins. The record shows up on the report card (summary), in the pupil profile (full history), and on the parent thread (when shared).

Steps

  1. Discipline in the sidebar (or Students → pupil → Discipline tab).
  2. Click Log incident (top right).
  3. Fill:
    • Pupil - search by name or admission number.
    • Kind - incident (negative) or merit (positive). Merits keep things balanced.
    • Severity - for incidents: minor, moderate, serious. Skip for merits.
    • Occurred on - today's date by default. Backdate if you're catching up on the register.
    • Summary - one-line headline. "Fighting in the playground", "Won inter-class debate".
    • Details - what happened, who was involved, what was said. Long-form. Future-you reading this in 6 months should understand the context.
    • Action taken - optional. "Detention Friday", "Awarded star sticker".
  4. (Optional) Tick Share with parent. This makes the incident visible in the parent portal AND on the parent thread for that pupil. Otherwise it's internal-only.
  5. Click Save.

Sharing with parents

Sharing is a separate toggle from logging. By default incidents stay internal - useful when you're still investigating.

If you tick Share with parent:

  • The incident shows up on the parent's mobile app + portal under their child's screen.
  • A push notification goes to the guardian (Family/Plus tier).
  • The parent can acknowledge the incident - useful proof that they saw it.

You can also share later: open the incident → tick "Share" → save. The parent gets the notification then.

Follow-up

Discipline isn't fire-and-forget. When you log a follow-up:

  1. Open the incident.
  2. Click Add follow-up.
  3. Note what happened - "spoke to pupil", "parent meeting Friday", "behaviour improved this week".
  4. Save.

Follow-ups stack chronologically. The pupil's discipline trend on the report card uses the latest status, not the original.

Term summary on report cards

When you publish term report cards, the discipline section shows:

  • Total incidents by severity.
  • Total merits.
  • Class teacher's note - written separately on the gradebook page; usually a one-paragraph summary of the term's conduct.

If you don't want raw incidents on the report card (some schools prefer a single qualitative paragraph), set Discipline summary mode under Settings → Grading to qualitative - the count disappears and only the class teacher's note prints.

Common gotchas

  • "Pupil already has 3 incidents this week" - there's a soft cap that asks you to confirm before logging the 4th. Lots of incidents on one pupil usually means a bigger conversation is needed.
  • Wrong pupil logged - open the incident → Delete (proprietor/head teacher only). The audit log keeps the original.
  • Parent says they didn't see the incident - check it was marked Share with parent. Internal incidents stay internal.

Talking to parents

Broadcasts, threads, and when to use which.

16.SMS broadcasts vs parent threads - which to use

SMS broadcasts vs parent threads - which to use — screen

ClassAddmin gives you two ways to talk to parents. Pick the right one and you save money and avoid mixed-up conversations.

SMS broadcast (Messages → Messages)

One message, many recipients, no replies. Use this for announcements:

  • "School re-opens Monday 8 January - bring water bottles."
  • "Closed early today due to rain - collect by 1pm."
  • "PTA meeting Saturday, 10am in the hall."

Every guardian gets it as a normal SMS on their phone, even if they don't have the app. You pay for SMS per message (it's part of your subscription bundle).

You cannot have a back-and-forth here. Parents replying to the SMS get a "this number doesn't accept replies" message.

Parent threads (Messages → Parent threads)

Two-way chat, one pupil at a time. Use this for anything specific to a single child:

  • "Adwoa missed her math test today - can she write it on Friday?"
  • "Kwame is feeling unwell - please pick him up early."
  • "Re: your fee question - your child's balance is GHS 1,200."

The parent reads it in the ClassAddmin parent portal (web link) or in the parent mobile app, and replies in-thread. You see the reply in your inbox - same place as Slack or WhatsApp would look.

Parents on the Family tier get an SMS notification when school staff reply, with a link to read the full message - so they don't miss anything even if the app isn't open.

Cost difference

  • SMS broadcast: every recipient costs an SMS credit. A 500-pupil school broadcasting twice a week burns ~4,000 SMS / month.
  • Parent threads: only the notification SMS to Family-tier parents costs an SMS. Everything else is free - parents read in-app.

For routine pupil-specific notes, parent threads are cheaper and clearer.

Quick decision

Question Use
Same message for many parents SMS broadcast
One pupil, specific to that family Parent thread
Reply might come back Parent thread
Urgent and the parent might not have the app SMS broadcast

17.Send an SMS broadcast

Send an SMS broadcast — screen

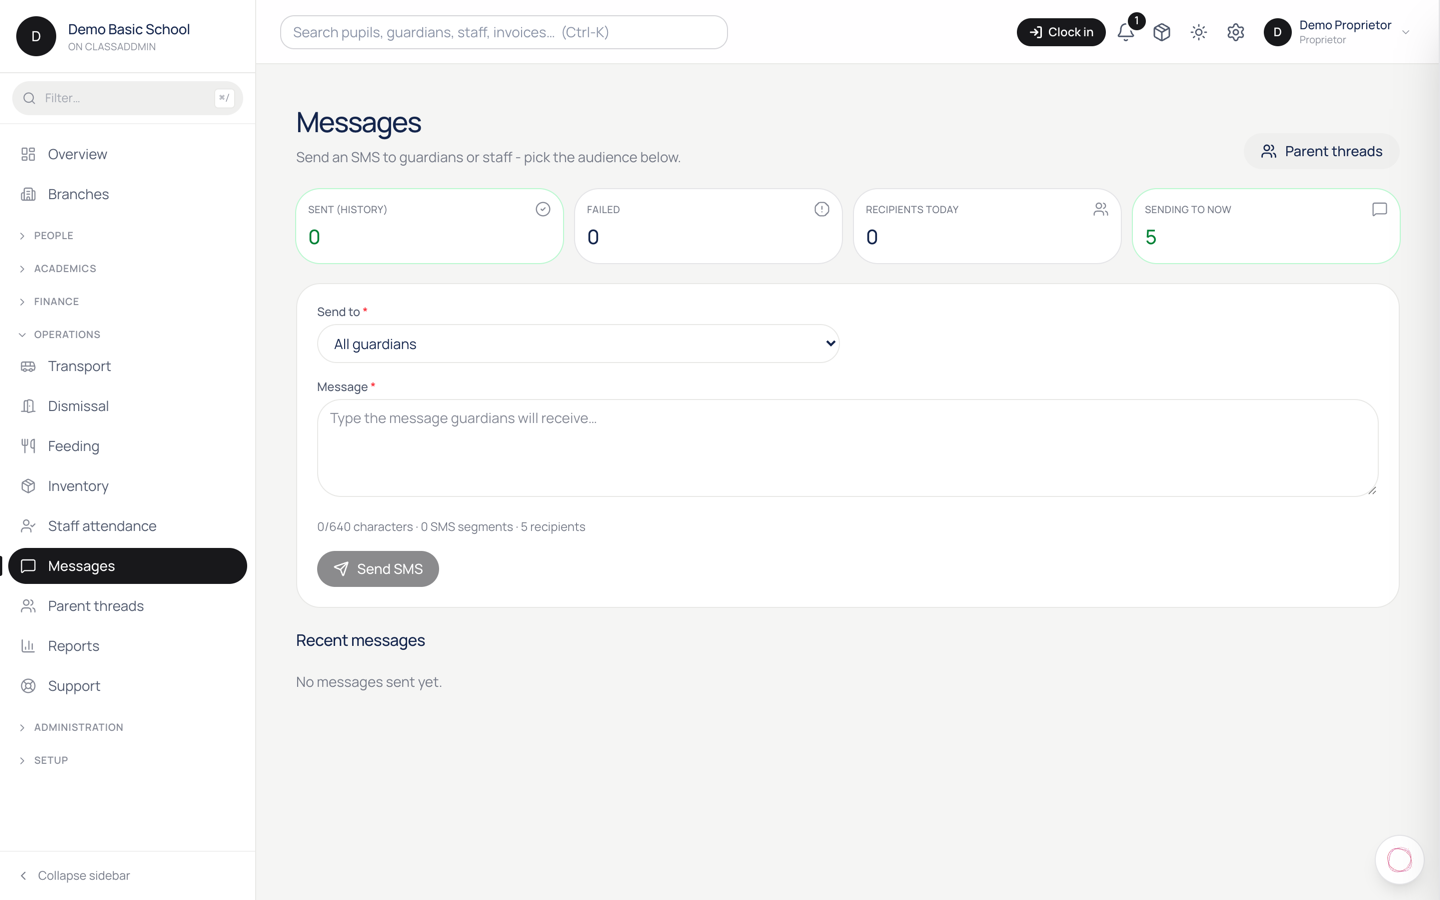
Use this to send a one-way SMS to every guardian, every guardian in a class, or every guardian whose pupil owes fees.

Steps

  1. Open Messages in the sidebar.
  2. Pick Send to:
    • All guardians - every active guardian in the school.
    • A class's guardians - pick the class from the dropdown.
    • Fee defaulters - every guardian whose pupil has at least one overdue invoice.
  3. Type your Message.
  4. Look at the recipient count and segment count under the textarea. One SMS is up to 160 characters; longer messages split into multiple segments (each costs another credit).
  5. Click Send SMS.

Tips

  • Keep it under 160 characters if you can - that's one SMS credit per recipient. A 200-character message costs two credits per recipient.
  • Sign off with your school name so parents know who it's from. The sender ID shown is your school's configured ID (default: CLASSADDMIN; you can change it under Settings → School to your school's short name on the Plus tier).
  • Don't send personal info (balances, names of other pupils) in a broadcast. Use a parent thread for that.

What happens after you click Send

The message is queued and dispatched to Arkesel (our SMS gateway). Most messages deliver within 30 seconds. You'll see the count change from queued → sent in the history list below the form.

If a number is invalid or out-of-service, you'll see failed with the reason. Those failures don't cost a credit.

How to see who got it

Below the form, the Recent messages list shows each broadcast, its recipient count, and its status. Click a row to see which individual guardians the message went to (helpful when a parent complains "I didn't get the message").

18.Reply on a parent thread

Reply on a parent thread — screen

Each pupil has one thread that runs the length of their time at the school. Staff send messages, the pupil's guardians reply. Everyone with messaging access at the school sees the same thread for that pupil - so a class teacher's message and a bursar's reply both live in one place.

Open a thread

  1. Messages → Parent threads in the sidebar.
  2. The inbox shows one row per pupil thread, newest activity first. Unread threads (a parent replied since anyone last opened it) have an orange dot.
  3. Click a thread to open it.

You can also start a thread from a pupil's profile - click their name in the Students list, then Message parents.

Send a message

  1. Type in the box at the bottom.
  2. Press Enter (or click Send). Shift-Enter adds a line break without sending.

The parent will:

  • See the message immediately if they have the parent app open.
  • Get a push notification if they have the app installed.
  • Get an SMS notification with a link to the message, if their school is on the Family or Plus tier. The SMS only carries a short hint ("New message from {school}") - the full message stays inside the app for privacy.

Read receipts

The header of the thread shows:

  • Parent last read at … - when the guardian last opened the thread.
  • School last read at … - when any staff member last opened it.

If a parent hasn't read your message in a couple of days and it's urgent, follow up with an SMS broadcast or a phone call.

Etiquette

  • Don't paste sensitive data (parents read messages on phones that family members borrow). For fee balances and report card highlights, link to the parent portal page instead.
  • Identify yourself in the first reply - "Hello, this is Mrs. Mensah, Adwoa's class teacher." Subsequent replies the parent already knows who you are.
  • Long replies are fine - there's no SMS character limit here.

Academic settings

Class subjects, grading policy, assessment types, strands and the comment bank.

19.Set your grading policy — weights and grade bands

Set your grading policy — weights and grade bands — screen

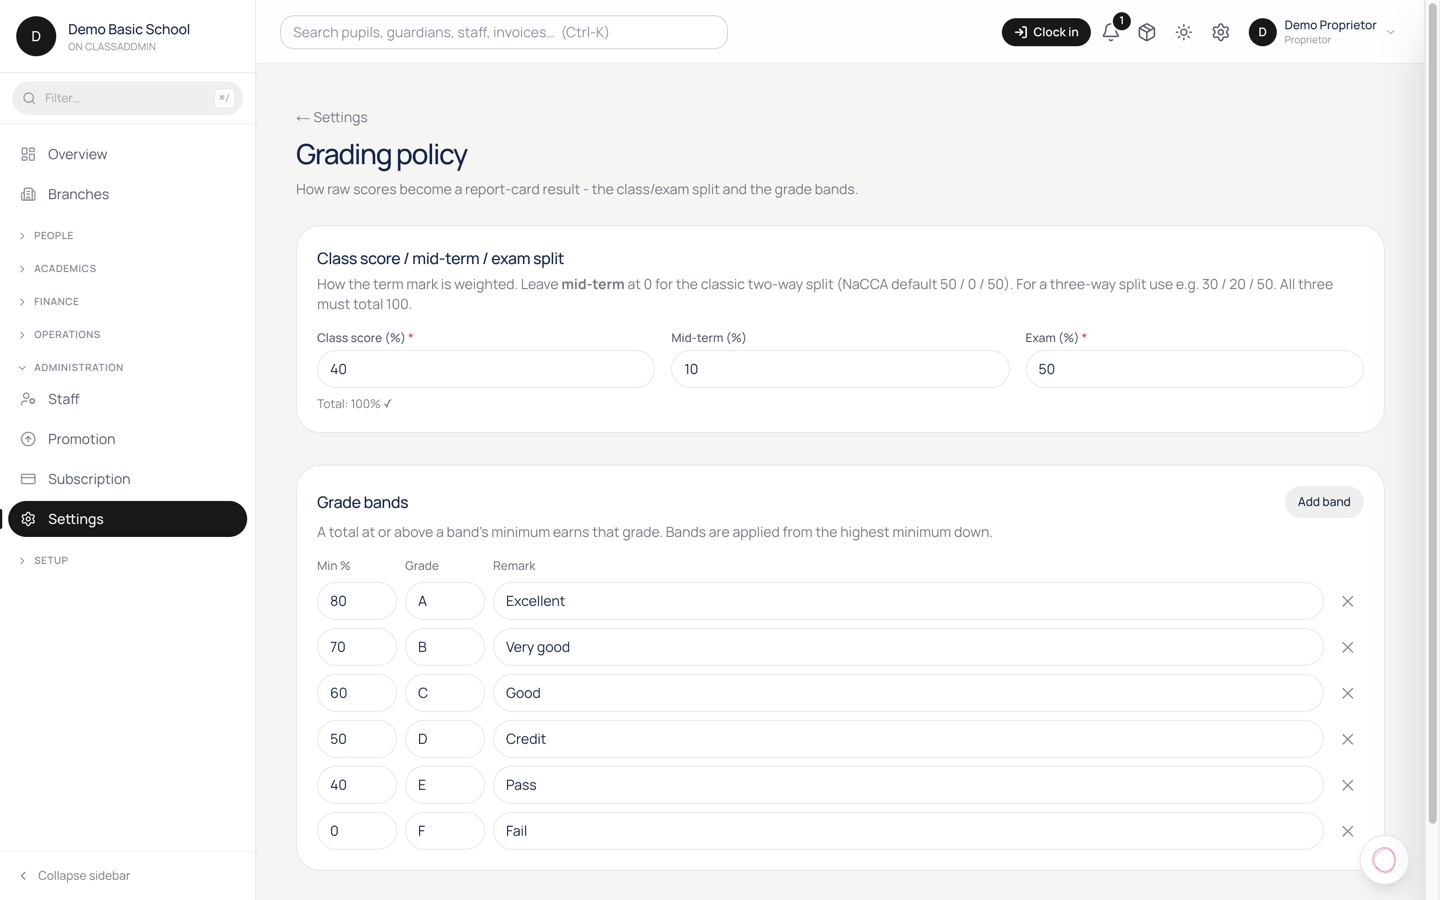
Your grading policy answers two questions for every subject on every report card: how much each kind of assessment counts, and which letter grade a mark earns. Set it once, before you publish a term's reports, and every subject follows it.

Find it at Settings → Grading.

1. The weights

A pupil's mark in a subject is built from three buckets:

Bucket What it usually is
Class score Continuous assessment — classwork, homework, tests during term
Mid-term The mid-term examination, if your school runs one
Exam The end-of-term examination

Enter what each is worth as a percentage. A common Ghanaian split is class score 30, mid-term 20, exam 50. If you don't run mid-terms, leave it at 0 and split the other two.

The three must add up to exactly 100. If they don't, saving fails with "The class-score, mid-term and exam weights must add up to 100." That's deliberate: weights that sum to 90 or 110 would silently make every report card in the school wrong.

How a subject mark is worked out

Each bucket is averaged as a percentage of what was available, then weighted. So a pupil who scored 16/20 on one class test and 36/40 on another has a class-score percentage of 85, and with a class-score weight of 30 that contributes 25.5 to their subject total out of 100.

This is why the marks you enter are out of each assessment's own maximum, and you never have to convert anything by hand.

2. The grade bands

Below the weights, list the grades your school awards. Each band needs three things:

  • Minimum score — the lowest mark that earns this grade, 0 to 100
  • Grade — what's printed, for example A or 1
  • Remark — the words beside it, for example Excellent

Add a row per grade. They're stored highest-first, so a mark falls into the first band it reaches. A typical set:

Minimum Grade Remark
80 A Excellent
70 B Very good
60 C Good
50 D Credit
0 F Fail

Always include a band starting at 0, or a very low mark belongs to no band and prints blank.

Click Save. You'll see Grading policy saved.

What happens after you save

  • Every report card generated from now on uses the new weights and bands.
  • The broadsheet (Gradebook → Results) recalculates immediately — subject averages, class average and pass rate all follow the new policy.
  • Marks you already entered are not touched. Only how they're combined changes.

Because of that last point, changing the policy mid-term re-grades the whole school at once. Do it between terms if you can.

Common gotchas

  • "The weights must add up to 100." Add the three boxes on screen. A frequent cause is leaving mid-term blank rather than 0.
  • A subject total above 100. A mark higher than its assessment's maximum inflates that bucket. ClassAddmin refuses a score above the maximum when you enter it, so this normally means a mark was loaded some other way, or an assessment's maximum was changed after marking. Check Gradebook → the subject's assessments.
  • A pupil has no grade letter. Their mark sits below your lowest band. Add a band starting at 0.
  • Report cards look unchanged. They're built when published. Re-publish the class to pick up a policy change.

20.Name the kinds of assessment your school uses

Name the kinds of assessment your school uses — screen

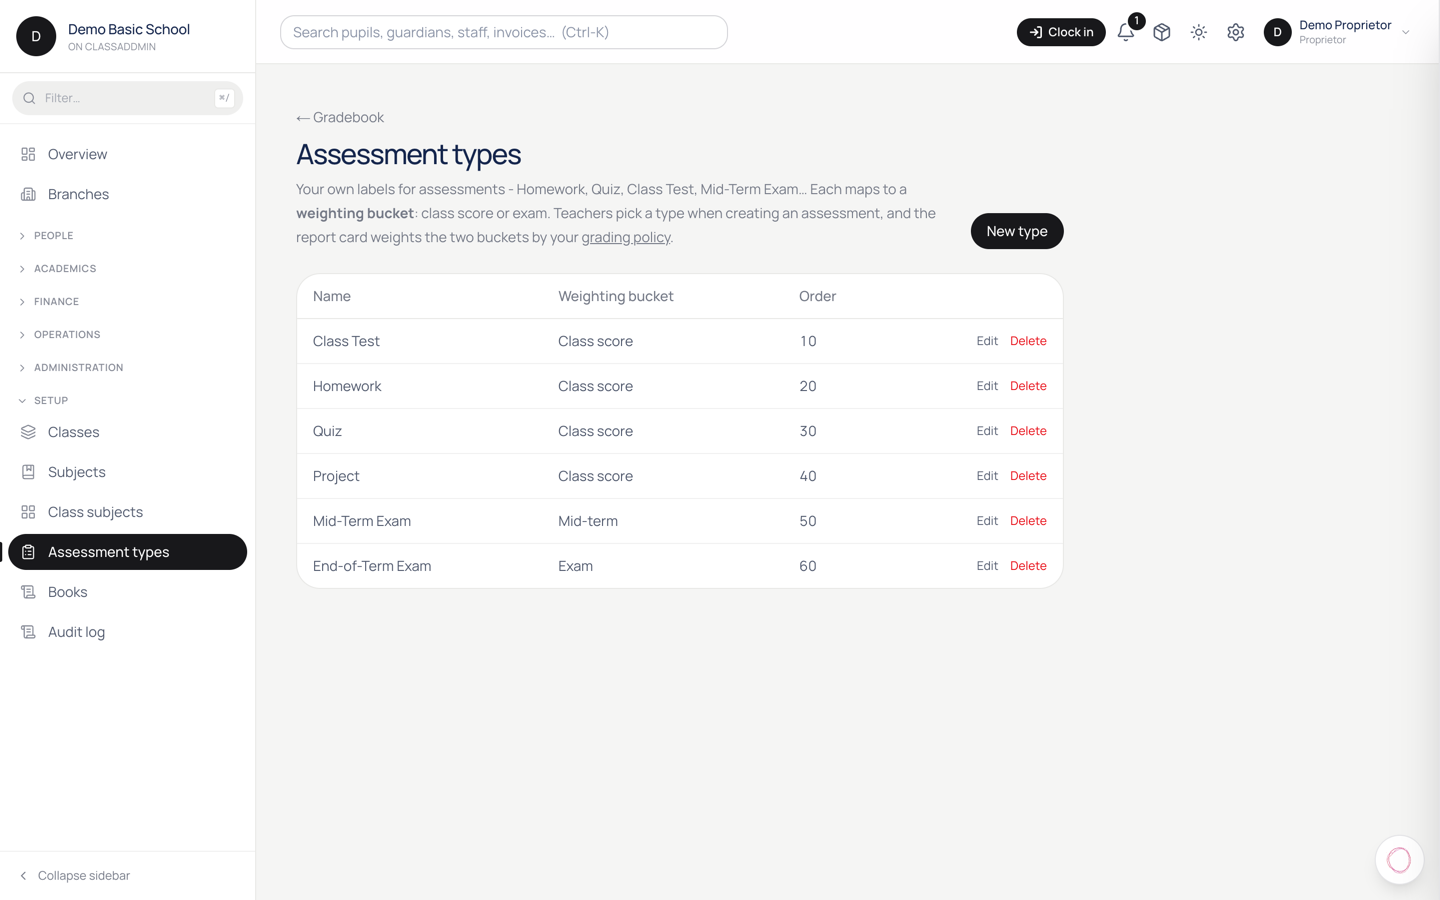
Assessment types are the names your school gives to pieces of work — Class Test 1, Project, Mid-Term Exam, End of Term Exam. Teachers pick from this list when they create an assessment, so setting it up once keeps every class naming things the same way.

Find it at Settings → Assessment types.

Steps

  1. Settings → Assessment types.
  2. Click to add a type and fill in three things:
    • Name — what teachers will see, for example Mid-Term Exam.
    • Weighting bucket — which of the three buckets it counts towards: class score, mid-term, or exam.
    • Order — a number controlling where it appears in lists. Lower shows first. Leave at 0 if you don't mind.
  3. Click Add type.

To change one later, open it, edit, and click Save changes.

Why the bucket matters

The bucket is the important field. It's how a mark finds its way into the pupil's subject total.

Your grading policy (Settings → Grading) says what each bucket is worth — for example class score 30%, mid-term 20%, exam 50%. An assessment type decides which of those three a given piece of work feeds. So five class tests and one project all set to class score share that 30% between them, however many there are.

Get the bucket wrong and the mark still records perfectly — it simply counts towards the wrong part of the report card, which is hard to spot later.

A sensible starting set

Name Bucket
Class Test Class score
Homework Class score
Project Class score
Mid-Term Exam Mid-term
End of Term Exam Exam

Most schools need no more than this. Resist adding a type per subject — the subject is already recorded on the assessment itself.

Common gotchas

  • A teacher can't find the right type. It hasn't been added here yet. Teachers choose from this list; they can't invent one.
  • Marks landed in the wrong part of the report. Check the type's bucket. Fixing the bucket re-grades everything using that type, which is usually what you want — but check the broadsheet afterwards.
  • Two types with nearly the same name. Mid Term and Mid-Term will both appear, and teachers will use both. Tidy duplicates before a term starts, not during.
  • Changing the order doesn't move anything. Order sorts the picker and report columns; it has no effect on marks.

21.Break a subject into strands

Break a subject into strands — screen

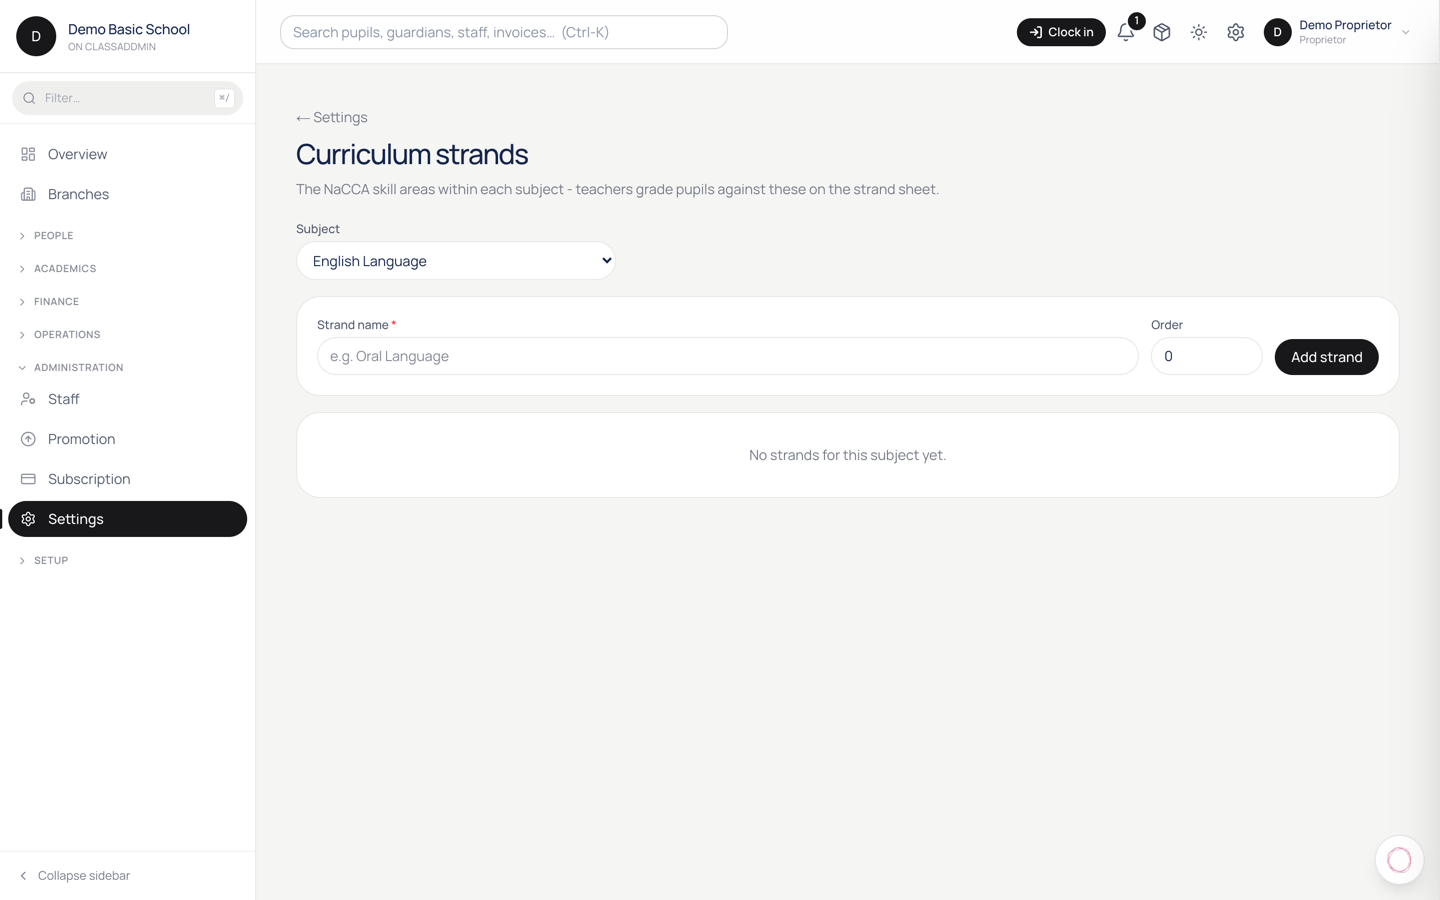
A strand is a named part of a subject. English Language isn't one thing — it's Oral Language, Reading, Writing, Grammar. Strands let a report card say which parts a pupil is strong in, rather than giving one mark for the whole subject.

Find it at Settings → Strands.

Steps

  1. Settings → Strands.
  2. Pick the Subject.
  3. Add a Strand name — for example Oral Language.
  4. Set the Order if you want them in a particular sequence. Lower shows first.
  5. Save, and repeat for each strand.

Follow your curriculum's own names. If the GES syllabus calls it Oral Language, call it that — a parent reading the report card should recognise the words from the syllabus, not from your shorthand.

Do you need them?

Not necessarily, and it's worth being honest about the cost.

Strands make a report card more useful — "strong in Reading, needs work on Writing" tells a parent more than "English: 72". But every strand is something a teacher has to assess and record separately. Four strands across ten subjects is forty judgements per pupil per term.

Add them where the extra detail earns its keep, usually the core subjects. Leave the rest as a single mark.

Common gotchas

  • Strands don't appear on the report card. The report card template has to be set to show them, and marks have to have been entered against them.
  • A teacher can't find a strand. Strands belong to a subject. Check you added it to the right one.
  • Reordering doesn't change past reports. Order affects how strands are displayed from now on. A report card already published keeps the order it was printed with.
  • You added the same strand twice. They're per subject, so Reading under English and Reading under French are different strands — that's correct, not a duplicate.
  • You want to remove one that's been marked. Removing a strand with marks against it loses that detail. Decide before the term starts, not during.

End of year

Promoting pupils into the next class, and what carries over.

22.Set up the academic year, terms and periods

Set up the academic year, terms and periods — screen

Three settings underpin nearly everything else: the academic year, the terms inside it, and the periods that make up a school day. Attendance, report cards, invoices and the timetable all hang off them, so it's worth doing carefully once a year.

1. The academic year

Settings → Academic years

  1. Label — how you refer to it, for example 2026/2027.
  2. Starts on and Ends on.
  3. Save.

2. The terms

Settings → Terms

For each term:

  1. Academic year — which year it belongs to.
  2. Term number — 1, 2 or 3.
  3. Label — for example Term 1.
  4. Starts on and Ends on.

The current term matters more than you'd think

One term is marked as current, and a great deal reads from it without asking you: which term new invoices belong to, which term marks are entered against, which term a report card covers, and the window attendance percentages are calculated over.

If the current term is wrong, everything downstream is quietly wrong too — and it usually shows up as a confusing symptom ("attendance looks far too low") rather than an obvious one. When a term ends, move it on.

3. Periods

Settings → Periods

Periods are the slots in a school day. For each: a Name (for example Period 1), a Starts time and an Ends time.

Add them in the order the day runs, including breaks if you want them on the timetable.

Periods are what the timetable places lessons into, and what per-period attendance registers attach to. A school taking attendance only once a day can keep this simple; a secondary school marking every lesson needs the full day laid out.

Order matters

Do these in order — year, then terms, then periods — because each references the one before. A term needs a year to belong to.

Common gotchas

  • "No current term." Attendance rates, report cards and new invoices all need one. Mark the right term current.
  • Terms that overlap or leave gaps. A date falling in two terms, or none, makes rolled-up figures unpredictable. Check the end of one is the day before the start of the next.
  • Changing a term's dates mid-term. Anything already calculated over the old window shifts. Adjust between terms if you possibly can.
  • A timetable slot won't save. The period doesn't exist yet. Add periods before building the timetable.
  • Dates in the wrong year. With 2026/2027 on screen it's easy to type a term that starts in 2025. Check the year on each date.

23.Promote pupils into next year's classes

Promote pupils into next year's classes — screen

At the end of the year, pupils move up a class and the final year leaves. Promotion does both without re-enrolling anyone by hand.

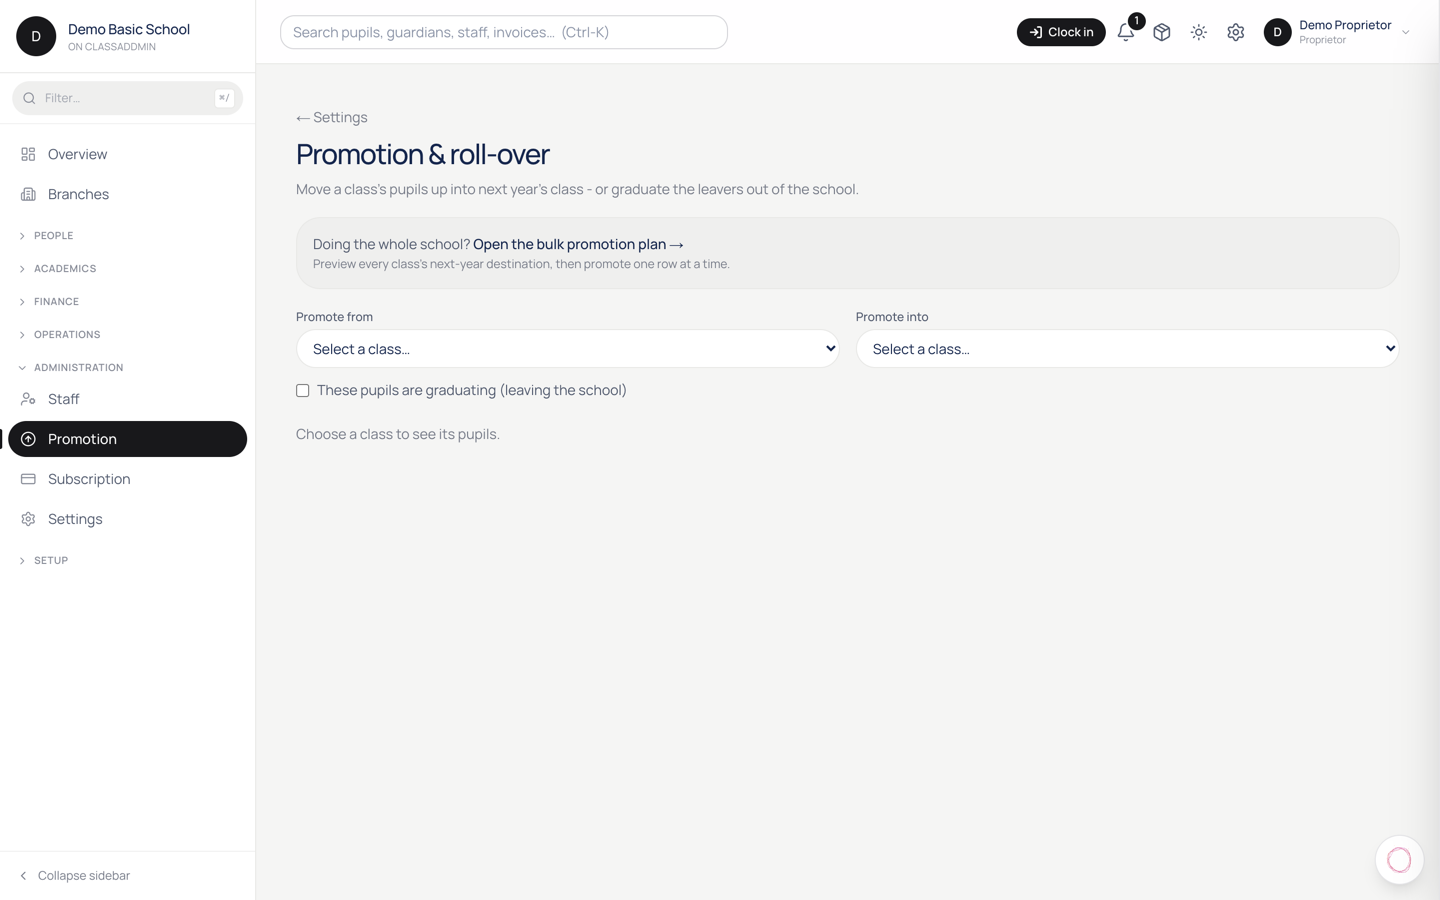
Find it at Settings → Promotion.

Before you start

Set up next year first — the academic year, its terms, and the classes pupils will move into. You can't promote into a class that doesn't exist yet.

Promote one class

  1. Settings → Promotion.
  2. Promote from — this year's class.
  3. Promote into — next year's class.
  4. Confirm.

Graduate the leavers

For the final year, tick graduate instead of choosing a destination. Those pupils leave the school rather than moving up — the right outcome for pupils finishing, and the reason there's no "Class 7" to promote Class 6 into.

Doing the whole school at once

Open the bulk promotion plan → shows every class with its proposed destination for next year, so you can check the whole roll-over before anything happens, then apply class by class.

Use this. Reading twelve rows on one screen catches the mistake that's invisible when you promote one class at a time — a class pointing at the wrong destination, or a stream that's been forgotten.

What promotion does

It moves pupils' enrolment to the new class. It doesn't touch their marks, their attendance history, their invoices or their guardians — that history stays attached to the pupil, and remains visible on their record.

Get it right the first time

Promotion moves whole classes of pupils at once. Reversing it means promoting them back, class by class, and any work recorded in between sits against the new enrolment.

So: check the plan screen first, do it once, and do it when the year has genuinely finished — not in the last week while marks are still being entered.

Common gotchas

  • The destination class isn't in the list. It doesn't exist for next year yet. Create classes for the new year first.
  • A pupil didn't move. They weren't actively enrolled in the class you promoted from — a pupil already withdrawn or transferred stays put.
  • You promoted too early. Marks entered after the move attach to the new class. Finish the term first.
  • A repeating pupil. Promote the class as normal, then move that pupil back individually from their own record.
  • Graduated someone by mistake. They've left the school. Re-admit them through admissions; it's not an undo.

Spotting trouble early

The at-risk report, and what it draws on.

24.Spot pupils who need attention — the at-risk watchlist

Spot pupils who need attention — the at-risk watchlist — screen

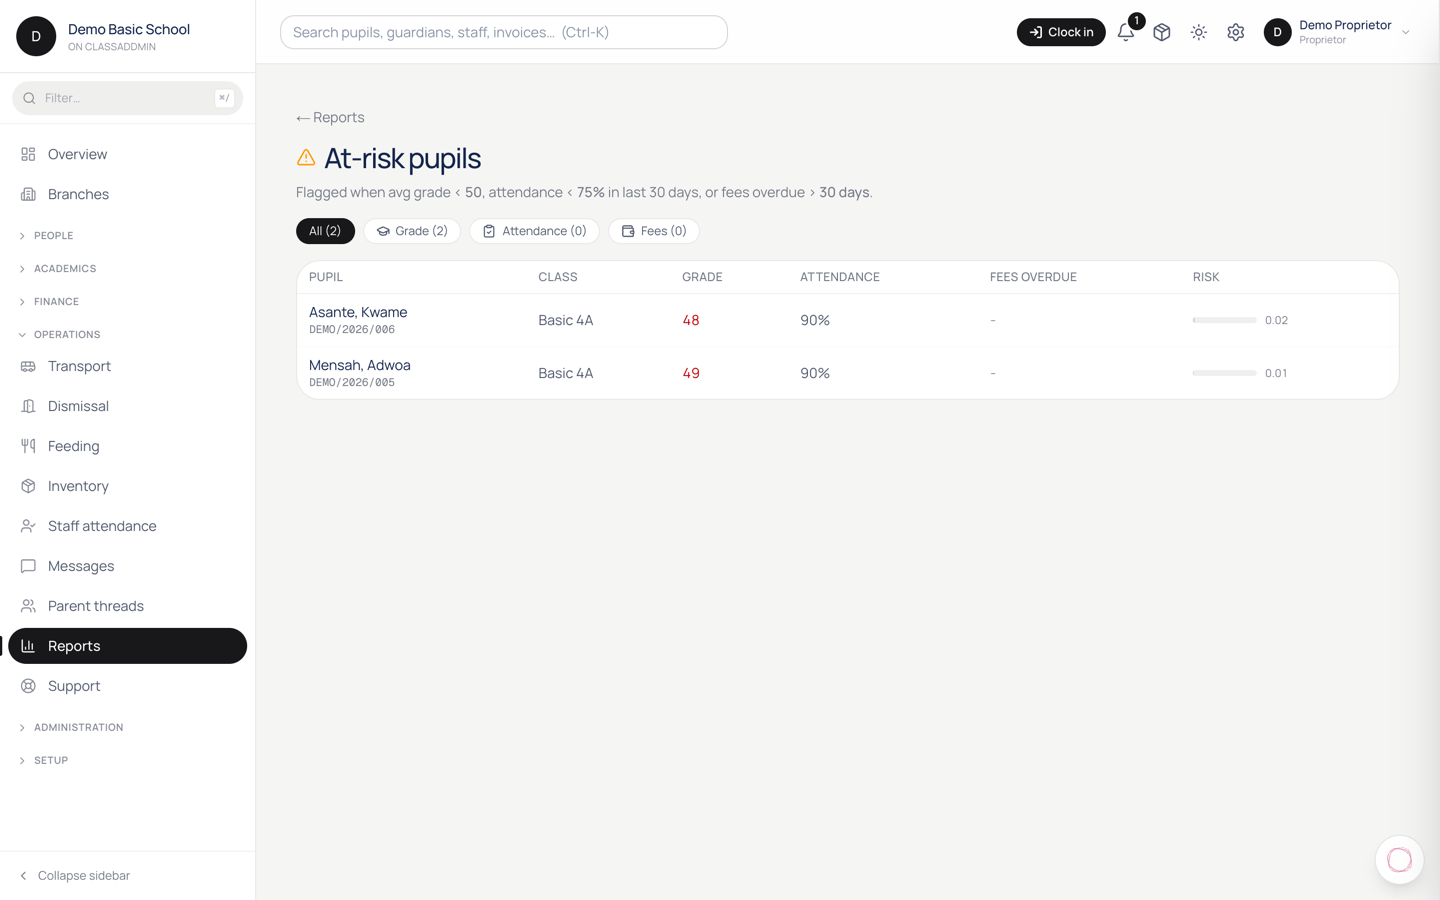
The at-risk list puts the pupils who need looking at in one place, ranked worst first. It's built for a weekly review — fifteen minutes with the head and the class teachers, rather than finding out at the end of term.

Find it at Reports → At-risk.

What puts a pupil on the list

Any one of three things is enough:

Flag What it means
Grade Marks below your threshold, or falling steeply even if still acceptable
Attendance Attendance below your threshold over the last 30 days
Fees Fees overdue past the grace period

A pupil flagged on any single one appears. Each pupil also carries a risk score combining all three, so the list sorts worst-first and your fifteen minutes go where they matter.

Use the filters — all, grade, attendance, fees — when you want one conversation at a time, for example handing the fees list to the bursar.

Why "trending down" matters

A pupil sliding from 78 to 71 to 64 is above most thresholds the whole way and would appear on no simple report. They are, however, in trouble. The grade flag catches a steep decline as well as a low absolute mark, which is often the earlier and more useful signal.

Using it well

Some habits that make it work:

  • Run it weekly, not at the end of term. The point is time to act.
  • Read across the flags. A pupil flagged on attendance and fees is usually one problem at home, not two problems at school.
  • Expect fees to dominate early on. Money is the easiest thing to measure, and a fees-only flag often needs the bursar rather than a teacher.
  • Take it off the screen. The list tells you who; it can't tell you why. That's a conversation.

Common gotchas

  • The list is empty. Either genuinely nobody qualifies, or the data isn't there — attendance flags need registers actually being marked, and grade flags need marks entered.
  • A pupil you're worried about isn't listed. They're above every threshold. The list is a floor, not the whole picture; your judgement isn't overridden by it.
  • The same pupils appear every week. That's the list working. Note what you did, so next week's review isn't the same conversation.
  • Attendance looks wrong. It reads the last 30 days. A pupil who was away for a fortnight and has since returned stays flagged for a while.

Around the school

Events, announcements, transport and dismissal.

25.Post a school-wide announcement

Post a school-wide announcement — screen

An announcement is a banner that shows at the top of every page in the parent portal and the mobile app - useful for urgent, time-bound notices that need to be impossible to miss.

Don't use it for everything; if it's always there, parents tune it out. Save it for things like "School closed Friday due to rain" or "Fees due reminder this week".

Steps

  1. Settings → Announcements (under Operations) or Messages → Announcements.
  2. Click New announcement.
  3. Fill:
    • Title - the headline. Short.
    • Body - 1-3 sentences. Markdown supported.
    • Severity:
      • info (blue) - informational, low urgency.
      • warning (amber) - needs attention but not an emergency.
      • critical (red) - closure, safety, emergency.
    • Starts at - when the banner becomes visible. Usually now.
    • Ends at - optional. The banner auto-disappears at this time.
  4. Click Publish.

Where the announcement appears

  • Parent portal - banner at the top of every page until end-time.
  • Mobile app - banner at the top of every screen.
  • Staff dashboards - same banner, so teachers also see it.

What an announcement is NOT

  • NOT an SMS - parents only see the announcement if they open the app/portal. For "must reach everyone immediately", send an SMS broadcast (see Send an SMS broadcast).
  • NOT a calendar event - calendar events have a date; announcements are time-bound but ambient. Use the calendar for "PTA meeting in 3 weeks"; use an announcement for "School closed tomorrow".
  • NOT a parent thread message - parent threads are per-pupil. Announcements are school-wide.

Edit or end an announcement

  1. Settings → Announcements.
  2. Click the row.
  3. Edit the body or push the Ends at forward (or to "now" if you want it gone immediately).
  4. Save.

You can also delete an announcement - it disappears from every banner. Edit history is preserved in the audit log.

Best practice

  • One critical banner at a time. Two red banners means readers ignore both.
  • End-time matters. Always set one. "Reopens Monday" with no end date stays up forever.
  • Combine with SMS for emergencies. Banner + SMS for closures = both channels covered.

Common gotchas

  • Parents say they didn't see the banner - they opened email or WhatsApp, not the app. For genuinely critical things, send SMS as well.
  • Banner shows but parents click through anyway - your wording isn't urgent enough. Use the critical severity for actual emergencies.
  • Banner doesn't disappear after end-time - the page is cached. They need to reload or pull-to-refresh.

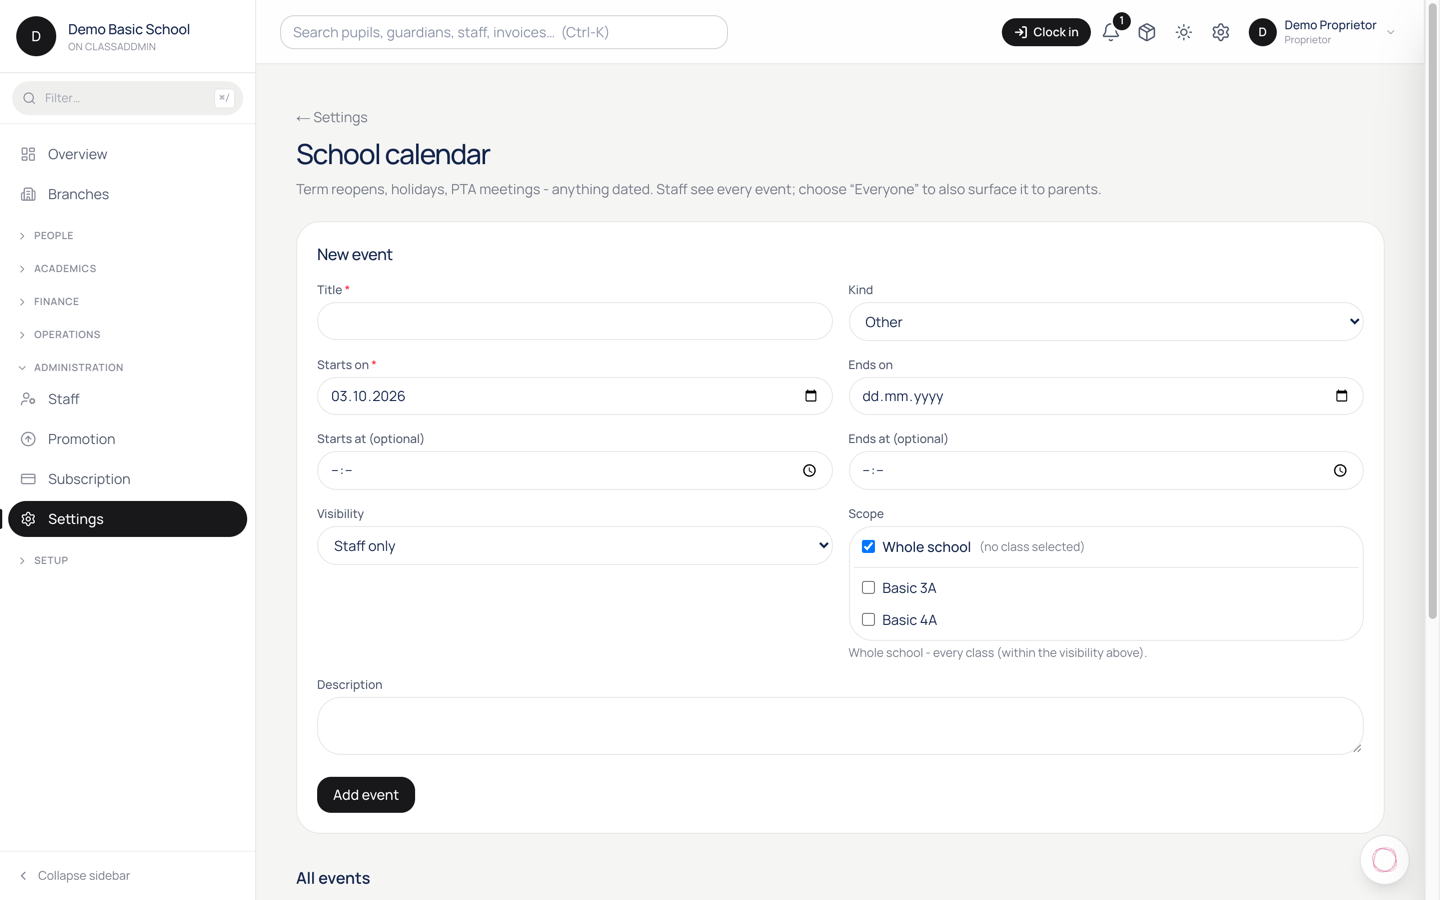
26.Schedule a school event

Schedule a school event — screen

The calendar holds three kinds of dates: term boundaries (term starts/ends), school events (PTA, sports day, exams), and holidays. Events you put here show up in the parent portal and the mobile app - parents see what's coming.

See the calendar

  1. Settings → Calendar (under Academics - yes, calendar lives there).
  2. The view shows the current academic year by default. Toggle to month/term/year.

Add a school event

  1. Click Add event (top right).
  2. Fill:
    • Title - what the event is. Keep it short - "PTA meeting", "Sports day", "Mid-term break starts".
    • Description - optional. Use for venue + time details.
    • Kind - pick from PTA, sports, academic, holiday, religious, other. The kind drives the icon and colour in the parent portal.
    • Start date (required) and end date (optional, for multi-day events).
    • Time (optional) - only fill if the event has a specific time. Half-day excursions have a time; "mid-term break week" doesn't.
    • Visibility - Public (all guardians see), Class (only one class's guardians), Internal (only staff see).
    • Class (only if visibility = Class) - which class.
  3. Click Save.

The event appears on:

  • The parent portal - guardians whose pupil is in the class (for class events) or any guardian (for public events) see it under "Upcoming".
  • The mobile parent app - same upcoming list.
  • Settings → Calendar - for staff.

Re-occurring events

ClassAddmin doesn't have native recurrence yet. If you have a weekly assembly, create one event per week. Tedious - but at least you can copy:

  1. Open an event.
  2. Click Duplicate.
  3. Edit the date.
  4. Save.

Term boundaries

Set these under Settings → Terms rather than the calendar:

  1. Settings → Terms → New term.
  2. Pick the academic year.
  3. Fill starts on and ends on.

These dates power:

  • Report-card publication windows.
  • The "reopen date" that the welcome email mentions to new families.
  • Auto-roll-over from one term to the next.

Notifying parents

Adding an event to the calendar does not automatically send an SMS - the parent has to open the portal/app to see it.

For events that genuinely need to reach every parent (the school is closed tomorrow for rain), send an SMS broadcast separately. See Send an SMS broadcast.

For events parents can plan around (PTA in 3 weeks), the calendar is enough. They'll see it next time they open the app.

Common gotchas

  • Event added but parents don't see it - likely visibility set to Internal, or the date is in the past. Past events drop off the "Upcoming" list automatically.
  • Wrong kind icon - edit the event → change Kind → save.
  • Class dropdown is empty when picking Class visibility - set up classes for the current academic year first.

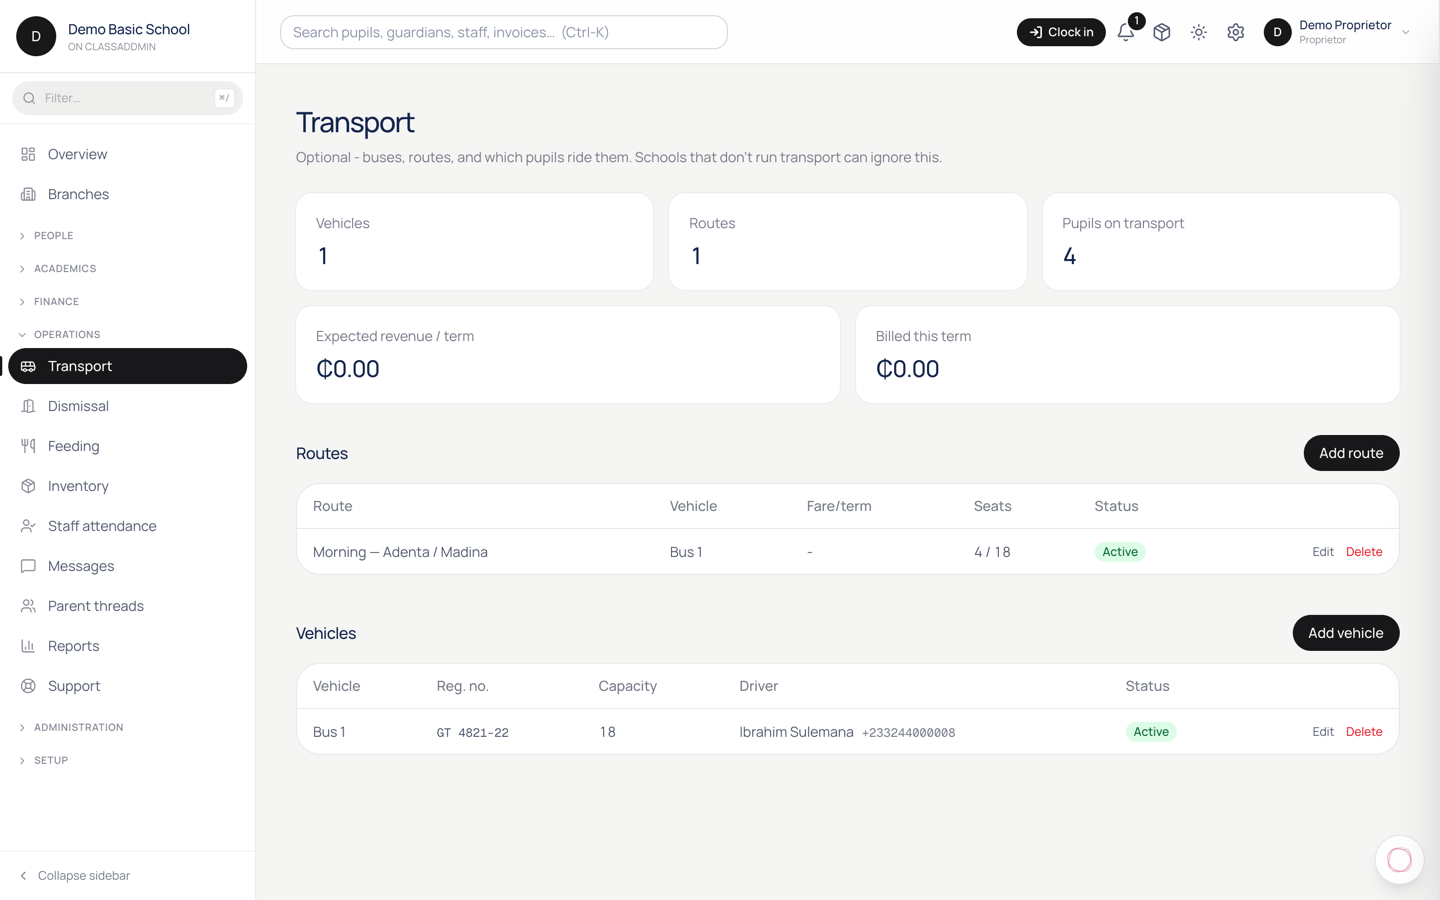
27.Set up school buses and routes

Set up school buses and routes — screen

If your school runs buses, the transport module tracks vehicles, routes, drivers, and which pupils ride which bus. Transport fees feed into the regular fee structure.

The setup order

You configure three things, in this order:

  1. Vehicles - your buses (and vans, if you run them).
  2. Routes - the morning/afternoon paths each bus runs.
  3. Pupil assignments - which pupil rides which route.

Step 1 - Add a vehicle

  1. Transport in the sidebar → Vehicles tab.
  2. Click Add vehicle.
  3. Fill:
    • Plate number - official registration.
    • Display name - what staff and parents see. "Bus 1", "Yellow van", "Toyota Hiace".
    • Capacity - how many pupils can ride safely. The system warns when you exceed this.
    • Driver - pick a staff member with the Driver role, or leave blank for now.
    • Status - active (in use) or inactive (off the road for repairs).
  4. Save.

Step 2 - Add a route

  1. Transport → Routes → Add route.
  2. Fill:
    • Name - "Madina Loop", "East Legon → School", "North Industrial Area Run".
    • Vehicle - which bus runs this route.
    • Direction - pickup (morning), drop (afternoon), or both.
    • Time - approximate first pickup and last drop.
  3. (Optional) Add stops - named pickup points along the route. Useful when parents ask "where does my child board?".
  4. Save.

Step 3 - Assign pupils

For each pupil who rides:

  1. Students → pupil → Transport tab.
  2. Click Assign route.
  3. Pick the route(s) the pupil takes:
    • Morning route - picks them up from home.
    • Afternoon route - drops them home.
  4. (Optional) Pick the stop if you've defined stops.
  5. (Optional) Add the fare per term - if it's not part of the class's fee structure.
  6. Save.

The pupil now appears on the route's roster. The driver sees the list on their phone via the transport app (if used) or as a printable PDF you give them weekly.

See who's on which bus

  1. Transport → Routes → click a route.
  2. The pupil list shows up - name, class, stop, contact.
  3. Click Print roster for the driver's clipboard.

Per-route changes

When a parent calls saying "Adwoa is going to her aunt's tomorrow":

  1. Students → Adwoa → Transport tab.
  2. One-day override - set a different route + stop for tomorrow.
  3. Save.

The driver's roster for tomorrow reflects the override; the day after, Adwoa is back on her usual route.

Transport fees

Two ways to charge:

  • Per-class fee structure - every pupil in a class who takes transport pays the same. Add a Transport component to the class's fee structure (Set up a fee structure).
  • Per-pupil - set the fare on each pupil's Transport tab. Useful when different families pay different rates (subsidised, sibling discount).

Common gotchas

  • Driver dropdown is empty - no staff member has the Driver role. Settings → Roles → assign one.
  • Capacity warning blocks assignment - bump capacity if the bus has a few extra seats, or reassign a pupil to a different route.
  • Pupil's parent says the bus didn't come - check the route's status (active?), and confirm the vehicle isn't inactive due to a repair.

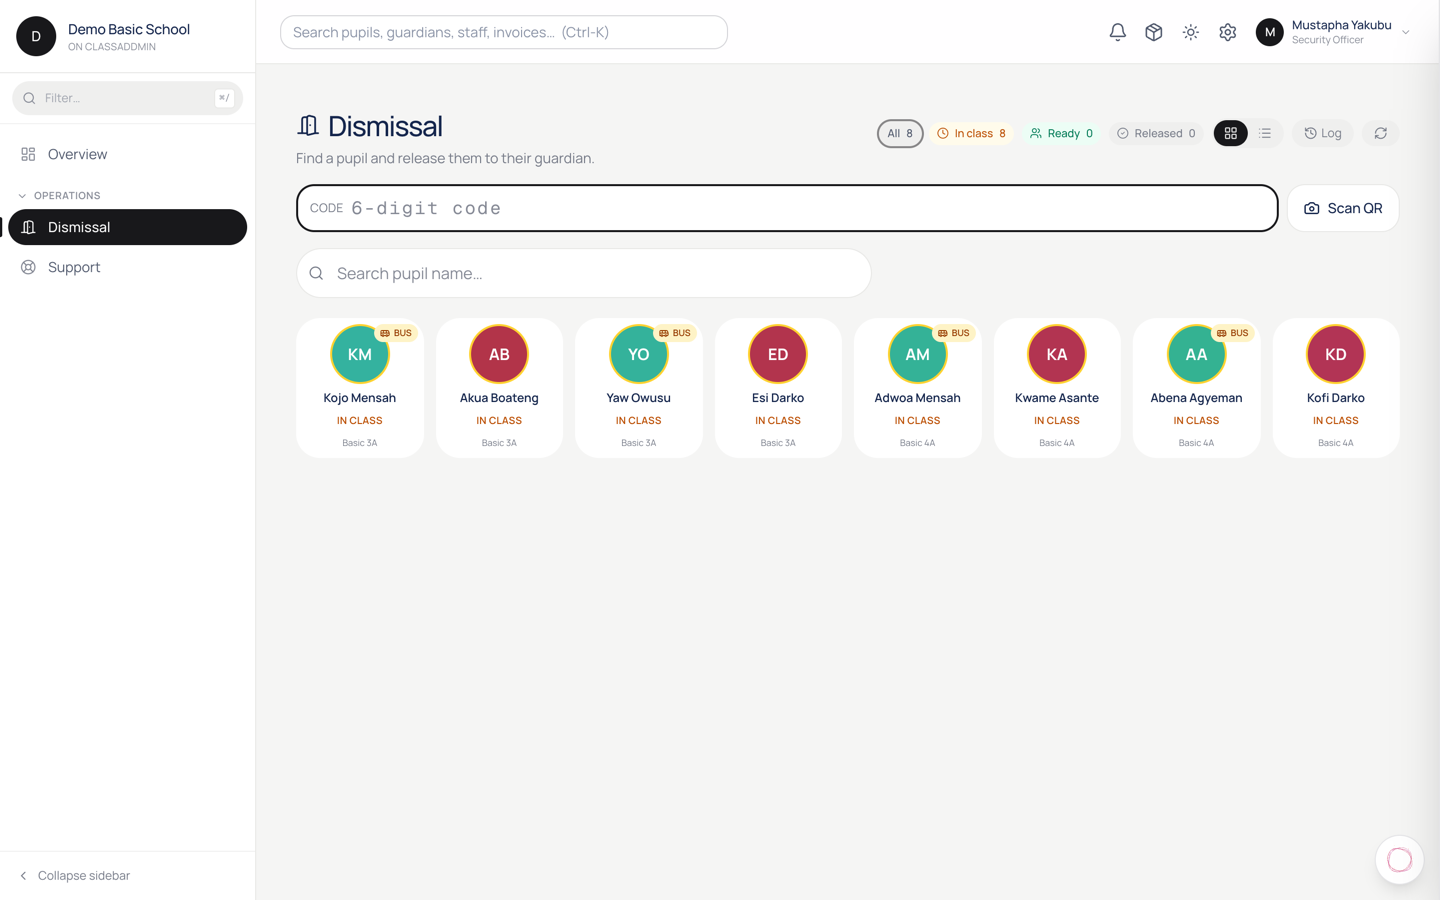
28.How dismissal + pickup works

How dismissal + pickup works — screen

Dismissal is the moment a pupil physically leaves the school with someone. The pickup feature makes sure the right adult collects the right child, every event is logged, and parents are told the moment their child is released.

The three roles that touch pickup

  • Class teacher — decides which pupils are ready to leave the classroom. Taps Hand off pupils on the mobile app; each pupil flips from In class to Ready.
  • Security officer (or any staff granted pickup.release_at_gate) — sits at the gate, sees the ready pupils, picks who's collecting them, and taps Release. A release fires an SMS to the primary guardian.
  • Parent (guardian) — manages the list of people allowed to collect their child, and can send a one-off delegate on any given day.

The two-step flow

Every pupil moves through three states each day:

  1. In class — the default. The gate can't release a pupil in this state (unless the school has turned off the two-step requirement in Settings → Preferences → Dismissal).
  2. Ready — the class teacher has handed them off. They're on the gate roster with a green ring.
  3. Released — the security officer has completed the release. The pupil card dims out; a new event lands in the audit log.

How the gate verifies who's collecting

The gate offers three paths, and the school picks which shows up in the fast-lane bar at the top of /dismissal:

  • The face — tap the pupil, see the authorised guardian roster (photos + names + last-4 phone), tap the face you see at the gate.
  • A 6-digit code — the parent has sent a one-time delegate. The delegate shows the code they received by SMS; officer types it in.
  • A QR scan — the parent app shows a live QR that refreshes every minute. Officer scans, releases.

Whichever path the officer uses, the release event records how it was verified. The head-teacher's audit log at /dismissal/log colour-codes overrides + refused-transport rows so anomalies stand out.

What happens after a release

  • The primary guardian's phone gets an SMS: "Kofi was collected by Ama Mensah (mother) at 15:42 from main gate."
  • The pupil disappears from the ready list.
  • If the pupil is on a bus route, the gate refuses walk-collection outright — the officer sees "Kofi is on Route 2, ask a transport officer to change today's assignment first." The refusal itself is logged.

Sibling batch

If a parent is collecting three siblings at once, the officer doesn't have to release them one by one. When they pick a guardian's face, a green panel appears: "Also collecting today: Ama (Basic 4), Kwame (Basic 2)" with checkboxes. Tap Release once — all three land as separate audit events under the same collector.